You may not be satisfied with any of the above official development boards. If that's so, you should know Arduino Due, another of the official flavors of this fantastic platform. With it you can create numerous projects, as with the previous ones, but in this case there is a very important different characteristic, and it is not only the memory, the available GPIOs or the size ...
I am referring to the microcontroller that integrates this board, since the main chip is not based on ARM. A rarity within Arduino, since the rest are based on 8-bit AVR architecture, while this other board uses the 32-bit ISA ARM. Of course, this chip is still from the Atmel brand, as is usual.
What is Arduino Due?
This Arduino Due board it bears great similarities with other Arduino development boards, and its usefulness is exactly the same. That is, to be able to create a multitude of electronic projects and program various sketches to control them. But, like other versions of Arduino, it has its notable differences ...
Technical characteristics, scheme and pinout
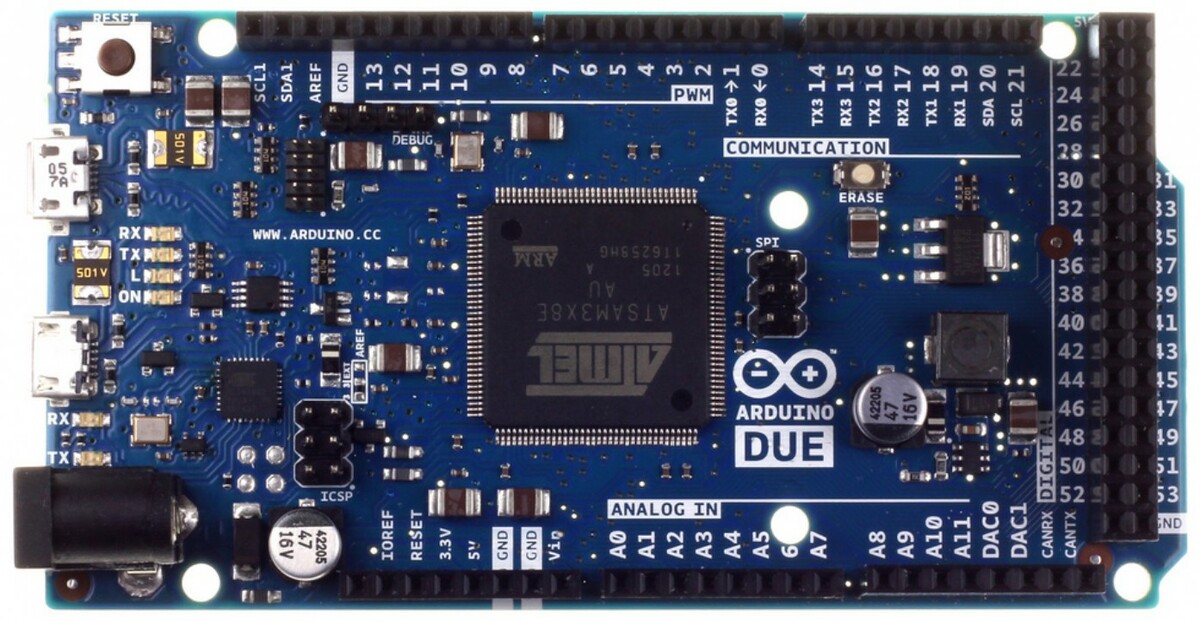
An Arduino Due is based on microcontroller chips or MCUs like the Atmel SAM3X8E. The first Arduino board to be based on ARM, specifically the 3-bit Cortex-M32 processing core. A performance plus over 8-bit MCUs that other similar boards have.
This Atmel chip (currently acquired by the Microchip company) started its series in 2009 to compete with its own AVRs. Some RISCs that are much more interesting and powerful than the previous ones.
Besides that, roughly, also you have more pinsas it includes 54 digital I / O pins, of which 12 are outputs PWM. It also includes 12 analog inputs, 4 UARTs (hardware serial ports), etc. Also, unlike other Arduino boards, the Arduino Due runs at 3.3v instead of the 5v of other boards.
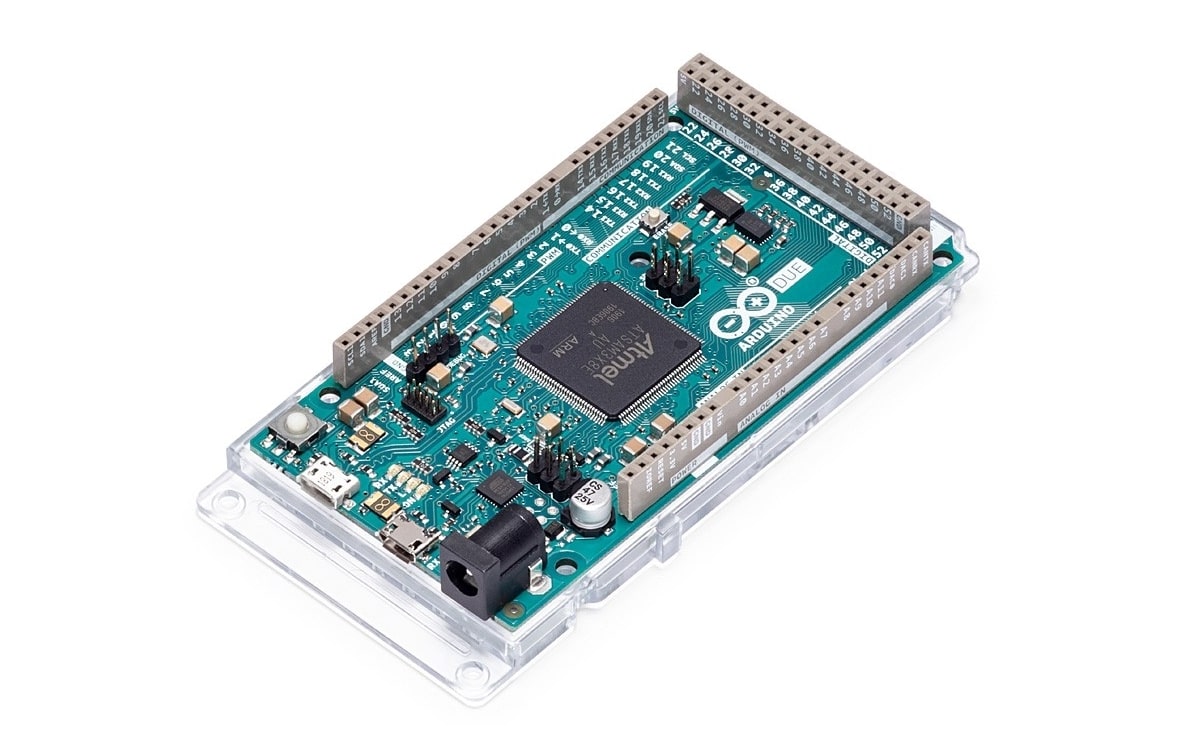
This Arduino Due board has everything you need to start creating your projects, just connect it to a PC using the microUSB cable and start downloading your sketches to get it working. And by the way, this USB will not serve as external power as in other cases, but you can use an AC / DC adapter compatible with the plug that this board integrates (central pin + 2.1mm).
On the other hand, you should also know their technical characteristics, which are summarized in:
- Microcontroller: Atmel SAM3X8E ARM Cortex-M3 32-bit 84 Mhz
- RAM memories: 96 KB (distributed in 2 banks of 64KB + 1 bank of 32 KB)
- EEPROM: it does not have this type of memory, unlike the other boards. ARM has the ability to do IAP (In Application Programming) written to flash. Thus it can be used for non-volatile data and code storage.
- microUSB: it has 2.
- A programming one (closest to the power jack) for which you will have to choose Arduino Due (ProgrammingPort) in Arduino IDE. This is connected directly to the 16U2 chip.
- Another native (the one furthest from the power jack) that can be used by selecting Arduino Due (NativeUSBPort) in Arduino IDE. In this case it is directly connected to the SAM3X microcontroller.
- Flash: 512 KB, all available to program, since the bootloader does not subtract anything like in other Arduino boards
- Operating voltage: 3.3v (although it has a 5v pin for your projects, as well as GND or ground)
- Input voltage (recommended): 7-12v
- Input voltage (maximum limit): 6-16v
- Digital I / O pins: 54, of which 12 are PWM.
- Analog input pins: 12 channels.
- Analog output pins:2 (DAC)
- Current intensity per I / O pin: 130mA
- Current intensity for pin 3.3v: 800mA
- Current intensity for pin 5v: 800mA
- Weight and measurements: 101.52 × 53.3mm and 36 grams.
- Price: € 30-40 approximately. You can buy it on Amazon.
As I mentioned before, it has a port USB OTG high speed, 4 UARTs, a JTAG connector, reset button, delete button, an SPI connector, and 2 TWI. In fact, what was previously commented on the 1.0 standard has to do with some of these connectors:
- TWI with SDA and SCL pins
- IOREF instruction that allows a shield, connected with the appropriate configuration, to adapt its tension to that of the plate.
- One unconnected pin reserved for future use.
By the way, I would not like to end this section without commenting something more about these other serial connectors and so on. At least the pinout where they are located:
- Serial 0: on pin 0 (RX) and pin 1 (TX)
- Serial 1: pin 19 (RX) and pin 18 (TX)
- Serial 2: pin 17 (RX) and pin 16 (TX)
- Serial 3: pin 15 (RX) and pin 14 (TX)
- PWM: go from pins 2 to 13 to provide 8-bit PWM.
- Digital I / O: from pin 0 to 53
- Analog outputs: from pin A0 to A11
- SPI: SPI head
- CAN: CANRX and CANTX for CAN communication
- LED built-in included and connected to pin 13
- TWI 1: pin 20 (SDA) and pin 21 (SCL)
- TWI 2: marked as SDA1 SCL1
- DAC1 and DAC2 with resolution in its output of 12-bits (4096 levels) with analogWrite () with voltages of 0.55v to 2.75v.
- AREF: an input analog input as a voltage reference. Used with the analogReference () function
- Reset: if you set this line to LOW or low voltage level, then the microcontroller resets itself.
Datasheets
Like other official boards, Arduino Due has a large amount of data available to the community, such as schematics, data, documentation such as the datasheets, etc. With these data you will be able to know everything about this plate to get the most out of it. For example, you have these documents at your disposal:
- Full pinout
- Datasheet of the Atmel SAM3X8E microcontroller
- EAGLE files with schematics for makers.
- Electronic schematics from the plate Arduino UNO.
- Fritzing Archives
Arduino IDE and programming for Arduino Due
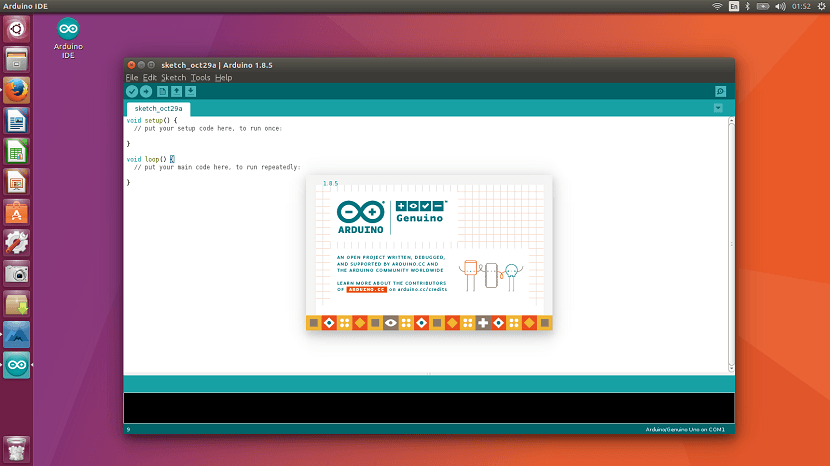
To program the Arduino Due, the same procedure is followed as for many other Arduino boards. You don't need a different IDE software as it is based on ARM. Therefore, you do not have to worry about it, it will be completely transparent for the programmer. You may download or use Arduino IDE as for the rest of the plates and you can download it from this link for the platforms macOS, Windows and Linux.
The language to write the source code of the sketch as well it will be exactly the same, with the exception of adapting to the pinout and peculiar characteristics of Arduino Due. If you are a beginner, you can use our free PDF course for Arduino IDE. In it you will learn to create the first simple sketches and learn a little better about Arduino programming. Although that course is based on Arduino UNO, works for all other versions of Arduino ...
La only quirk What you should keep in mind when you install the Arduino IDE is that, by default, it comes prepared to start with Arduino UNO. Therefore, you must choose the appropriate board to transfer the code from the PC to your board. To do this, you can follow these simple steps:
- Open Arduino IDE
- Go to the Tools menu.
- Then to Plaques.
- There, look for Arduino Due and select one of the two USB options that exist according to your preference ...
Now you can continue as you would normally. Enjoy to create new projects and never stop learning ...
I think there is a small mistake in the second paragraph. Where it says: «I mean the microcontroller that integrates this board, since the main chip is not based on ARM. When it's actually based on ARM