Arduino has various boards, various flavors with which to satisfy different needs. One of the most popular development boards, along with the Arduino UNO, Is the Arduino Leonardo. This board with a programmable microcontroller hides one of the most powerful features of the board line when compared to one of its sisters.
Of course, this official board from the Arduino Foundation is compatible with all electronic components let's go showing in other posts. This will give you the freedom to combine the Leonardo plate with a multitude of components to create the most varied projects you can imagine.
What is Arduino Leonardo?
This Arduino Leonardo board it bears great similarities to the Uno, even in appearance. But you should not confuse them, since there are notable differences between the two ...
Technical characteristics, scheme and pinout

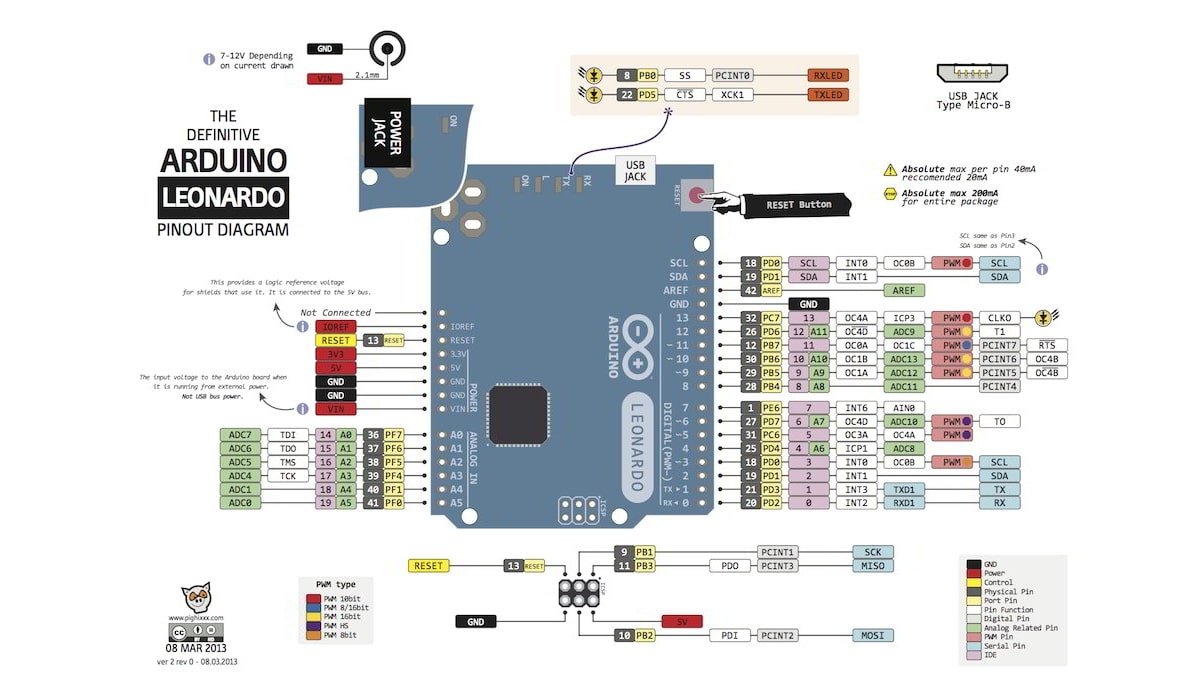
One of the main features that you should knowing about Arduino Leonardo is your pinout, that is, the pins or connections that you have. As you can see in the image above, it is not the same as the UNO Rev3 board. There are some differences between the quantity, limits, and buses.
On the other hand, you should also know their technical characteristics, which are summarized in:
- Microcontroller: Atmel ATmega32u4 at 16 Mhz.
- RAM memories: 2.5KB
- EEPROM: 1KB
- Flash: 32 KB, but you have to subtract 4 KB used for the bootloader.
- Operating voltage: 5v
- Input voltage (recommended): 7-12v
- Input voltage (maximum limit): 6-20v
- Digital I / O pins: 20, of which 7 are PWM.
- Analog input pins: 12 channels.
- Current intensity per I / O pin: 40mA
- Current intensity for pin 3.3v: 50mA
- Weight and measurements: 68.6 × 53.3mm and 20 grams.
- Price: € 18 - € 20 approximately. You can buy it on Amazon.
Datasheets
As is often the case with official Arduino boards, there are a large number of schematics, data and documentation in this regard, even to be able to create a board derived from it as it is open-source. From the official website of the project, you can find a lot of information to download about Arduino Leonardo and thus know better how it works. For example:
- Datasheet of the Atmel ATmega microcontroller from Arduino Leonardo, to understand more about the microcontroller chip (MCU) that it includes and its operation.
- EAGLE files with schematics for makers.
- Electronic diagrams of the board Arduino UNO.
Differences with other Arduino boards

The ideal is to compare it with the most similar plate, and that is Arduino UNO Rev3. Yes you compare Arduino Leonardo to UNO, you can see many similarities, but also differences that are vital if you have doubts between buying one or the other.
Physically it seems to have the same dimensions and same number of pins. In addition, they are arranged in the same way. The power supply is also the same, and even the frequency provided by the frequency generator. Also the A0-A5 could be configured as digital with the function pinMode (pin number, mode). Where is the difference then?
Well, one of the main differences between both development boards is in the microcontroller. While UNO is based on ATmega328, Arduino Leonardo is based on ATmega32u4 in their most recent revisions. In the case of the ATmega328, it does not have built-in USB communication, so a converter is required for that serial port. Function that the integrated circuit ATmega16u2 does.
In the case of the ATmega32u4, it does have that USB communication already implemented, so that second chip is not necessary. That, at a practical user level it makes a difference. When you connect the board Arduino UNO, a virtual COM port is assigned for communication. While in Leonardo the plate is recognized by the computer as if it were a USB device such as a mouse or keyboard. This gives the possibility of using mouse and keyboard functions.
Of course, having another MCU also varies some memory data. Of the 32 KB flash of Arduino UNO with 0.5 KB reserved for the bootloader it goes to 32 KB and 4KB used by the bootleader in Leonardo. For SRAM it goes from 2 KB to 2.5 KB and for EPROM it remains the same in both.
Another difference lies in the channels of the analog inputs. While in Arduino UNO It only has 6 channels, in the Arduino Leonardo it has with 12 channels. That's for A0-A5, and for pins 4, 6, 8, 9, 10, and 12 that would correspond to channels A6-A11.
Regarding PWM, Leonardo has one more than ONE. In addition to the same ones for ONE, another is added to pin 13. The rest will be the same for both cards, that is, it will be on pins 3, 5, 6, 9, 10 and 11.
You will find more differences in the I2C communication. Both can use TWI, but the difference is where the pins intended for the serial data line or SDA and clock line or SCL. In UNO they are on pins A4 and A5. But in Leonardo you have them in 2 and 3 respectively. Slight difference, but enough that UNO's hats or shields are not fully compatible with Leonardo.
With regards to SPI communication, In the Arduino UNO you have pins 10, 11, 12, and 13, for the SS, MOSI, MISO and SCK signals respectively. This is not the case on the Leonardo, as it has a specific ICSP connector, a 6-pin male connector near one end of the card. Another reason that could make UNO shields not worth it ...
For external interruptions there are also some changes. In UNO you have two pins for it, pin 2 (interrupt 0) and pin 3 (interrupt 1). In the case of Arduino Leoanrdo they extend to 5 pins. They are pins 3, 2, 0, 1, and 7 for interrupt 0, 1, 2, 3, and 4 respectively.
There is also another change between the two plates that many tend to forget, and it is the type of USB cable required to connect both boards to the PC. While in UNO an AB cable is used, in Leonardo an A-microB is needed.
In short, in the following difference table you can see more details:
SUMMARY OF THE DIFFERENCES ARDUINO UNO vs. ARDUINO LEONARDO
|
Arduino IDE and programming for Leonardo

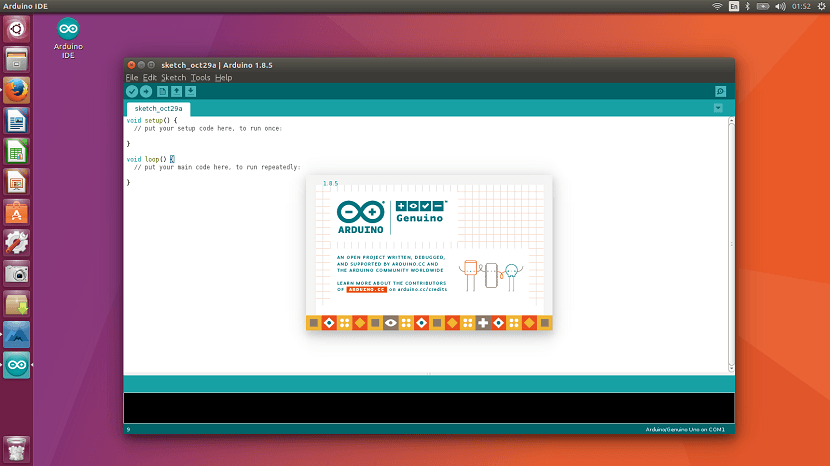
To program Arduino Leonardo, as with the rest of Arduino boards, you can do it from different platforms such as macOS, Windows and Linux. That's thanks to the fact that your development environment Arduino IDE it is available for those platforms.
For more information about the programming to start with this board, I advise you to download our free PDF course for Arduino IDE. The truth is that Leonardo has no greater mystery to start creating sketches. You just have to take into account the differences for the connections and select the correct board in the Arduino IDE menu to load the program.
That is, open Arduino IDE, go to Tools> Boards> Select Leonardo… And start enjoying the projects that you create on your own or those that we have been publishing on Hwlibre.com. I repeat, the language and codes will be the same, the only thing you should pay attention to is those variations that I have mentioned in the I / O pins and their functions ...