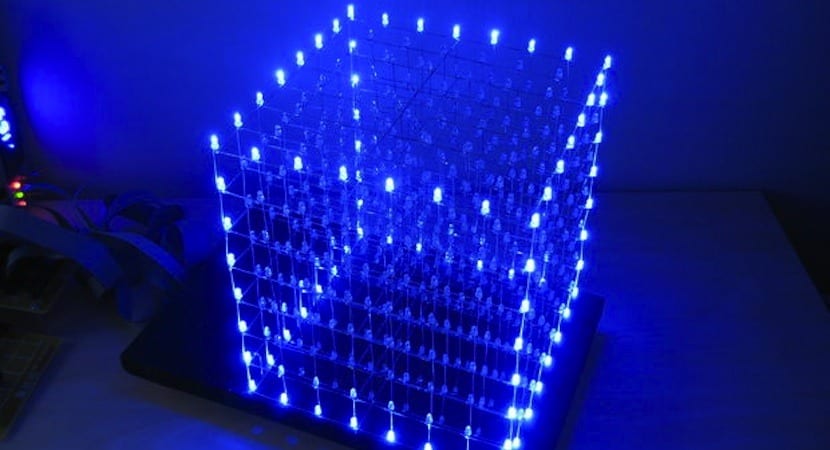
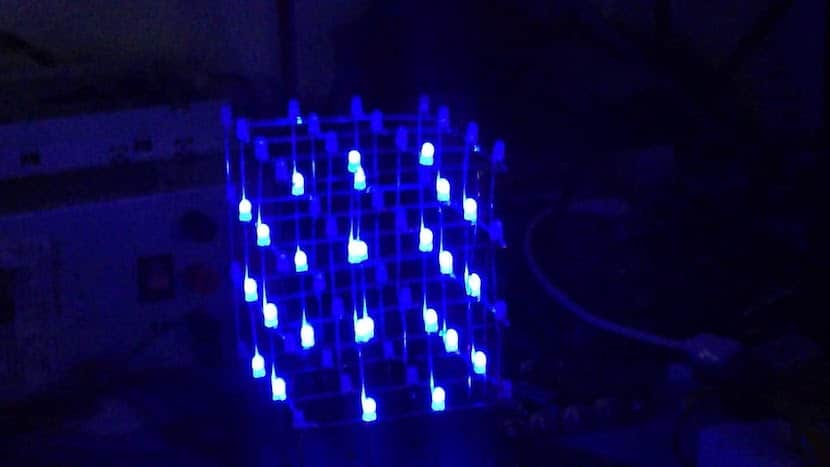
At last we are on Sunday, in many communities a day to celebrate and that is perhaps why today I want to present you a project created from an Arduino board that you will surely like, nothing less than a LED cube manufactured from 8 x 8 x 8 Blue LEDs that, although it has little less than the functionality of recreating different styles and dynamism of lights, it is also true that all of us who like to recreate this type of project are something that we cannot resist.
To have a clear example of what you can do with this LED cube I leave you a video located just below these lines where, with just a few days of work, surely you can get a smile and even see some other face of impression to see what it is capable of and even the amount of designs and graphics that you can get to "draw".
As you can see, this is quite a project «affordable" as long as do you know some electronicsIf not, you don't have to worry either, since building an LED cube is not too difficult since, at the end of the day, all you have to do is your program where you turn on the LEDs as if it were a matrix and go playing with the outputs so that the LEDs turn on and off.
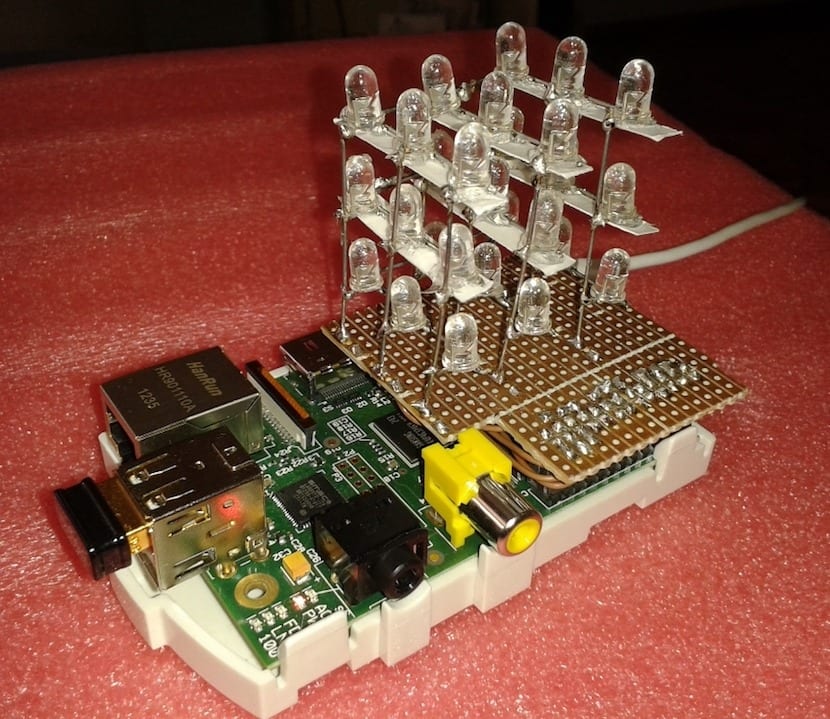
Learn to mount and control an LED cube with your Raspberry Pi
Many are the users who acquire a Raspberry Pi only to use it as a multimedia center and even as an emulator to continue playing their favorite games, those in which, as young people, they have invested an enormous amount of hours. In HWLibre we try, in addition to showing you and understanding the operation of a controller like this, to show you that has much more capacity that only serve, precisely, as a multimedia center or emulator for video games.
Today we will go a step further and I will try to show you something as different as well as striking as it can be build an LED cube that you will be able to control completely independently, something very simple with which to leave all the people to whom we show the project speechless, being able to turn the cube on and off completely or show the most fun sequences of lights.
At this point I'm sure that you will control the hardware that your Raspberry Pi has fairly well, if this is so, surely you will know about the problems you can have when manufacturing a larger LED cube in terms of 3 x 3 x 3 dimensions. I say this since it is very easy to get turn an LED on and off by connecting it to a GPIO pin, the problem is when, for example, in a 3 x 3 x 3 cube we already have 27 LEDs and the Raspberry Pi only has 17 GPIO pins, imagine if we increase these dimensions.
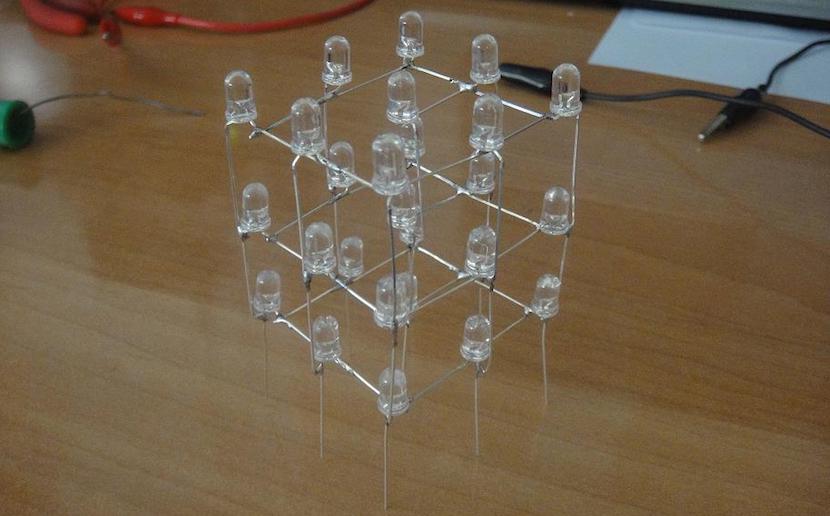
The solution to this problem is found in the software that we must develop and in the way in which we have to connect the LEDs between them to optimize the use of the GPIO pins of our Raspberry Pi as much as possible. Going into a little more detail, the first thing we have to do is identify, in each of the LEDs that we are going to use the positive and negative endsThis is very simple since normally the anode or positive end is the pin that is a little longer while, therefore, the cathode or negative end is the shortest pin.
Once we have this controlled, we have to weld the cathodes in such a way that we can get the matrix of the size we want. An idea to work faster and without mistakes is to go level by level, that is, first we build a square of the size we want, with three LEDs, four, five ... to later repeat this action as many times as we want, once we have all the LED squares built we just have to stack them. Thanks to these solutions we will be able to identify each led with a three-dimensional coordinate.
Of course, the theory is very simple, at least to explain when you fairly understand what to do or have directly already done this work on some occasion. It may seem much more complex to achieve develop to code necessary for all this to work as they appear in so many videos that are published on pages such as YouTube.
To make all of this even much easier for you, I leave you a link where you can see in detail and step by step how to create your 4 x 4 x 4 LED cube. Dare we double the same and go up to 8 x 8 x 8?