Generate a beep It is something that is sought in various DIY projects, that is why makers must use various devices to be able to generate said sound. One of the devices that you can use is a small speaker, although that is not the most suitable if the only thing you send is an electrical signal, since it will generate a very characteristic crack or click due to the vibration of the membrane, but little noise. Therefore, it is best to use a buzzer or buzzer.
The size is usually much smaller than conventional speakers, and what is better, the buzzer will generate a beep or sound that will attract more attention than that sound from a speaker if no audio signal is supplied to it. So if you are a maker and want to generate any alert for an event in your project, the device that we present to you today will suit you like a glove ...
What is a buzzer or buzzer?

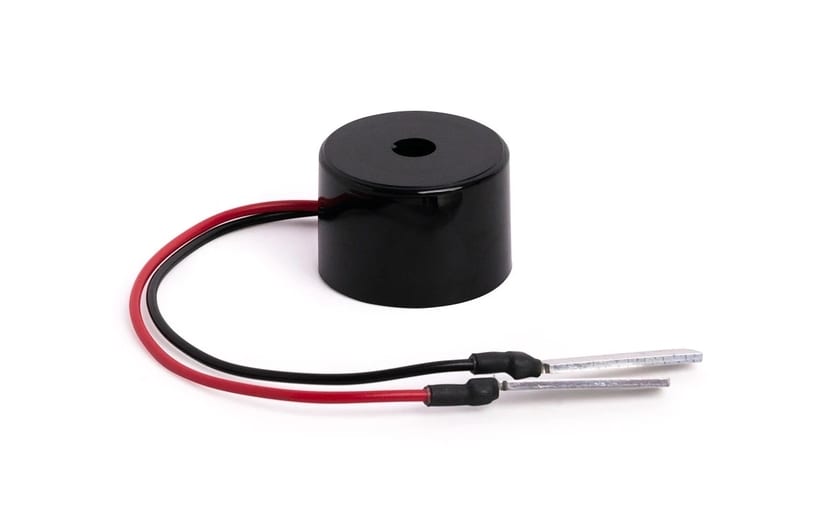
The buzzer or buzzer is an electronic device that acts as a transducer. Its function is to produce a high-pitched or humming sound while power is being supplied to it. That is why it is ideal to integrate with Arduino, because when an event is generated that you want to warn or alert, you could program the microcontroller to send a signal to the buzzer if that event happens and thus warn you with that sound.
By exampleIf you have used a temperature sensor and you want it to warn you when it exceeds 100ºC, then you can use the buzzer as an alert element and the Arduino will send an electrical signal to the buzzer when the temperature sensor makes those measurements. Obviously, the applications that you will find are very varied ...
In your house, there are many devices where you can find buzzers, for example in alarm clocks. Many of these clocks use buzzers to emit sounds, especially the small ones, although some may use speakers to wake you up with the radio, with a melody, etc. The truth is that you do not have to disassemble anything to get a buzzerIn fact it is very cheap and easy to find.
Types of buzzers
You can find various types, apart from those that use electromagnet coil or piezoelectric disc you can also find:
- Those who do not integrate oscillator: in this case an external oscillator is required for it to work well.
- Those who integrated oscillator- The built-in oscillator makes it easy to operate, simply apply a voltage to the buzzer or buzzer terminals and you will have the sound.
Important to remember that also there are special modules for Arduino with the buzzer and everything you need for an easy connection with your favorite DIY board.
Operation
Its constitution is simple, it only has one electromagnet or piezoelectric disc (depending on the type of buzzer) and a metal sheet of steel. This is enough to emit the sound when current is supplied to the piezoelectric or electromagnet and this makes the metal foil vibrate.
The most common are the piezoelectric type, in this case they have a metal sheet glued to a ceramic sheet. When applied a tension between the two arches emitting a click. When the supplied voltage ceases, they return to their normal state. But if clock or alternate pulses are generated, it will emit the audible beeps we are looking for.
Integration with Arduino
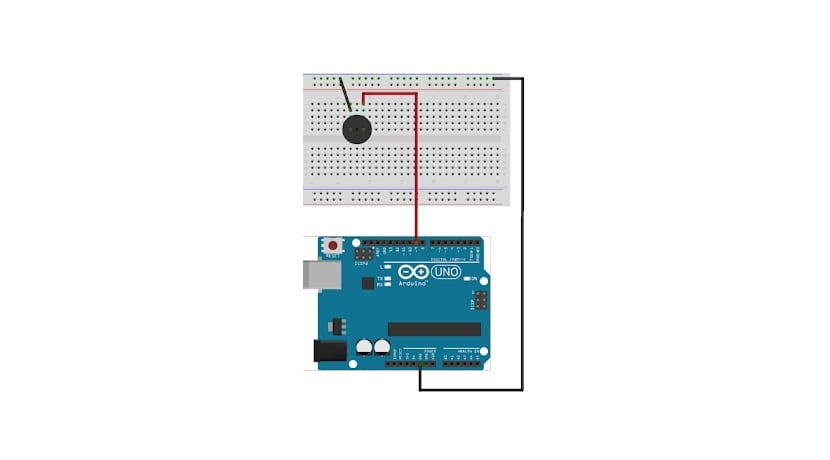
Su integration with Arduino It couldn't be simpler, whether you buy a normal buzzer or a passive module for Arduino it can be connected very easily and the code you have to write in Arduino IDE is really simple too (the base, then it will depend on what you want to add yourself) .
As for a simple code example, it could be the following, in which the buzzer emits sound for 1 second and stops, it returns to producing 1 second, and like this:
/* Programa simple para emitir pitidos de 1 segundo intermitentes */ const int buzzer = 9; //El pin al que se conecta el buzzer es el 9 void setup(){ pinMode(buzzer, OUTPUT); // Pin 9 declarado como salida } void loop(){ tone(buzzer, 50); // Envía señal de 1Khz al zumbador delay(1000); noTone(buzzer); // Detiene el zumbador delay(1000); //Espera un segundo y vuelve a repetir el bucle }More information - Arduino programming manual
You are mistranslating it says that those who integrate the oscillator must be fitted with an external oscillator, if you mention that they “integrate it, so that an external one must be added, you are confusing those who do not know. it is the opposite.
On line 14 of the code:
tone (buzzer, 50); // Send 1Khz signal to the buzzer
YOU COMMENT THAT THE FREQUENCY IS 1kHZ, THAT IS FALSE, IT IS 50hz,
tone (buzzer, 1000); // Send 1Khz signal to the buzzer // This is the correct code.
Greetings.
Buzzer Types explanation is reversed.
Please correct to avoid confusion.
Greetings.
Hi roberto,
Thank you very much for advising. I did not realize that detail. It is already corrected.
A greeting!