La pinhole photography has its audience, and for this you need a device or camera with very particular characteristics and different from those of a conventional camera. If you are thinking of creating a homemade pinhole camera or are curious to know this type of device, we will explain everything in detail in this guide. Both what a pinhole camera is as well as the procedure to create one yourself step by step.
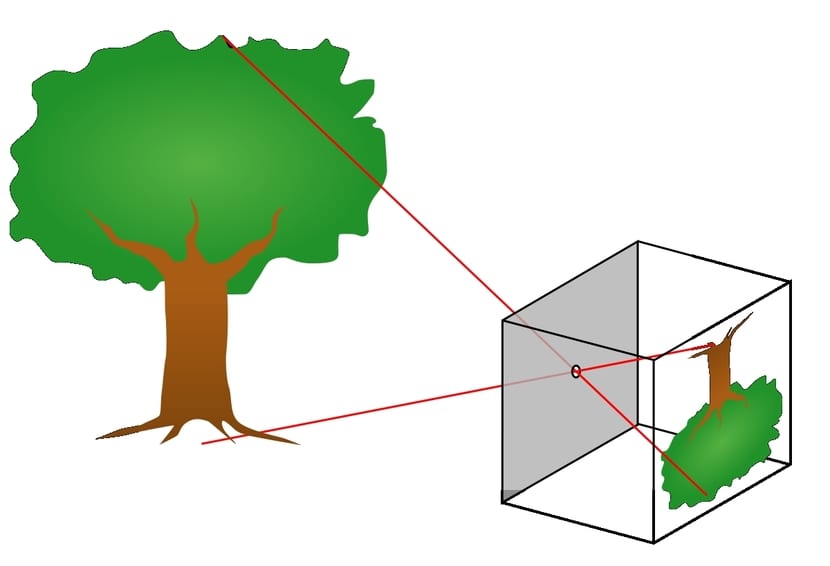
La pinhole camera It is one that does not have optical systems like other cameras, that is, it lacks lenses or objectives based on the refraction of light. Instead, they simply do not have a hole that is responsible for forming the image. This hole is known as a pinhole and makes the image look very peculiar by dispensing with that optics.
A Little History
Despite the fact that cameras are much more recent, the history of this type of system dates back to 500 BC, when the Greeks Aristotle and Euclid they wrote about natural "pinhole cameras." They didn't really have cameras or devices of that type, of course, but they did observe something curious when light passed through some slits or fabrics such as baskets or woven sheets of leaves at that time.
Later an English scientist named David brewster, was the one who began to practice the first pinhole photography that is known. That would happen in the 1850s, at which time Brewster himself would also coin the term pinhole, which is also used in English to refer to pinhole cameras. Since then, little by little it has been spreading and developing until today ...
Ideas for your pinhole camera:


The fact that a pinhole camera does not need advanced optical lenses or devices such as the CCD or CMOS sensors of modern cameras, makes it much easier to be able to create a homemade camera out of cheap, everyday materials and quite simply as we are going to check here.
To build the camera can be done in various ways. Here we are going to explain the simplest and cheapest way to do it, but we also give you some ideas so you can improve the design if you want:
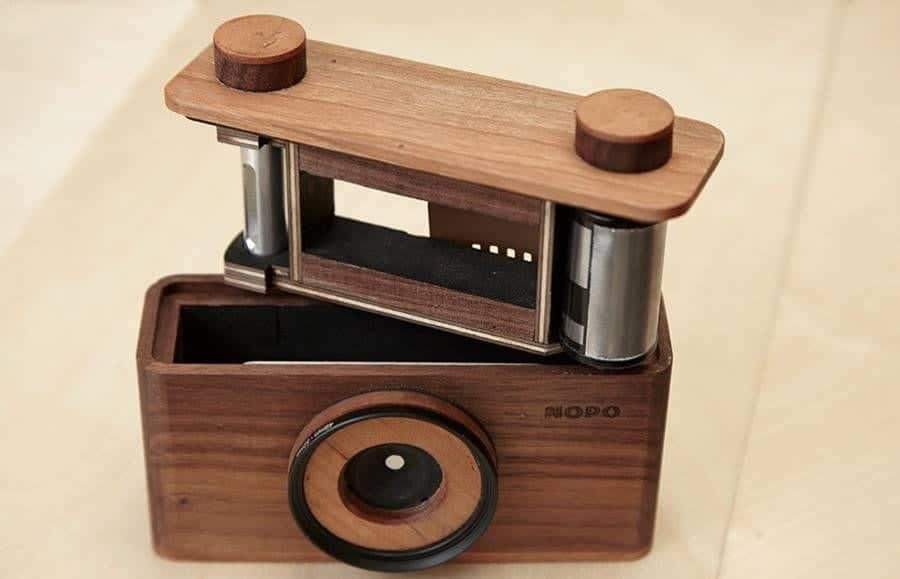
- Instead of using a cardboard box, you can create a box with wood and carve it out to your liking and even create a design that resembles a classic camera to give you a vintage touch to your design. The base may be the same as in the design shown here, but those ornaments will make it a bit more attractive.
- If you count with a 3D printer, that would be great, because you could create your own computer design as you like and then print it on plastic with your 3D printer to make it that much better. You can simulate the shape of an old camera or a modern one, and even create a totally different shape than a camera (that simulates a book, a scale TV, a small trunk,…). That is your choice ...
- You can also use any other material whatever you want, such as metal, papier-mâché, etc.
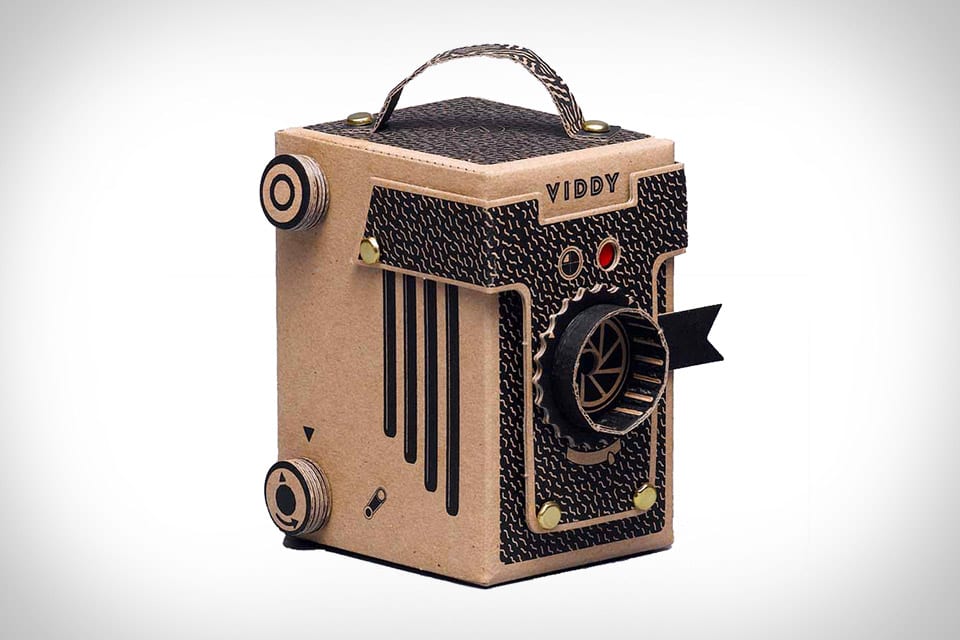
Giving him a attractive design It will not only serve as a camera, but also as an ornament.
Necessary materials:
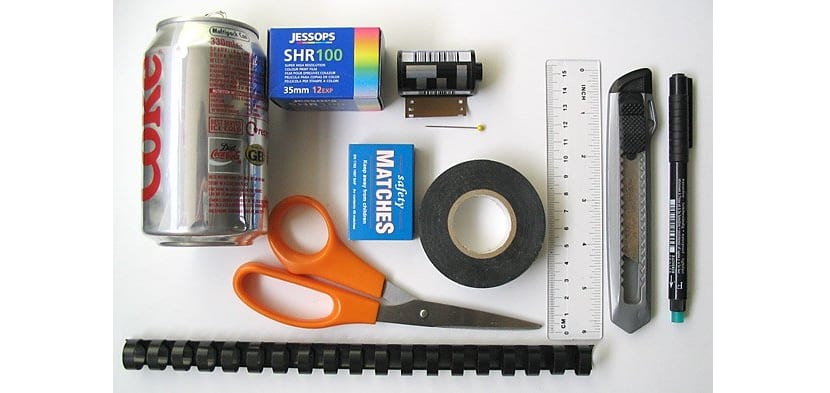
In order to create your first pinhole camera you will not need a large outlay of money, but it can be done with recycled materials and very cheap that we all have at home:
- Una small cardboard box or a large cardboard that you can fold and glue to create a closed box shape.
- Un Photo reel new 35mm. Your photos will be captured in it so that you can later develop them.
- Un used reel 35mm that we will use as a device to extract the new reel strip.
- Una Metal sheet, such as kitchen aluminum foil, a small tin plate, or even an empty soda can to cut a metal sheet. If you use kitchen foil, be careful not to crease it, the creases will spoil everything.
- Black electrical tape. Important that it is black.
- Sewing needle as thin as possible or an awl or lace to pierce the metal sheet. The ideal diameter is 2mm approx. The smaller, the sharper the images will be, even if it may seem otherwise ...
- Scissors and cutter to cut.
- Glue for cardboard if you have chosen to create the box with cardboard sheets yourself. You already know that if you use another type of material, such as wood, you must use a suitable glue, such as carpenter's glue, etc.
- Pencil, marker and ruler to make measurements for cuts.
- Black indelible roller.
With that you will have everything you need to create the pinhole camera as shown in the next section ...
How to create a pinhole camera:
Now we go to the base design that you can use to create your first prototype and improve it with the ideas that we give you in the previous section. The step by step procedure is
STEP 1: Cut the metal foil
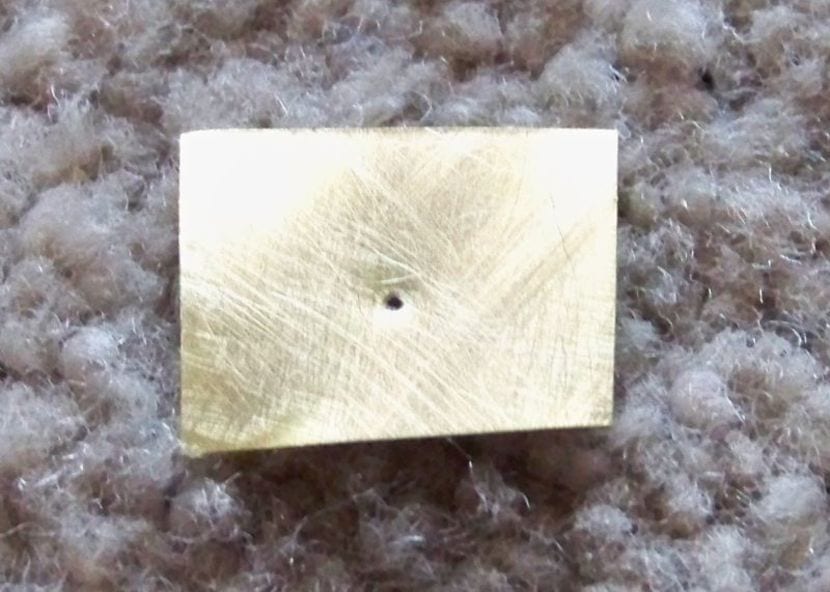
First we are going to cut the metal foilEither from aluminum foil (remember not to crease it) or cut a piece of metal from a soda can. If it is a soda can, make a hole in the surface and insert the tip of a pair of scissors through it and cut a square of about 2.4 × 2.4cm. It cuts easy.
Then, with the needle, lace or awl, make a small hole in the middle. It should not be large, remember that it is simply a small hole for light to pass through and serve as a camera lens.
STEP 2: Prepare the box
You can do it in different ways, if you have chosen to create yourself the cardboard box Because you cannot find a custom box, you can cut and assemble the box. But if you have found a box of an object that you have recently bought, you can work directly with it. The dimensions should be just right so it can house the two separate spools inside and a central hole for the sheet metal. It does not have to have specific dimensions ...
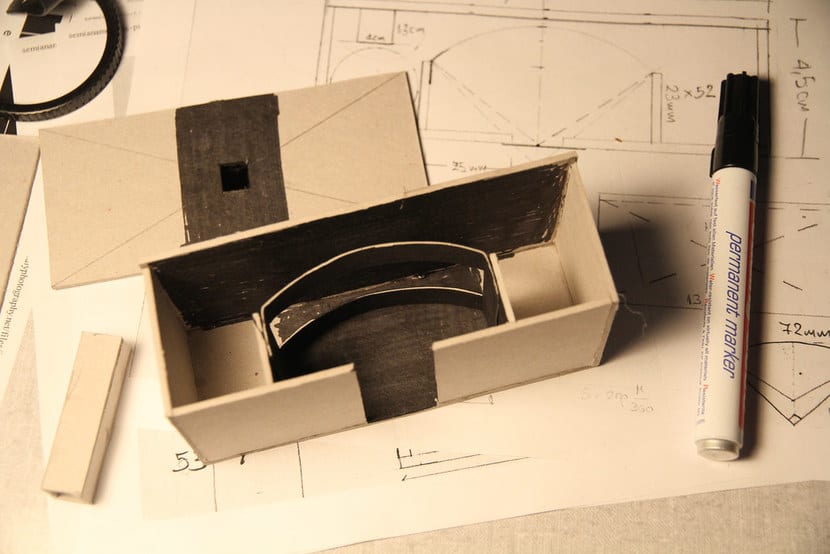
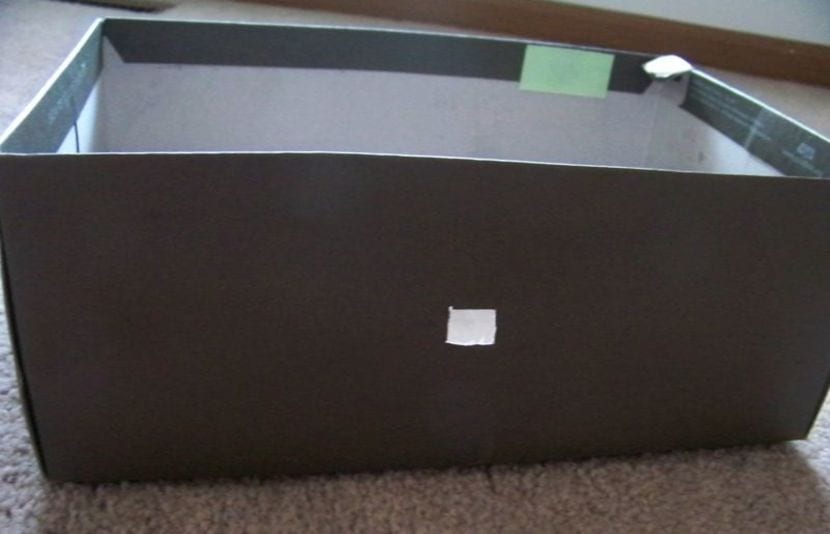
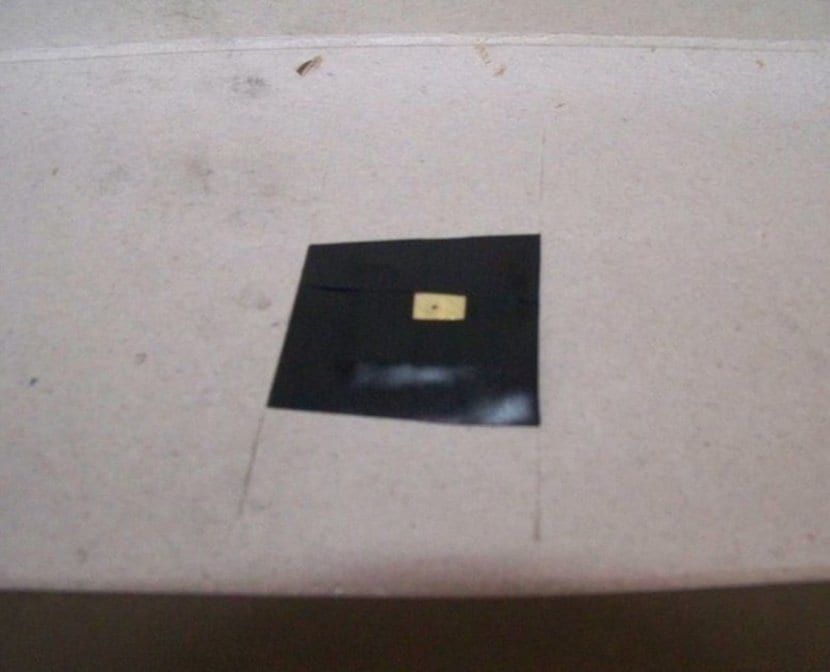
Remember that it must be well covered so that no light enters more than through the hole in our camera. Therefore, make sure that the lid closes well. If not, you can seal it with electrical tape to prevent light from entering through the lid. For the moment you must leave it uncovered to continue working on it. Basically on one of its faces you must make a small opening of 1x1cm as can be seen in the image. That will be our goal.
Another possibility is to use a matchbox empty, of the great ones. Inside the reels obviously do not fit, but they will stick to the sides of the box. To do this, you can remove the "box" that is inside the matchbox and that housed the matches and leave only the body of the box. At both ends you put the reels in such a way that the reel can flow from one roll to another passing through the box and on one side of the box you will cut the hole to add the metal sheet ...
STEP 3: Attach the lens and shutter
-

- 1

-

- 2
-

- 3
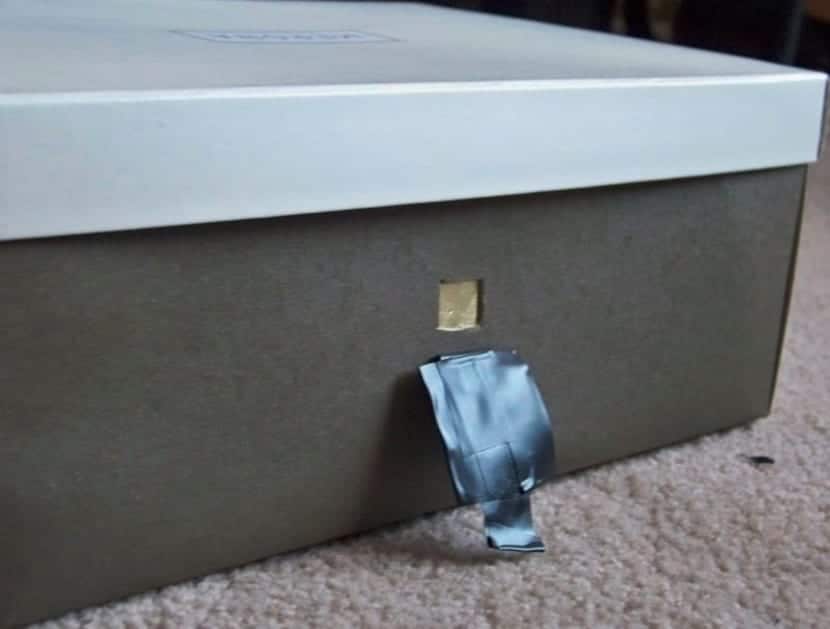
Put it sheet metal on the inside face of the box made of cardboard (image 1), fix it with electrical tape (image 2) on the inside, making sure that you do not cover the hole in the center. Then we are going to put our homemade shutter on the outside (image 3), we can simply use a piece of insulating tape that completely covers the light that passes through the hole in the metal sheet. You can use a piece of cardboard covered with black tape and glue it on the sides with this tape. Cover as much metal surface as you can with the tape to avoid possible reflections.
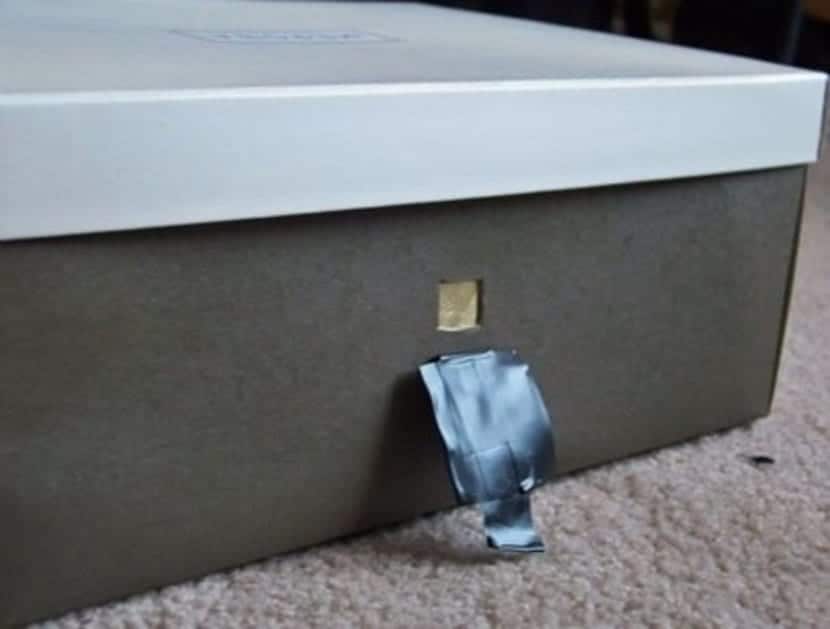
put the shutter glued at the bottom area, and so when you open it it will be hanging by its own weight. If you put it in the upper area you will have to constantly hold it during the exposure time and it can be uncomfortable. Remember also that when the tape loses its glue and no longer sticks, you must renew it. Or if you prefer, you can use another permanent device such as a small hinge and a more worked wooden closure or made with the 3D printer, etc.


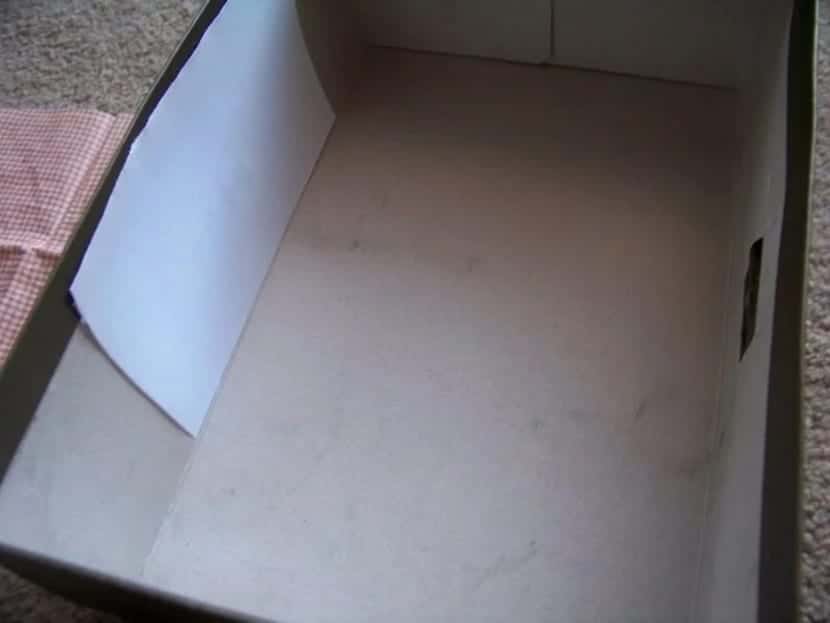
Other idea is to use a cardboard sheet with a hole to pass the image to the metal sheet, as in the images above. Tape the ends of the cardboard to the body of the box aligning the hole with that of the metal sheet and then cut a cardboard cutout that we can insert between the perforated cardboard and the sheet to close or open our shutter more comfortably.
STEP 4: Put the photo paper or spool
Now is the time to put the material with which we are going to capture the image. If is one reel, Put the new spool on the side of the box. You must work in the dark so that it is not revealed. Take out a piece of reel and stick it to the worn or old reel, so you can turn the old reel to extract new reel so that it passes through the central area where it will be printed with the light that enters through the opening of the plate.
-

- 1

-

- 2
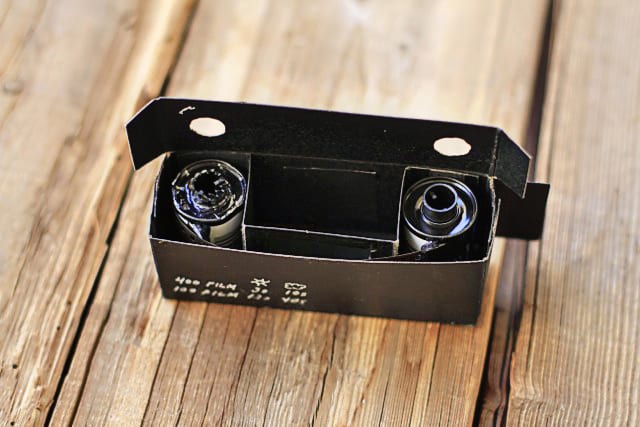
I mean, you must simulate the system of a conventional camera, leaving the new spool aside, passing a piece of spool through the central area of the cardboard box and at the other end use the old empty spool as a method to roll up and pass the new spool as you take photos ... You can use two plates that are used to open the cans of soft drinks as handles for each of the reels and that are outside the cardboard box to be able to rotate them from the outside ... Remember that light must not enter.
In the case of using a photographic paper, the procedure will be similar, only that you will have to stick the paper on the inside back face of the box, that is, the opposite to the one with the plate so that the light hits the paper or spool directly and thus it can be engraved.
STEP 5: Close the box
Close the lid of the box once all the elements are in place. Remember to avoid letting light inside so that the film is not developed or spoils the photos. If the lid doesn't close properly, use electrical tape to seal the gaps.
How to take a photo:
For take a picture, it is quite simple, just follow these steps:
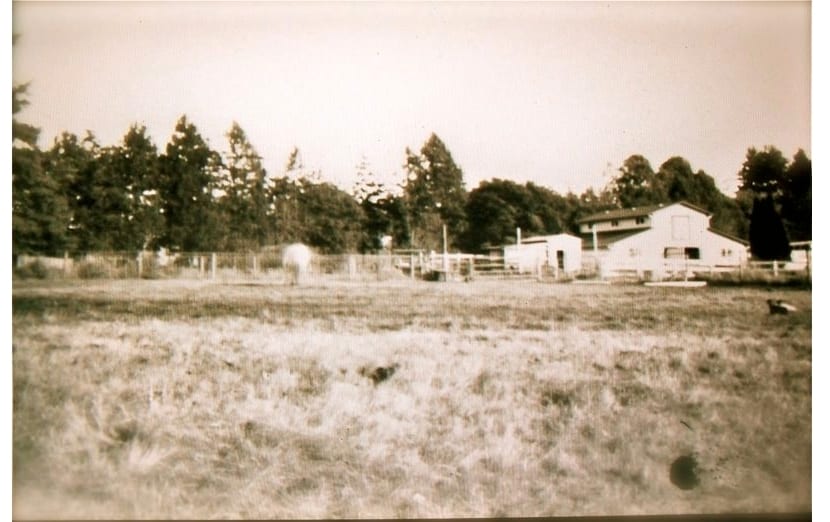
- Put the pinhole camera on a stable and flat surface pointing towards the landscape or whatever you want to capture. You can even get a tripod to take it wherever you want. It is important that you are completely still due to the sensitivity of this type of camera, otherwise the photo will not come out well.
- Now comes the most complicated, since you will have to experiment what is the optimal exposure time for you. There are cameras that also use photographic paper instead of photo reels. In the case of photographic paper, the exposure time could be a few minutes, but in the case of film it is much faster and a few seconds will suffice. That is, I advise you to experiment with some photos first and see when developing them which one looks better. Write down on a paper the times you have taken for each one and then, the one that came out the best, you will already know what the best exposure time is. Remember that depending on the ISO of the film or reel, it can also change. For example, for an ISO 400 it could go from 2 to 12 seconds, while for an ISO 100 it could be multiplied by four, that is, from 8 to 48 seconds, and so on. I advise you to also try different lighting, for example, if you take the photo outdoors it will not be the same as indoors or if there are spotlights, etc., since the more light there is, the shorter the exposure time. That is why those ranges of seconds vary depending on the ambient lighting. How is the exhibition carried out? See step 3 ...
- The exhibition is carried out simply opening the shutter flap that we have created to let the light enter through the hole in the sheet metal that we have created and print on the photographic spool. You must be careful not to shake or shake the camera. If you want to superimpose several images on the same portion of the film, that is, on the same photograph, you can leave the film as is and close the shutter, point towards the other image you want to capture and superimpose on the previous one, open the shutter and return to wait for the exposure time. But remember that it is important to close it before moving the camera to the next target ...
- After the exposure time, close the shutter flap again. The image should have already been captured on the spool or photographic paper.
- You can use the reel rolls to go winding the reel new towards the old one that we will use as an extractor and thus move on to take a new photo if you want.
- Once you have used up the new reel, you can reveal it in a photographic studio or take it to a photographer to do it, if you don't have a dark room and everything you need ...
And you will have your photographs ready...
How to develop photos?
If you would like to develop the photos by yourself, and not order it from a professional photography studio, you can if you have the following materials that you will find in specialized photography stores:
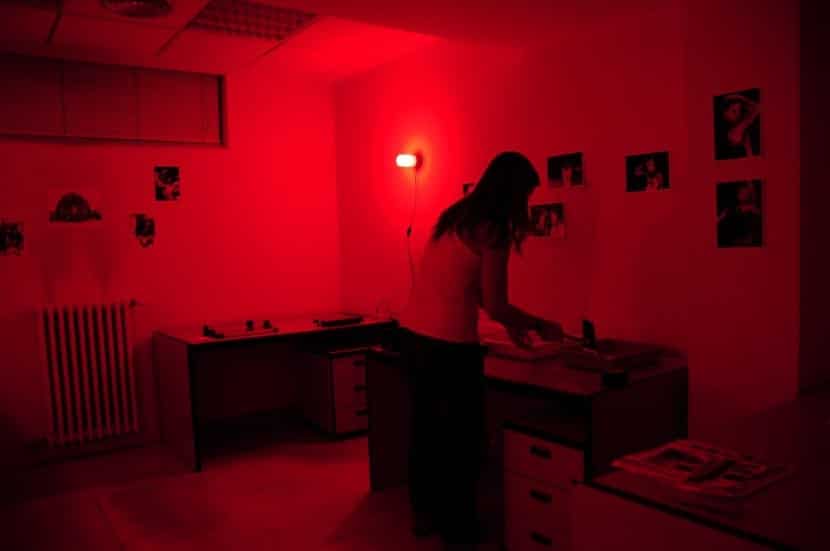
- Dark room with red light to prevent development like photographers use. It can also be LED light such as those of the security lights, etc.
- An enlarger
- Chemical containers
- Chemicals (a developer liquid, water as a stop bath, and a fixative)
- Clothesline and clips to hang the photos
- Towels or rags
- A sheet of glass
The procedure for the revealed:
- Go to the dark room for development.
- Fill a container with about 5 inches of developer, another with the same amount of water, and another with the fixative solution.
- Now we take the film out of our camera. Remember that any white light will destroy the images.
- With an enlarger you can transfer the negatives to a photographic paper choosing the appropriate f to generate stripes of different brightness. If you used photo paper directly for your pinhole camera instead of film, you can skip this step.
- Immerse, with the help of tweezers so as not to touch it, the photographic paper in the developer liquid. Shake the container a bit so the liquid runs off the surface properly. Once you see the image appear, you can remove it. Keep in mind that in a bright room, the image will appear a little darker than it does in a dark room.
- With the tweezers, extract the photo when the image is already visible in it and place it in the container with water, that is, to give it the bath while standing. The water should be at room temperature.
- Then we use the tweezers again and pass the photo to the container with the fixer. We will leave it there for 2 minutes.
- Rinse the photo again with water for another 2 min.
- Hang the photo on a clothesline with clothespins from one corner and wait for it to dry completely. To speed up the process you can use a hair dryer.
- Repeat the procedure with all the photos you need to develop ...
After the work is done, you can turn on the normal light in the room and you are done with your work.
Sources:
Instructables - How to Make a Pinhole Camera
How many times do I spin the empty spool to be able to take the next photo?