At this point, you will surely know all the advantages of an assistant, such as Amazon Echo. Now, thanks to this attractive project, you will not only be able to create your own assistant in the purest style AlexaBut, with a good dose of patience, you can even improve it, and all with just a Raspberry Pi. Before continuing, let you know that the project that we will take as a basis results in an assistant whose orders are in English, although it serves as a perfect example of how a project like this can be carried out.
One of the main advantages of creating this project, as the author of it says, is that we will only need an investment of about U.S. dollar 50 compared to the almost 200 that the Amazon Echo costs since, despite the fact that ours is not so attractive or beautiful and well finished, the truth is that the truly important thing is Alexa and this is nothing more than a software that we will have to resort to to everything works as it should.
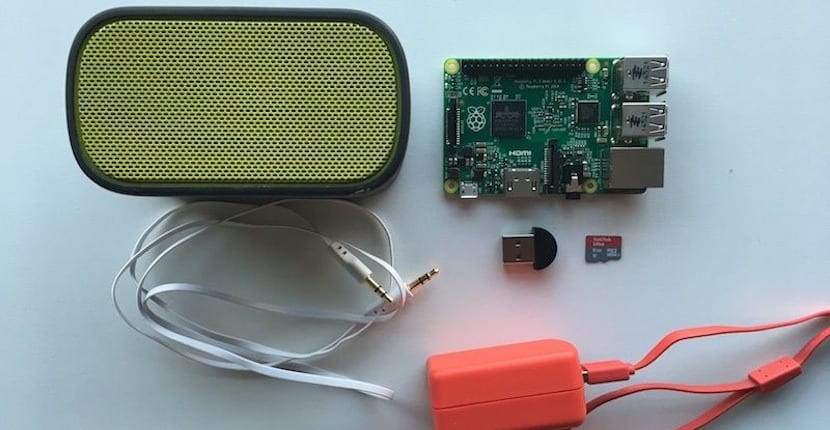
An investment of less than 50 euros and a Raspberry Pi is enough to enjoy your own Amazon Echo.
The basic idea behind all of this is to use a Raspberry Pi 3It also works with previous versions although the interesting thing, at least in this case, is to be able to use the integrated WiFi, to which we will connect a good quality speaker and microphone. This last point, that of microphone, It is something that you should take very seriously since, yes or yes, it must be of quality Because Alexa must understand you clearly, if we use a Chinese microphone, the interaction between the assistant and us can be quite complicated.
Once we have all the materials, we must register with Amazon as developers, a process that, although it is quite simple, the truth is that it is very long. Once we have this step, we must click the Alexa code on our Raspberry Pi with the latest version of PIXEL. One of the negative points of this project is that We will need to restart the Alexa Web service by hand each time we turn on our Rapsberry Pi.
Further information: lifehacker