There are some electronics projects or for use with your Arduino, where you will need to work with controlled magnetism. I mean, in a normal permanent magnet, there will always be attractive force, but with a electromagnet you can control this magnetic field to generate it just when you need it. In this way, you can attract ferromagnetic materials for a multitude of applications.
For example, imagine that you want to open or close a small hatch automatically when something happens, or move some metal object, etc. In that case, the best thing you can use is an electromagnet, thus avoiding having to create other complete ones. mechanisms that perform the same function.
What is an electromagnet?
Un electromagnet It is an electronic device that allows you to generate a magnetic field at your whim. That is, a device that becomes a magnet only when you need it, and not always like permanent magnets. That way, you can attract ferromagnetic objects at exactly the right moment when you want it.
Electromagnets are widely used in industry. For example, you have surely seen on TV those machines that are in some places where metal is recycled and that have an electromagnet that the operator activates from the cabin to pick up the chassis of a scrap car, or attract other metal parts. Then when the crane holding this electromagnet has positioned itself where it wants to leave these metal objects, they simply deactivate the electromagnet's magnetic field and everything will fall.
The way to activate it is by supplying this element with a continuous current. As long as this current is acting on the electromagnet, the magnetic field is maintained and the metal remains attached to it. When that current ceases, it will disappear and the metallic elements will detach. So you can control it quickly.
Well, this can also be used by you for your own benefit and in a very cheap way. You can buy the electromagnet ready-made or create it yourself, as it is not complicated at all, unlike other electronic components.
But if you think that electromagnets only serve to catch or attract objects, the truth is that you are wrong. The uses or applications are multiple. In fact, if you look around, surely many devices use this effect for their operation. For example, you will find it for many house bells, for some devices that have electrically controlled mechanical actuators, for robots, for hard drives, for electric motors (the rotor rotates thanks to the magnetic fields that are generated), generators, speakers, relays, magnetic locks, and a long etc.
How It Works
Even if you already have more or less clear how to operate an electromagnet, you must understand well how it works to attract or repel objects (if you change polarization). With these types of devices, you will not have to use permanent magnets to attract ferromagnetic materials such as iron, cobalt, nickel, and other alloys.
Keep in mind the type of metal or alloy that you are going to use for your project, since not everyone is attracted to these magnets.
For the electromagnet to work, we must go back to Danish studies Hans Christian Orsted, 1820. He discovered that electric currents can generate magnetic fields. Later, the British William Sturgeron would make the first electromagnet taking advantage of that discovery, and that dates back to 1824. And it would not be until 1930, when Joshep Henry would perfect it to create the electromagnet that we know today.
Physically it will be constituted by a wound coil and inside it a ferromagnetic core, such as mild iron, steel and other alloys. The loops are usually made of copper or aluminum, and have an insulating coating like a varnish to prevent them from making contact, since they will come very close to each other or directly in contact to compact them even more. Something similar to what happens with transformer coils, which also have this varnish.
The function of the coils is to generate said magnetic field, and the core will increase this effect and concentrate it to reduce scattering losses. Within the core material, its domains will be aligned or oriented in one direction thanks to the intensity generated by the coil, that is, it resembles what happens inside permanent magnets, which also have said domains aligned in a specific direction according to his pole.
It can control the force of attraction increasing the current that you are passing through the electromagnet. That said, I have to say that it is not the only factor that affects the electromagnet's attractive force, to increase its power you can increase one or all of the following factors:
- Number of solenoid turns.
- Core material.
- Current intensity.
When the current ceases, the domains tend to reorient themselves randomly, and therefore lose magnetism. So when you remove the applied current, the electromagnet stops attracting. However, a residual magnetic field may remain which is called remanent magnetism. If you want to eliminate it, you can apply a coercive field in the opposite direction or raise the temperature of the material above the Curie temperature.
Get an electromagnet
As I have already commented, you can create it yourselfIf you like DIY or are looking for a type of electromagnet with characteristics that are not satisfied with the ones you can buy. Another option, if you are more lazy, is to buy the electromagnet in any store such as Amazon.
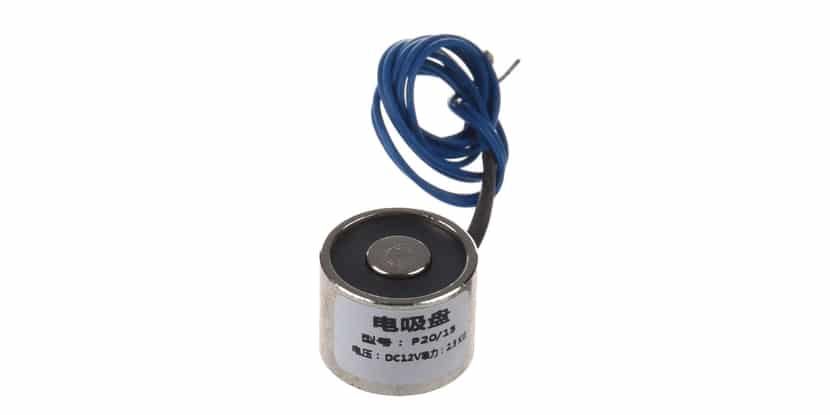
Please note something, if you are going to buy the electromagnet. And you are going to find different prices and several types that have different characteristics. Among them, what varies the most is the amount of weight they can support or attract. For example, the 25N of 2.5Kg, the 50N of 5Kg, the 100N of 10 Kg, the 800N of 80 kg, 1000N of 100 Kg, etc. There are larger ones for industrial applications, but it is not frequent for domestic applications ... Do not think that the price goes up so much between one and the other, since you have them from € 3 to € 20.
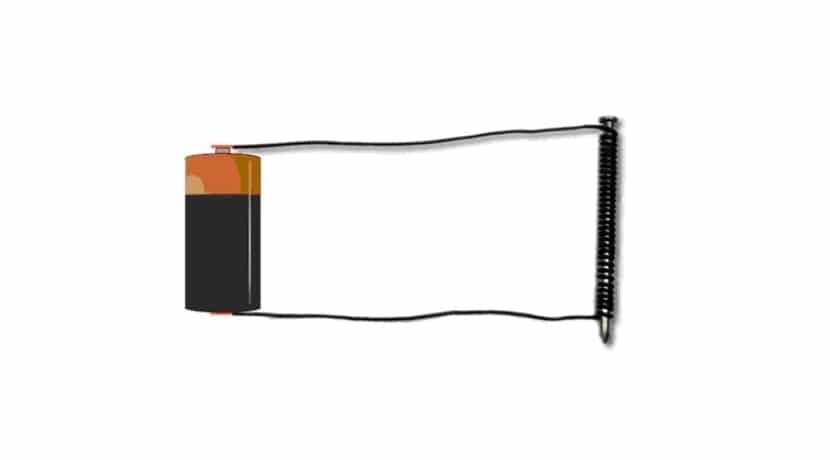
If you decide to create it yourselfYou can have a cheap electromagnet by simply winding wire to generate a coil and inside you must insert a ferrous core. For example, the simplest and simplest electromagnet that children usually do to learn in laboratories is to use a battery that they connect to a wound conductive wire (it must be covered with insulating varnish or plastic insulator so that they do not make contact on the turns ) and inside which they introduce a lace as a nucleus. When you connect the two ends to each of the poles of the cell or battery, a magnetic field will be generated in the coil that attracts metals ...
Of course, the electromagnet you can perfect with a larger coil or using a different metal core if you want to achieve higher power dimensions and magnetic fields.
Integration with Arduino
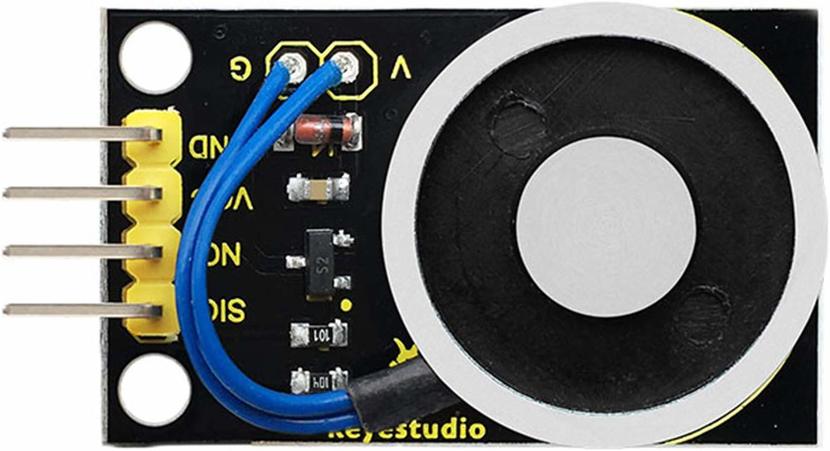
La integration with Arduino it is not complicated at all. Either a purchased electromagnet or one created by yourself, you can directly use the Arduino outputs and the power output to activate or deactivate the electromagnet as you wish using your sketch code. But if you want to do it in a better way, you should use some element to control the electromagnet in a more adequate way, especially if it is a more powerful electromagnet. In this case, you can use for example a transistor MOSFET as a control element, or an NPN TIP120 (it is the one I used to test), and even a relay. Thus, you can use one of the digital pins to control the transistor and this in turn to the electromagnet ...
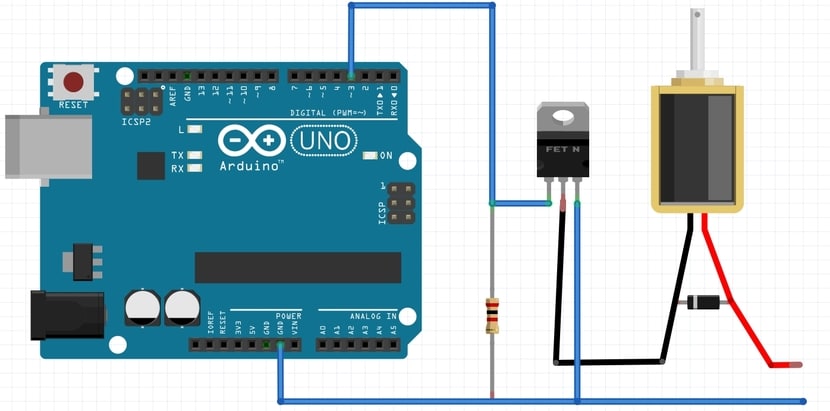
You must put a fly back or antiparallel diode like the one in the image, between the two connectors of the electromagnet. You must also include a 2K ohm resistor as you see in the diagram. The rest of the connections are very simple, as you can see. Of course, in this case, the blue and red wires correspond to the external power that will be applied to the solenoid.
Remember that there are electromagnets of Nominal voltage 6V, 12V, 24V, etc., so you must know well the voltage that you must apply to the solenoid so as not to damage it. You can see the details in the Amazon description or by looking for the datasheet of the component you are using. Remember to also respect its pinout, which are two pins, one for ground or GND and the other Vin to apply the control current.
The one that I have used to prove this schematic example that I have created in Fritzing is 6V, so in the lines that I have put to the right in the diagram it will be applied + 0 / 6V in the red and -0 / 6V in the blue. Remember that depending on the intensity you will get more or less force of attraction.
For the code, You can do something simple like the following (remember that you can modify the code so that instead of activating and deactivating intermittently after a while, like this one, it does so depending on another sensor you have in your circuit, or that some event occurs ...):
const int pin = 3;
//Recuerda que debes usar el pin correcto que hayas utilizado en el esquema eléctrico de tu proyecto

void setup() {
  pinMode(pin, OUTPUT);  //definir pin como salida
}

void loop(){
  digitalWrite(pin, HIGH);   // poner el Pin en HIGH para activar el electroimán
  delay(10000);               // esperar un segundo
  digitalWrite(pin, LOW);    // poner el Pin en LOW para desactivar el electroimán
  delay(10000);               // esperar un segundo
}