Surely many times you have seen or, at least, heard about the electroscope. A measuring instrument often used as a demonstration in many workshops and educational classes when dealing with electromagnetism. In addition, it can be used for many other applications, as you can see in this article.
Here you will learn All you need to know about the electroscope, how to make a homemade one, its applications, and how it can be used to make measurements of different parameters or for your home experiments ... It can even be a good educational tool to teach the little ones about electromagnetism.
What is the electroscope?
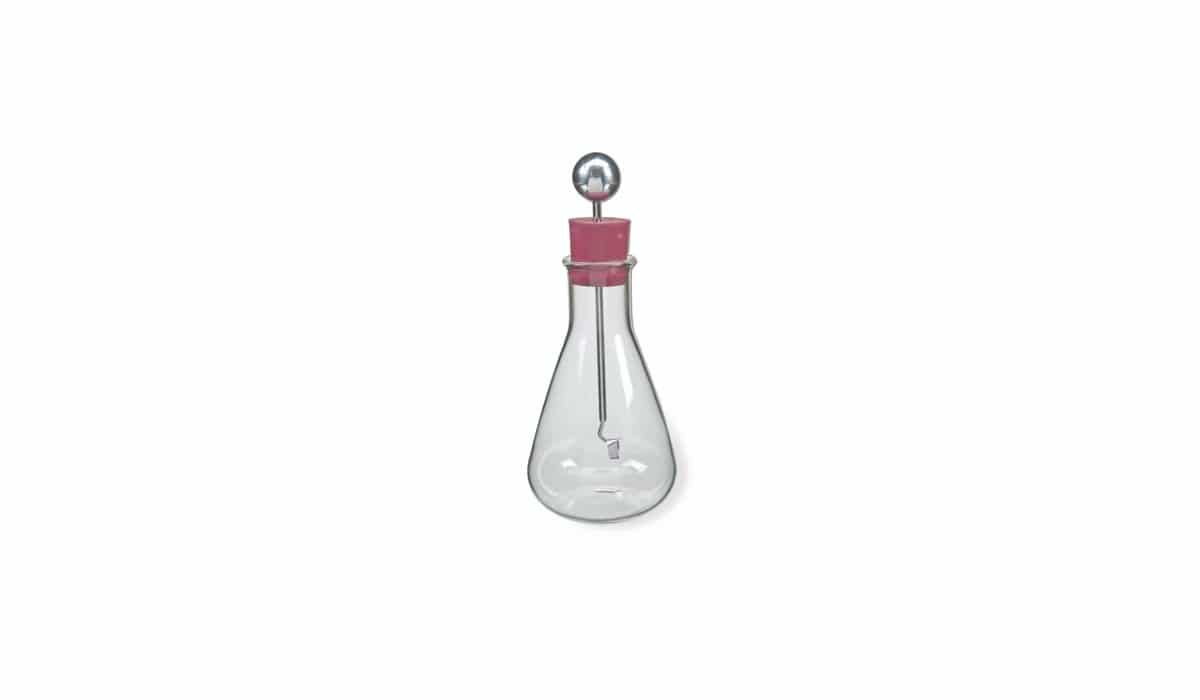
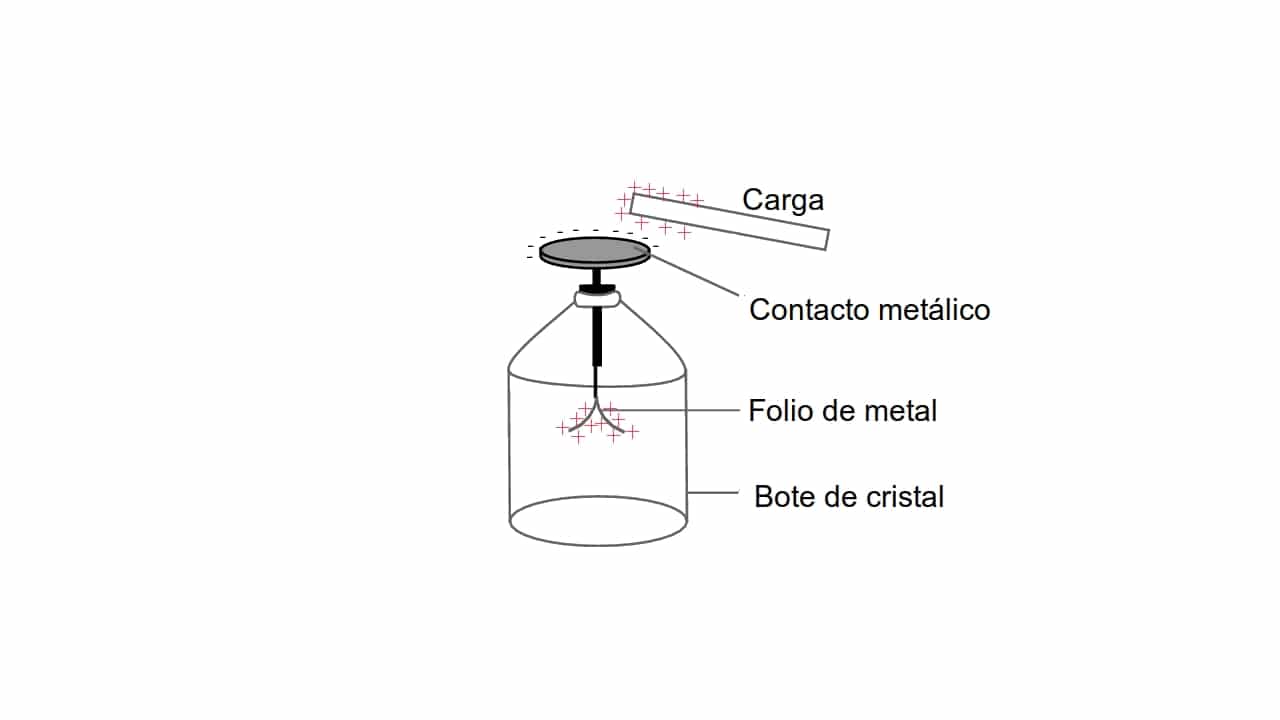
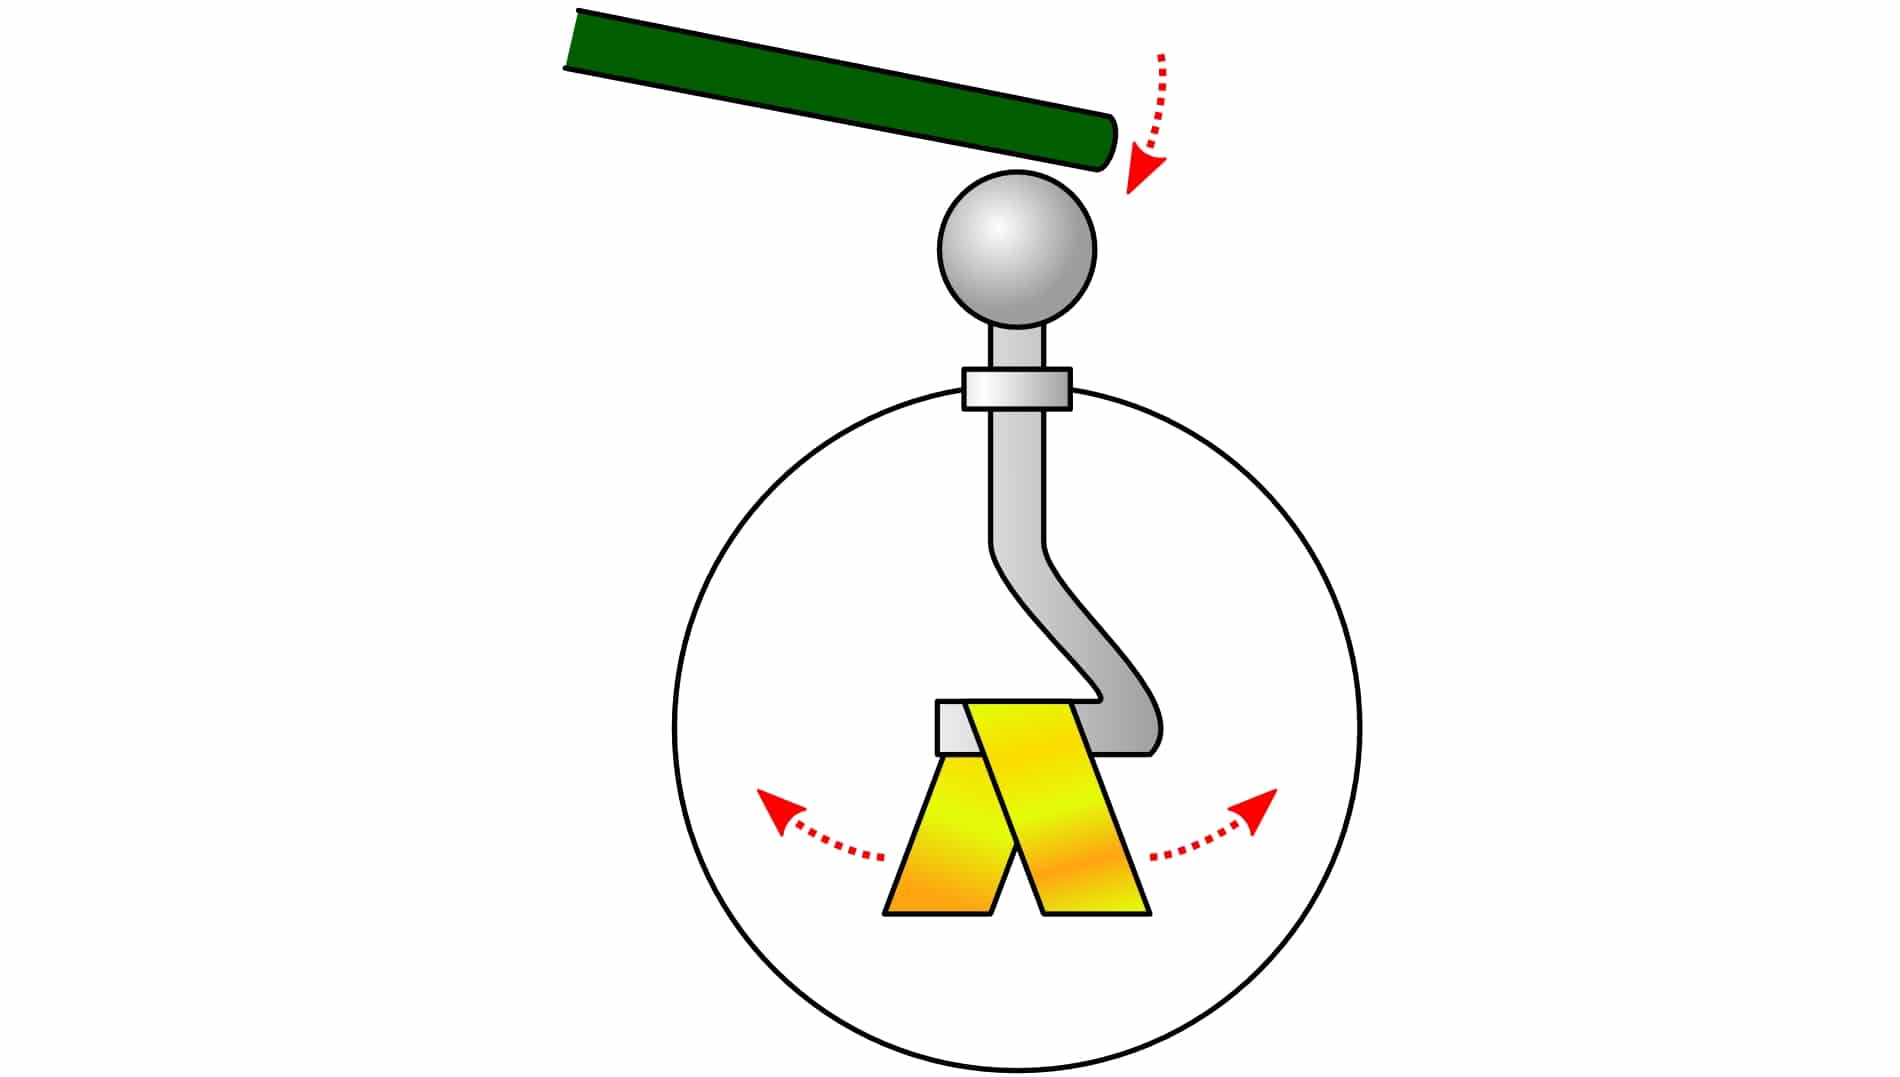
Un electroscope It is a device that contains a vertical metal rod with which it makes contact with some charge. At the opposite end it has two thin metal sheets. When a charge is brought close to the tip of the electroscope, these blades will separate due to the equal sign of these charges on the two blades, producing a repulsive magnetic force.
Typically, the metal rod vertical is usually made of copper, or similar, while the plates at the opposite end can be made of gold or aluminum. The sheets will be placed in a transparent glass box or bulb (the glass cannot be in contact with the sheets or with the rod). Glass, in professional electroscopes, has a metal frame that will be in contact with the ground.
The result is that when a load approaches the vertical rod, the blades move opening (they separate). This movement is what indicates to the user that there is a load present, and its intensity, since they can be opened more or less depending on it. And when the load is removed or canceled, the blades return to their resting position.
However, it is not a price gimmick to measure loads accurately, only to determine their presence. What can be determined precisely is the sign of the burden. When the charge is of the same sign as the known charge of the electroscope, then they will be of the same sign. But if they approach, then they will be the opposite.
On the other hand, you should also know that, ideally, the sheets should remain in position due to the load. But this is not the case, the charge is lost due to the effect of electrical conductivity of air inside the glass bottle (it should be empty for that not to be the case). But this effect, far from being negative, is even practical for measuring the density of ions in air.
History
This device was first created by William Gilbert, in 1600. And he did it to carry out experiments with electrostatic charges. And although at that time it served for that, currently it does not have much use beyond education or to make certain demonstrations.
To this day, there are instruments that measure charges much more precisely, and with much more efficiency than this crude element ... For example, there are electrostatic meters, electromagnetic field detectors, etc. All of them with very diverse applications.
Applications
The electroscope, as you must already intuit, is used as an instrument to measure if there is an electric charge and its sign. But it does not only have that application, what I have mentioned about measuring the density of ions in the air also gives it another capacity that is not so well known.
And it is that, the electroscope, can also serve to measure radiation in the environment. A kind of "Geiger counter»Homemade, although not too accurate… But sufficient to detect the presence of radioactive materials or nearby radiation.
How to make an electroscope at home
Make an electroscope It is a very easy task, and it can be done even with materials you already have at home or recycled. It is not necessary a large investment, and you can do it even with the smallest to learn about the operation.
The materials that you should gather are:
- Gold foil strips or kitchen aluminum foil. It can be a strip of about 2cm thick and one 10cm long.
- Copper wire thickness for the vertical rod and the hook that will hold the blades.
- Glass jar with insulating lid.
- Optional - If you cannot find a jar with an insulated lid, and you use a conventional can with a metal lid, then you should add an insulating tube so that the vertical rod does not make contact with the metal cap. The insulator can be the copper cable cover itself (if it has one), or you can use a plastic straw or similar ...
To carry out the assembly, you may also have to use some tools (pliers to bend the wire and cut it, hot melt gun in case you want to hold everything better, ...), although it can be done manually. Regarding the editing itself, the steps would be:
- Once you have all the necessary materials, the first step is to cut shaping copper wire or cable. The wire must be bare, without any type of insulation as in the case of cables. If it does, you should peel it. You must generate a kind of coil at one of its ends (serpentine), that will act as a metal ball. This way, it will have more surface area to capture the charges (electrons) that approach it.
- Now with the wire itself, carefully pierce the cork lid of the boat. If you find that you cannot handle the wire, do it with an awl or a fine drill bit so that the wire can go through it, but without any slack. It must be tight so that the wire is trapped.
- The other end (the one that goes inside the boat), once you have crossed with it, will bend in L shape and it should be more or less suspended in the middle of the inside of the glass jar. Do the length calculations and cut to fit snugly. If you see that for any reason something has been loose, you can stick it on the lid using the hot glue gun, but be careful that neither the serpentine end, nor the L end, gets glue on them, since it is insulating and you it could ruin the experiment.
- Then cut a sheet of foil 1 or 2 cm wide and 10 cm long. You can increase or decrease these dimensions according to the size of the boat you have purchased. Remember that at no time should they touch the bottom or the walls of the boat ...
- Now, fold the foil right in half, and use this fold to support the central area where you have bent over the horizontal area of the copper rod (in the L). Do it in such a way that the sheets are hanging and free to move, and at an angle of 45º. That is, they are free to both approach (detect charge of different sign), and move away (detect charge of the same sign).
- Finally, carefully insert the rod with the foil into the can and press the cap so that it is well sealed.
Now you are done, the result should be something similar to the image above. You just have to try it ...
Buy an electroscope?
Another option may be buy a ready-made electroscope. They are sold for education and some are not too expensive. Although, the really fun thing is creating it ...
There are various types, here are some:
- No products found.
- No products found.
- Ajax Scientific, phitball electroscope.
- 3B Scientific Scientific Electroscope.
- Science2Education electroscope for education.
Test the electroscope
Now, to test it, you can do several things. The simplest is to bring the meandering tip close to something that you know has an electrical charge, or static electricity. The result will be a movement at the ends of the blades, both attraction and repulsion depending on the charges ...
To make the experiment:
- Bring the meandering cable that is outside the boat to something that you know surely has no load, always keeping the boat vertical and stable. You will see that the sheets do not move.
- On the other hand, if you use a charged balloon (rubbing it against your hair), you will see that when you bring it closer, the electrons of the static charge are transferred through the copper wire and reach the aluminum sheets, causing both to be negatively charged and they repel each other (they will open).