![]()
When you buy one of the versions of the Raspberry Pi board, one of the things you have to do is prepare the SD memory card so that it has a bootable operating system compatible with this SBC board. For that to be possible there are many tools, although one of the most popular and that I recommend is Etcher or balenaEtcher. With it you will have everything you need to prepare your OS in the SD in a very intuitive and fast way.
You should know that there are a large number of operating systems that are already supported with the Raspberry Pi board. Many GNU / Linux distributions already support ARM and can work well on the Pi. You also have other open source operating systems that are not based on the Linux kernel and are special for the Raspberry Pi, such as RISC OS, RaspBSD, etc. You can even find some for specific use such as Windows IoT, OpenELEC to set up a media center, RetroPi for retro games, etc.
Introduction
Well, whatever the operating system you choose, and even several on the same SD, lor what do you have to do for your Raspberry Pi to run is:
- Download your operating system. In the link I have left you the officials of the Raspberry Pi Foundation, but there are many more in other sources.
- Download balenaEtcher from the official website of the project.
- Install balenaEtcher on your system.
- Use Etcher to pass your OS image to SD card so you can boot from the Pi.
Of course, for that you need a PC with a card reader, the SD itself (in the case of the Raspberry Pi it will be a microSD) and the SBC board.
What is Etcher?

Balena has developed this software popularly known as Etcher. Although that is the name by which it is known, it must be said that it was called that at the beginning. But it was renamed in 2018 when resin.io changed its name to balena.io.
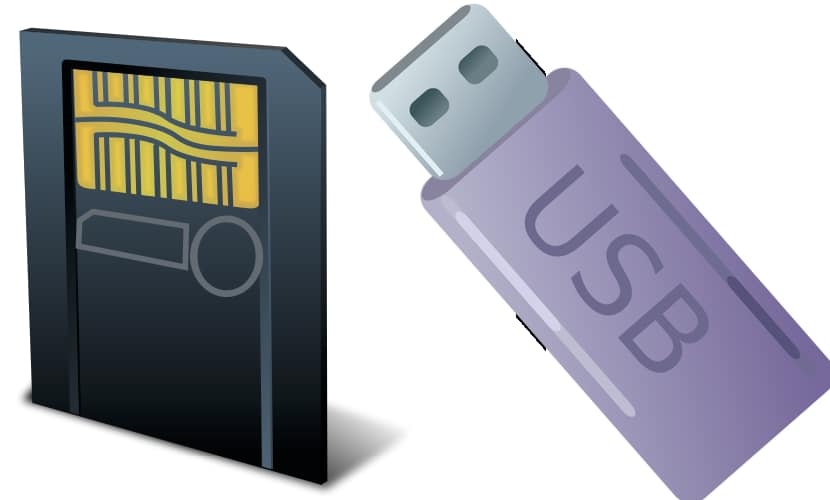
It is a free and open source program under the Apache 2.0 license. Used to write image files to media storage. They are generally images of operating systems such as ISO or IMG and the media used are usually SD memory cards, although it also supports USB flash drives. That is, you can not only use it for SDs for your Raspi, but also to create a Live USB, prepare a Windows 10 installation medium, etc.
In addition, it is a multiplatform software, since it can work both in Microsoft operating systems Windows, Apple macOS and also GNU / Linux.
Among its characteristics most prominent are:
- Automatically detect media on which you mount the operating system image. You already know that they can be USB memories or SD cards that you have inserted in the equipment.
- Protects against hard drive selection. That is, you don't have to worry like other programs about making a mistake and choosing your hard drive and having it loaded ...
- Do everything the process automatically once started, without you having to intervene. Also, if you want to make several copies on different media, for example for a class with several SBCs, once the first one is finished it allows you to do the same process quickly.
In the future, developers also want to add support for compatibility for the persistent storage. That is, so that when you create a medium with a GNU / Linux distro, you can save the changes made to the SD or USB. That creates a partition or space in the middle where everything is saved. In general, other programs that are already compatible with this allow you to choose the size of that partition.
Steps to use balenaEtcher
Now that you know the details of this software, let's see the steps to use it. You will see that it is extremely simple:
- Download balenaetcher in the edition you need:
- For Windows: you have two options, one is the .exe to install it on your system. The other is a Portable that does not need to be installed, you download it, unzip it and you can run it directly.
- For macOS: There is only one option, an Apple system executable that you can easily install.
- For Linux: like above, there is also only one option. It is a universal AppImage type package, so the installation will work for any distribution and is done easily. You just have to run it and the process will begin.
- Now is the time install it. To do this, run the package you have chosen. Except for the Portable which doesn't need it, as I have already said. Once the installation is finished you can start.
- Run the app balenaEtcher searching for it among the available apps of your OS.
- Its graphical interface is very simple. It has no loss. You only have to do three steps:
- Select the image first. From the file browser you can go to where the image of the operating system you have chosen was downloaded: .iso or .img.
- The next step is to select the SD card or USB flash drive where you want it to load.
- Then touch flashing, that is, copy and prepare the chosen medium with the system you have used so that it can be booted.
- Wait for the process to finish and then, if you are not going to copy more than one medium, you can still exit.
After that you will have clever the means to test it on a computer or on your Raspberry Pi….
In the link https://www.balena.io/etcher/ where is the version for Raspberry?