There are vA number of Arduino "flavors", so to speak. Apart from Arduino UNO and his older brother Arduino Mega, there are more of this plates. Some with very specific characteristics to satisfy all the possible needs of makers. This way they will adapt to all kinds of DIY projects. A different one from the aforementioned is Lilypad.
Lilypad is a small open source development board and with some characteristics similar to the plate Arduino UNO basis, but whose size has been reduced considerably so that it can be adapted to embedded projects, low consumption, small devices where reducing the size is important, and even for home wearables ...
What is Lilypad?
One of the small devices that have prevailed in the DIY community are wearables. That is, in Spanish they would be the "wearable" devices, although it does not sound too good. As you can imagine, in case you don't know yet, they are devices that can be used as clothing or accessories. Surely you have already seen some wearables such as smart watches, T-shirts, hats, etc., that have some electronic element to display messages, emit some type of signal, etc.
Well, for this type of device it is not practical to use a Arduino UNO, Mega, etc., since they are boards of a considerable size, which together with the type of power that these boards usually need, would make the task of building wearables impossible discreet. That is why boards like Lilypad have been created, another key piece within the Arduino ecosystem.
Therefore, Lilypad flora they are nothing more than development boards that provide makers with the same capacity as other boards, but with a smaller size and the possibility of integrating a discrete power supply, such as a small button cell.
In this article I will cover both LilyPad and Flora, since both projects are very interesting to create interactive clothing or small accessories like caps with lights, your own smart watch (like Fitbit, Appel iWatch, Samsung Galaxy Gear…) T-shirts that react to Twitter events, sneakers that react to steps, or whatever you can imagine.
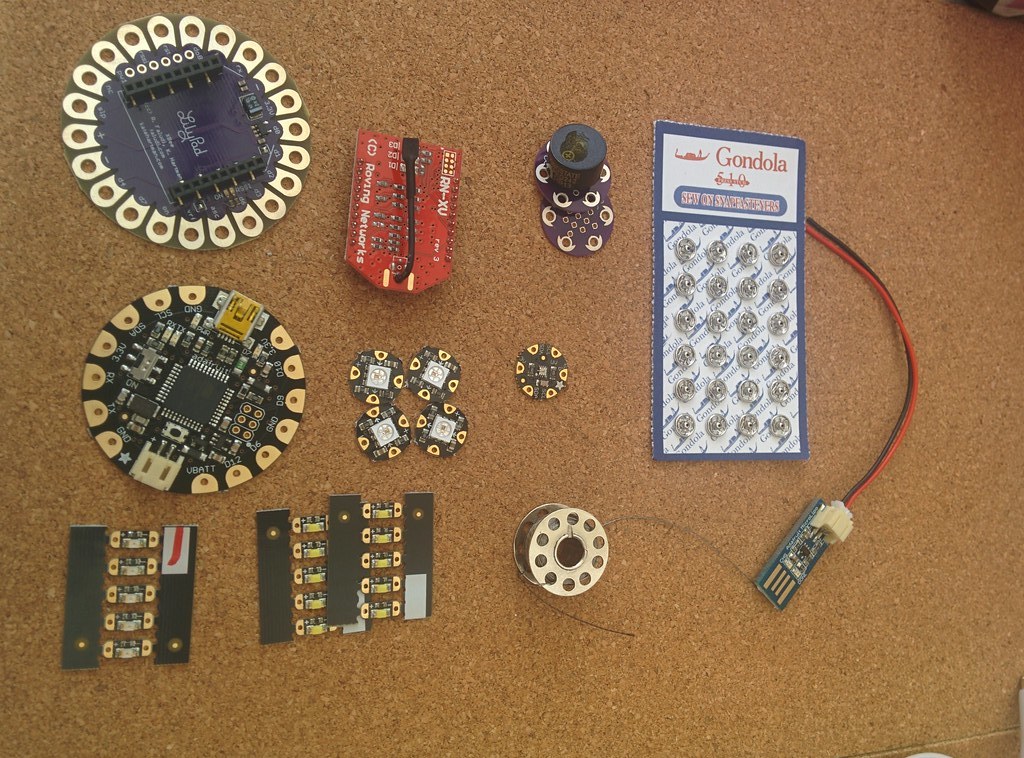
Also, you should know that the community and other manufacturers have developed all kinds of complementary projects that you can use and many extra devices (sensors, LEDs, actuators, ...) that work alongside these plates to expand their capabilities beyond those of the base.
LilyPad / Flora technical characteristics
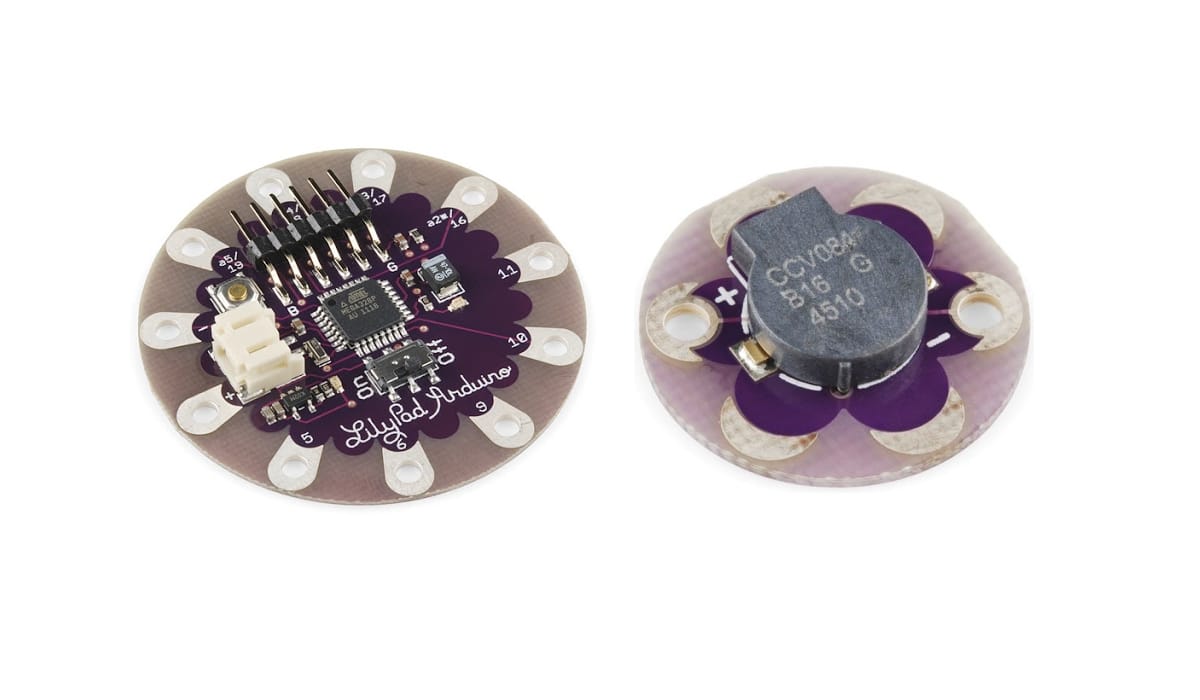
This LilyPad / Flora plate It is specially designed for garments and textiles, a wearable version of Arduino as I said. It was developed by Leah Buechley and SparkFun Electronics. It is true that the characteristics are not as powerful as other Arduino boards, but it is more flexible and reduced, qualities that other boards do not have.
Lilypad
The LilyPad board is powered by a low-power Atmel microcontroller ATmega328P. An MCU chip that only demands between 0,75μA at 0,2mA, depending on the mode, and with supply voltages from 2.7 to 5.5v. This MCU is 8-bit, working with a clock frequency of 8 MHz.
Despite its small size, this board has 23 GPIO pins so you can program them. But only 9 of them are accessible, all as digital pins. They are numbered like this: 5, 6, 9, 10, 11, A2, A3, A4, and A5. Of all of them, the ones without an A can be used as PWM. In addition, it can be used the I2C protocol through pins A4 (SDA) and A5 (SCL). Of course, there will also be pin GND as ground (marked with the - symbol) and another for 3v3 power (marked as +).
Lilypad integrates a JST connector to connect the lipo battery on the reverse side, although the serial-USB adapter is not included in the basic kit (you would have to buy FTDI module). What does include an integrated MCP73831 chip to charge the battery through USB, a reset button, several integrated LEDs, one of them to know if the board is on and another for debugging accessible by pin 13.
All the LilyPad technical characteristics complete are:
- 328Mhz Atmel ATmega8P microcontroller.
- 8-bit
- SRAM 2KB
- EEPROM 1KB
- 32KB flash memory
- Supply voltage from 2.7v to 5v5.
- Consumption between 0.75 microamps up to 0.2mA.
- Digital pins 23, only 9 available. With 5 PWM (5,6,9,10,11).
- Four analog pins A2, A3, A4, A5. Of which A4 (SDA) and A5 (SCL) are for I2C.
- Power pins: 1 of 3v3, 1 of GND.
- Maximum current of the pins: 40mA.
- Dimensions 55mm in diameter and 8mm thick.
- Price: about € 6 or € 7 (BUY HERE)
Flora
En the case of Flora, It is an Adafruit plate somewhat more expensive than the previous one, but also cheap. There are several revisions of this board, with v3. It is Arduino compatible, and designed by Adafruit founder Limor Fried, known in the community as Ladyada, and as an alternative to LilyPad.
It has some interesting advantages over LilyPad, even though they look almost identical. This plate yes it integrates the microUSB for your connection, therefore it is already an extra point. In addition, Flora has dimensions of 45mm and 7mm, which make it somewhat smaller, although practically the same in this case.
Another of the advantages of Flora are the functions it implements regarding Lilypad. Also, if you want to go further, they also sell complete development kits.
For Flora, the characteristics would be these others:
- Atmel ATmega32U4 16 Mhz microcontroller.
- 8-bit
- 2.5KB SRAM
- 32KB Flash
- 1KB EEPROM
- Supply voltage 3.5v to 16v.
- Maximum consumption from 8mA to 20mA.
- Available digital pins are reduced by 1, that is, you have 8 at your disposal. They are 0, 1, 2, 3, 6, 9, 10 and 12. As PWM there are 4 of them, those numbered as 3, 6, 9 and 10. It has I2C, but this time they are in 2 (SDA) and 3 (SCL).
- Integrated Neopixel accessible from pin 8.
- You have 4 analog pins: A7, A9, A10 and A11.
- Add 2 voltage pins 3v3 and 3 of type GND. Also, add a VBATT output. This last pin gives the voltage of the battery used to power it, therefore, it can be used as one more power pin, as for NeoPixel (always up to 150mA of maximum load, but be careful because it increases consumption).
- 45mmx7mm dimensions.
- Price from 16-30 € (BUY HERE)
Plates differ in their origin. While Flora is from Adafruit, Lilypad is from Arduino and Sparkfun. But both designed for wearables, and with similar dimensions and characteristics as you can see.
Starting to program with the Arduino IDE
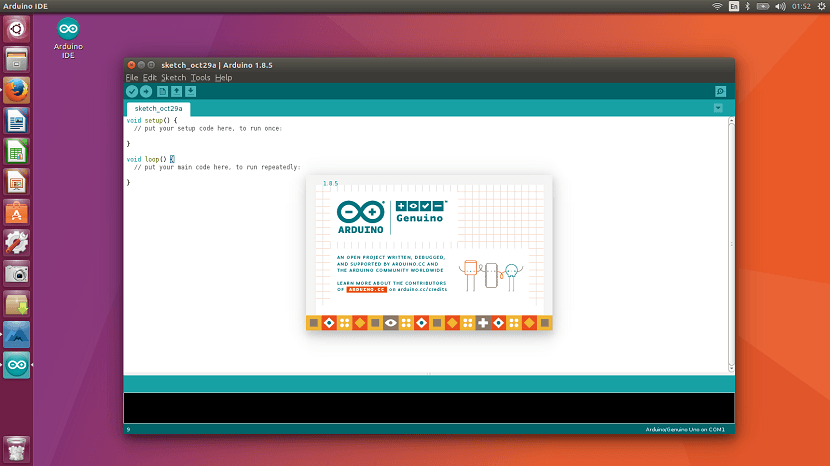
For program Flora and LilyPad is the same as doing it with Arduino UNO, etc. The same programming language and the same development environment are used, that is, Arduino IDE. The only difference that you must take into account is that you must select the type of plate to program in the IDE menu, since by default it will be UNO.
For select the plate properly in Arduino IDE:
- Lilypad: go to Arduino IDE, then to Tools, then to Boards section and there select the LilyPad board. With the FTDI module connected and the cable from the PC to the microUSB, you can pass the sketch to leave it programmed.
- Flora: go to Arduino IDE, then File, then Preferences. In the Settings tab, look for "Manager of additional plate URLs" and there paste this link. By the way, if you already had another URL in that field, use a comma to separate this new URL you add and don't delete the old one, or click the icon next to the text box and add the new URL below the other one in the new window that appears. Once you finish, you give OK and that's it. Now go to Tools, Board, Card manager, and select Contribution from the drop-down menu Type, search in the search engine "Adafruit AVR" without quotes and once located Install. Once done, you can go back to the Tools menu, LilyPad Arduino Board and inside you can select Adafruit Flora that will appear after installing that plugin. Here you directly connect the USB to microUSB cable from the board, without the need for a separate module.
The rest of the procedure would be the same as for any other Arduino board, taking into account the available hardware resources, which will be smaller ... For example, to blink an LED that you connect to pin 6 of LilyPad / Flora, you can use the following example code:
const byte pinLed6 = 6;

void setup() {
  // Modo del pin como salida
  pinMode(pinLed6, OUTPUT);

}

void loop() {
  // Hacemos parpadear el LED cada 3 segundos
  digitalWrite(pinLed6, HIGH);
  delay(3000);
  digitalWrite(pinLed6, LOW);
  delay(3000);
  digitalWrite(pinLed6, HIGH);
  delay(3000);
  digitalWrite(pinLed6, LOW);
  delay(3000);

}