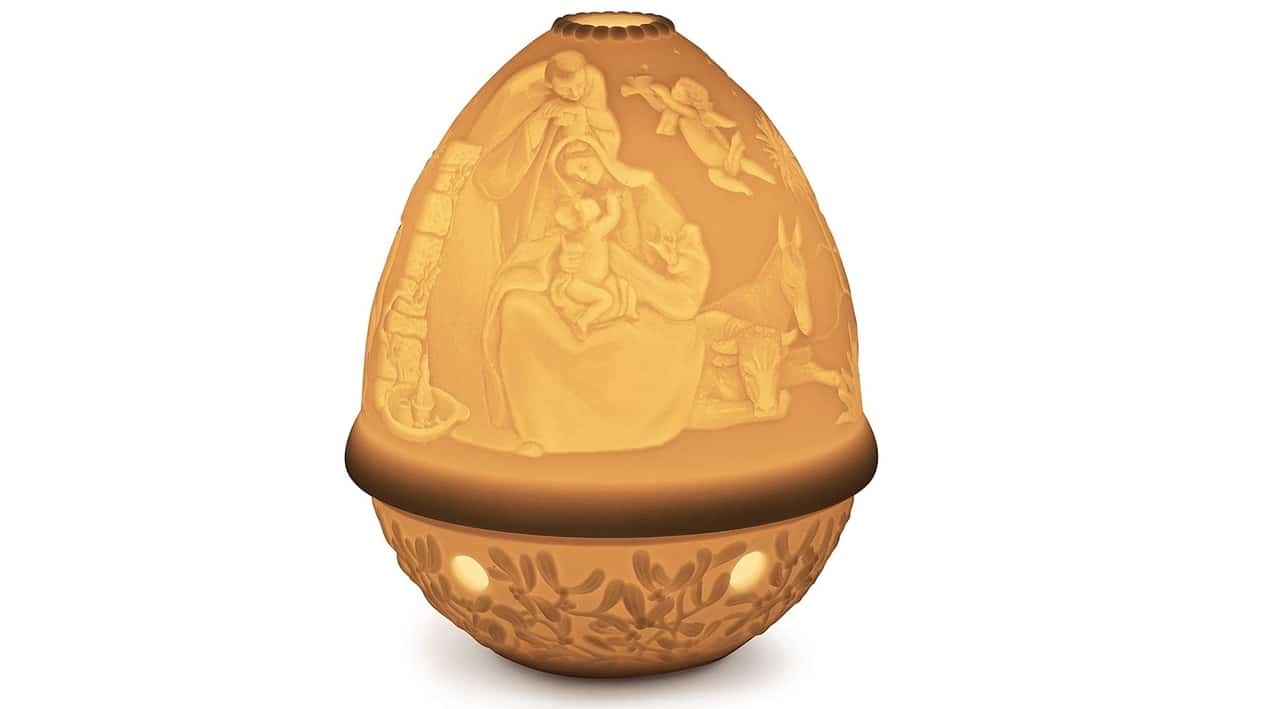
Behind this strange name there is a very beautiful way of representing art. The lithophany is gaining more and more followers within the world of maker and 3D printing. With it you can print all kinds of scenes, personal photos, drawings, shapes, or whatever comes to mind.
If you are interested learn more about this way of making art with lithophany, in this article you will learn what it is, the differences with other techniques such as lithography, and how you can start creating your own designs with Print 3D.
What is lithophany?
La lithophany it is a type of projection of images and forms that use light. Formerly the light of fire, sunlight or that of a candle was used. Currently the light of a light bulb is used. Either way, the light source will pass through a sheet with a series of semitransparent silkscreens to shape the image.
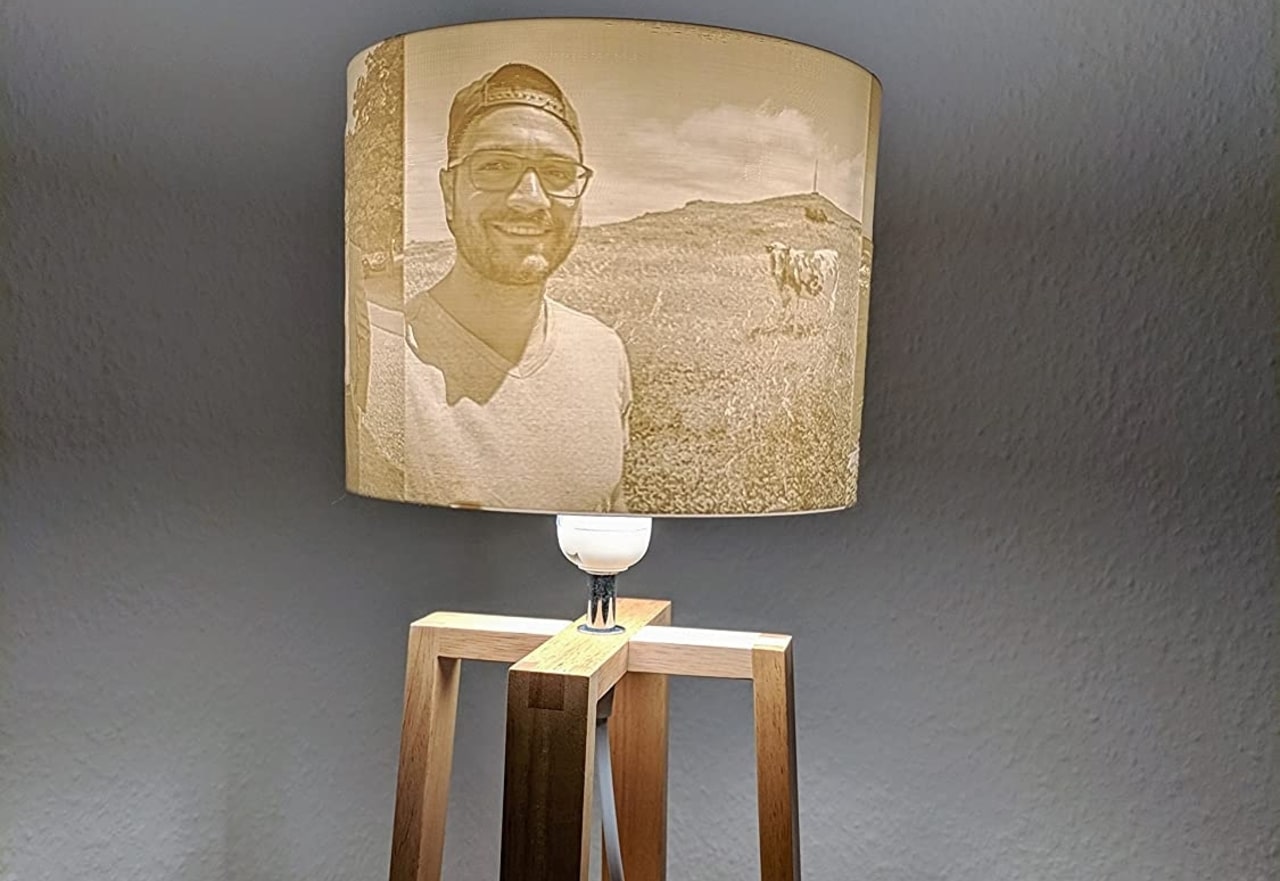
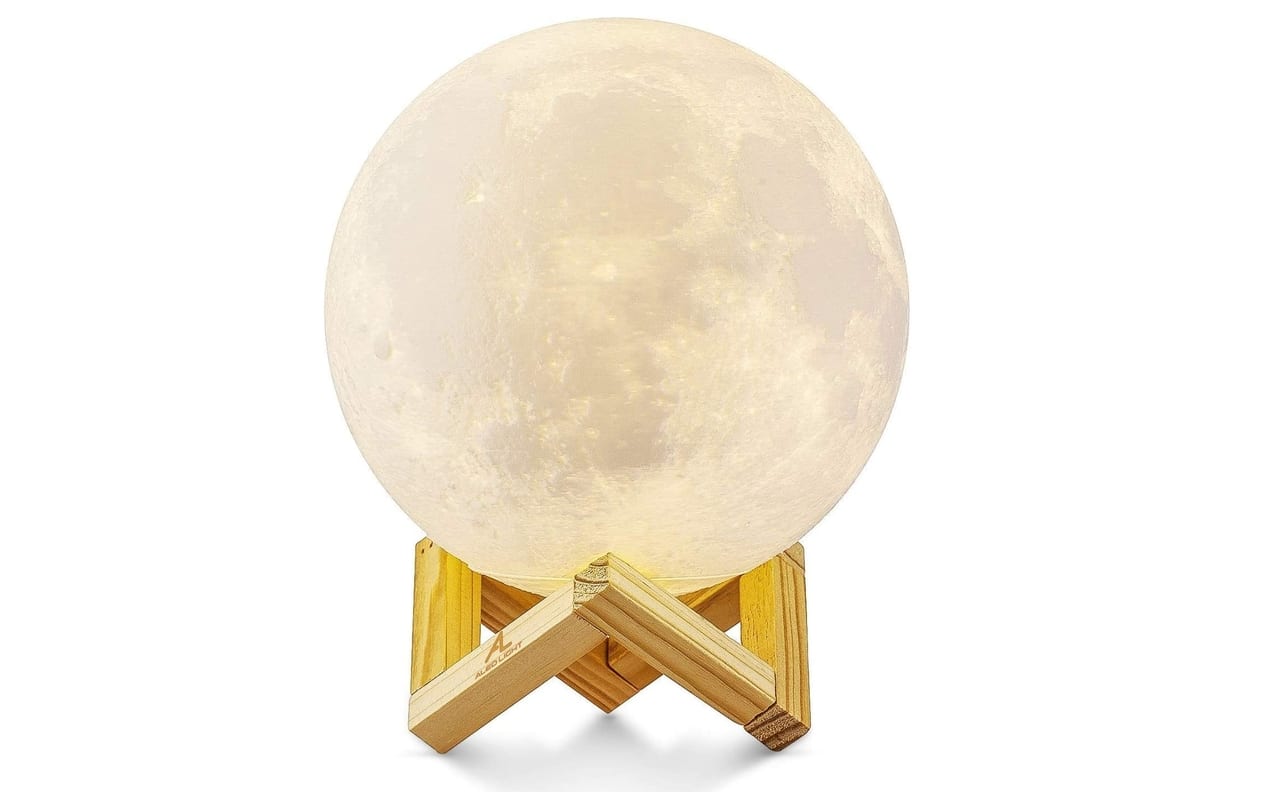
The idea is to have different thicknesses in the foil so that the light varies in opacity, generating some darker areas and others more original. The result is really beautiful, especially to use as four to decorate a room, or for a lamp for the bedroom of the children's room, etc.
Originally, this engraving it was modeled in wax. Then other materials began to be used, such as porcelain. Now, many other materials can also be used, such as polyamide polymers or the plastic of 3D printers.
At nineteenth century This technique would become popular in countries such as Germany and France, to spread throughout Europe later. Many point to Baron Bourgoing as its creator, and if you want to know more about his history, you should know that there is a complete museum dedicated to this art in Toledo, Ohio (USA), the Blair Museum of Lithophanies.
Lithophany vs Lithography: differences
Some confuse lithophany with lithography, But they are not the same. Lithography is an old form of printing (still used today) to be able to print shapes or images on stones or other types of materials in a flat way. In fact, its name comes from there, since lithos (stone) and graphe (drawing).
With this technique you could create duplicates of artistic works, and also had a great field of application in the world of printing, where lithographs are still used for printing.
Instead, the lithophany uses lithography or 3D printing to be able to generate the thickest and most opaque areas, and the thinnest and most translucent ones. But this technique needs light to get the results.
How to make lithophany with 3D printers
To be able to create your own lithophany works you don't need to have any skill for art or drawing, you will only need one 3D printer, filament, a PC, with the appropriate software, and the image you want to represent. Nothing more than that ...
Regarding the software for generate lithophany, you can use several of them, to convert the image into a design suitable for lithophany and a delaminator for 3D printing. For example, you can use a web app that you can use on any operating system with a compatible web browser.
This app is called 3dp and can access this link. Once you have accessed this web app, you must follow the following steps:
- Press on Pictures and select the image you want to convert into a lithophany.
- Once the image is loaded, now in Model select the model you like the most of all the ones there are and press Refresh to refresh.
- Now go to the tab Settings. You will see several options:
- Model settings: to configure the model to your liking.
- Maximum Size (MM): will be the size of the lithophany.
- Thickness(MM): with this parameter you play with the thickness of the sheet. Don't make it too thin or it will be too brittle.
- Border (MM): option to create the border on the sheet or frame. If you don't want to, set it to 0.
- Thinnest Layer (MM): you play with the thickness of the pixel of the photo so that more or less light passes in the thinnest areas.
- Vector per pixel: The higher it is, the better the resolution, but there is a risk that if it is too high, the piece will not be made. You can leave it in about 5.
- Base / Stand Depth: It creates a base in the sheet for the support, although if you are making another shape, such as a round sheet, you will not need this base to stand.
- curve: will cause more curvature to the sheet. You can even put 360º so that it comes out cylindrical. An ideal choice for lamps.
- Image Settings: to configure the image to better suit the model.
- Positive Image / Negative Image: It is used to make the photo stand out or be inwards, as you wish. That is, the direction of the relief.
- Mirror Image Off / Mirror Image On: serves to create a mirror effect.
- Flip Image Off / Flip Image On: you can flip the image.
- Manual Refresh / Refresh on Image Click: If you check it, when you go to the model tab it will update automatically.
- Repeat X Count: makes horizontal copies.
- Repeat And Count: makes vertical copies.
- Mirror Repeat Off / Mirror Repeat On: apply the mirror effect.
- Flip Repeat Off / Flip Repeat On: apply the flip effect.
- download settings: where to configure the download file.
- Binary STL / ASCII STL: how the STL file is saved. You should select better binary.
- Manual / On Refresh: to download manually or every time you do a refresh. Personally, it is preferable in manual mode, so that you download when you have it finished.
- Model settings: to configure the model to your liking.
- Modification with them your design until it is as you really want, depending on your case.
- Once you have it ready, press the button Download for the STL to be downloaded.
Once you are done with that, now is the time to import the STL for print with your 3D printer.You can use any compatible software with this format for 3D printing. The rest of the steps will be to print the model, and wait for it to finish.
At the end, you can use conventional bulbs, the light of a candle, LED light, use different colors of light, etc. This is already a matter of taste ...