![]()
Surely you have seen makers show projects using these sets of RGB LEDs on more than one occasion. The applications of these strips can range from a simple decoration that can change color depending on some external event, to being used for light races, and much more. That is why in this article we will introduce all the most important information you should know about the neopixel and how it can be integrated and control with Arduino.
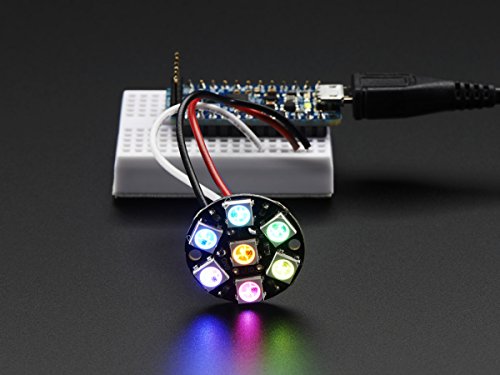
What is Neopixel?
![]()
Neopixel is nothing more than a registered trademark of Adafruit Industries. However, the generic term for these components is individually addressable RGB LEDs (eg: SK6812, WS2811, WS2812,…). In other words, it is a logic circuit with these colored lights that will act as a result of a control signal, showing different colors, carrying out certain power-up sequences, etc.
It is important that you know that each of the RGB LEDs that make up the matrix uses 4 pins or connectors, so your pinout is
- 5V: high level supply.
- GND: power low level or ground.
- DIN: pin to receive color information.
- DO: pin to send color information.
In addition to that, it integrates an electronic circuit with a memory capable of store 3 bytes, one for each color. For more information, you can read the datasheet or documentation for the specific model you have purchased, as there may be variations.
Where to buy Neopixel
If you are looking for an buy a neopixel or similar elements for your DIY projects, you can find them in some specialized electronics stores or also on Amazon. Some recommendations in this regard are:


Integrate Neopixel with Arduino UNO
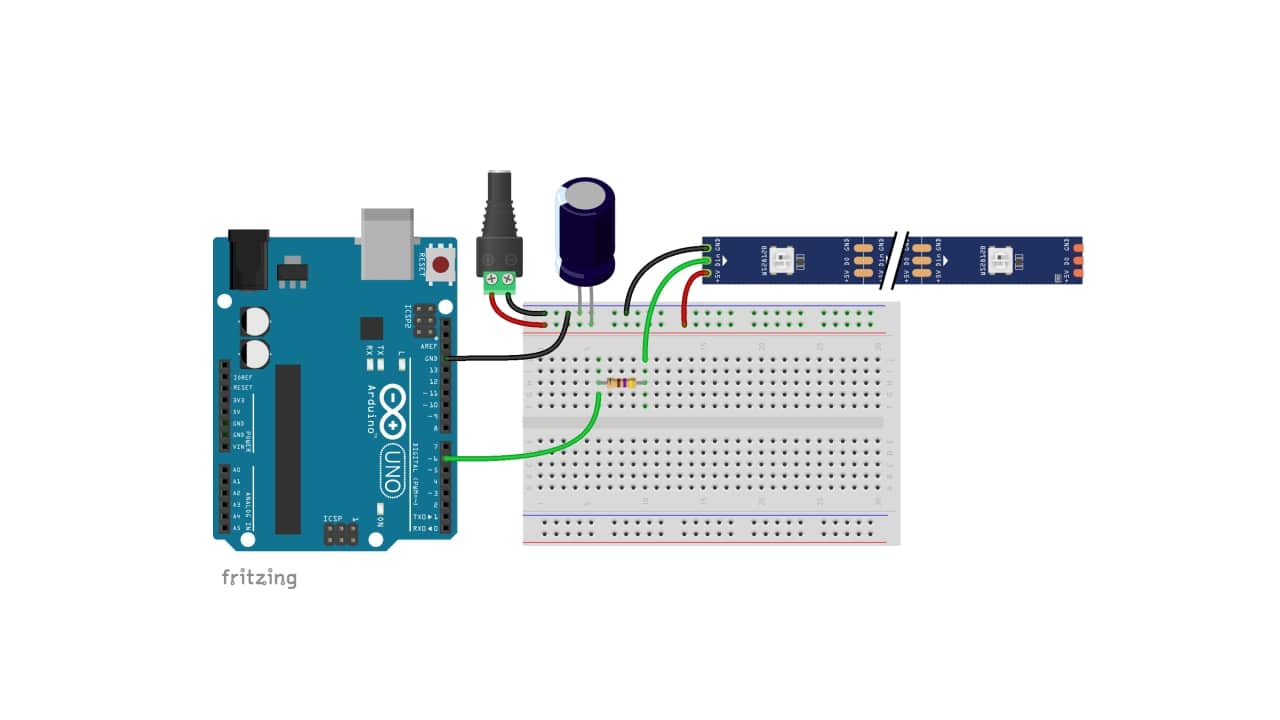
For integrate Neopixel, or any other brand, with your Arduino board and start creating code in the Arduino IDE to be able to control the colors and lighting, you will need:
- License plate Arduino UNO rev3
- Neopixel type LED matrix
- 470 resistance Ω
- 1000 µF electrolytic capacitor ≥6.3V.
- Protoboard
- Connection cables
- 5V at 1A power supply and connector
The connection between the Neopixel matrix and Arduino UNO It is as seen in the previous image. Once connected, the next thing is to start with the Arduino IDE code. In this case you have to use a library called Adafruit NeoPixel which you can download from here, and start testing and modifying the examples that come with it. For example, you can start with Simple, where you would get something like:
#include <Adafruit_NeoPixel.h>    //Incluir la biblioteca

#define PIN 6   //Pin en el que has conectado el Neopixel

// Número de píxeles encadenados (en este caso 21, pero puedes modificarlo según necesites)
#define NUMPIXELS 21

// Inicializamos el objeto "pixeles"
Adafruit_NeoPixel pixels(NUMPIXELS, PIN, NEO_GRB + NEO_KHZ800);
// Argumento 1 = Número de pixeles encadenados
// Argumento 2 = Número del pin de Arduino utilizado con pin de datos
// Argumento 3 = Banderas de tipo de pixel:
//   NEO_KHZ800  800 KHz bitstream (most NeoPixel products w/WS2812 LEDs)
//   NEO_KHZ400  400 KHz (classic 'v1' (not v2) FLORA pixels, WS2811 drivers)
//   NEO_GRB     Pixels are wired for GRB bitstream (most NeoPixel products)
//   NEO_RGB     Pixels are wired for RGB bitstream (v1 FLORA pixels, not v2)
//   NEO_RGBW    Pixels are wired for RGBW bitstream (NeoPixel RGBW products)

#define DELAYVAL 500 //timpo de espera en ms

void setup() {
  pixels.begin(); // Inicializamos el objeto "pixeles"
}

void loop() {
  pixels.clear(); // Apagamos todos los LEDs

  // El primer pixel de una cadena es el #0, el segundo es el #1, y así sucesivamente hasta el n-1
  for(int i=0; i<NUMPIXELS; i++) {

    // Modificamos el LED #i, encendiendolo con un color verde moderadamente brillante
    pixels.setPixelColor(i, pixels.Color(0, 150, 0));

    pixels.show();   // Mandamos todos los colores con la actualización hecha

    delay(DELAYVAL); // Pausa antes de modificar el color del siguiente LED
  }
}