There are more and more tools and facilities for programmers. Some stand out especially, as is the case of Google Collaboratory, which is giving a lot to talk about. Another of the platforms to which you have to pay attention is PlatformIO, a site to find extraordinary resources for those who create source code for various platforms.
In this tutorial you will learn what PlatformIO is, what it is for, how you can access it, and much more about it. fantastic programming utility.
What is PlatformIO?
PlatformIO is an IDE, that is, an integrated development environment, with its professional code editor, and its compiler so that you can compile the source code for a multitude of platforms, a debugger, as well as a series of very interesting functions and tools for programming (unit of serial monitor test, code analyzer, code autocomplete, library manager, etc.). It's free, open source, and you can extend its capabilities through plugins or extensions. It even allows remote development, can be integrated with GitHub and GitLab code repositories, etc.
On the other hand, its environment is very friendly and easy to use, with a modern, powerful, fast, light environment. A plataform Very versatile that already has thousands of users, and that is available for both GNU / Linux, as Apple macOS and also for Microsoft Windows. You can even install it on certain SBC boards like the Raspberry Pi.
More information about PlatformIO - See official site
More about the community and source code - View site on GitHub
Platforms supported by Platformio
The list of supported platforms by Platformio is really good. Some of the architectures supported by your compiler are:
- ARM
- atemel avr
- ARC32
- NXP LPC
- PIC32 microchip
- RISC-V
- etc.
How do you install?
For install PlatformIO Core on Windows, or on macOS it's really easy. However, if you have GNU / Linux, the steps will be somewhat more complicated (although they also have a script to facilitate everything), or if you decide to install it from source by compiling yourself.
The steps to follow are:
- Download the Platformio package:
wget -q https://raw.githubusercontent.com/platformio/platformio-core-installer/master/get-platformio.py
- Install Platformio Core
sudo PLATFORMIO_CORE_DIR=/opt/platformio python3 get-platformio.py
- Now you need to create a symbolic link to the pio command in the / usr / local / bin / directory:
sudo ln -s /opt/platformio/penv/bin/pio /usr/local/bin/pio
- Now pio can be used as a system command for all users. By default, the root user and users with sudo privileges will be able to read and write to the serial port. The following is to add the user to the corresponding group:
sudo usermod -a -G dialout $USER
- Remember that to make changes and for them to take effect, you should restart the computer or log out and log back in. Now try:
pio --version
- Finally, you can now delete the installation script and the cache that was generated during the installation, since they are not necessary:
rm -rf get-platformio.py
sudo find /root/.cache -iname "*platformio*" -delete
Densinstall Platformio Core
</div>
<div>sudo rm -rf /opt/platformio
sudo rm -rf /usr/local/bin/pio
rm -rf ~/.platformio</div>
</div>
<div>
Questions and more information - Official documentation
Install Platformio IDE
For install Platformio IDE It is as simple as following these steps:
- Download and install the official version of the Atom text editor from this link.
- Once installed, open the Atom package manager.
- Go to Menu> Edit> Preferences> Install.
- Look there for official platformio-ide.
- Then install the package.
In this case Atom has been chosen for Platformio, but it is also possible to do it integrating it in Visual Studio Code, which is available for Windows and also for GNU / Linux. It is easily installed, since you have it available in DEB and RPM packages at this link. In Windows the installation would be equally simple, with the .exe.
If you wonder about the steps to install extension in VS Code, are similar to those of Atom:
- Open VS Code.
- Select the extensions icon that appears on the left side in the form of cubes.
- Type PlatformIO and select the first option that appears.
- Press Install to install.
- Wait for it to complete and you're done.
Other environments in which to integrate Platformio
There are other environments in which to integrate Platformio in addition to Atom and VS Code, such as:
- Netbeans
- Sublime Text
- codeblocks
- Eclipse
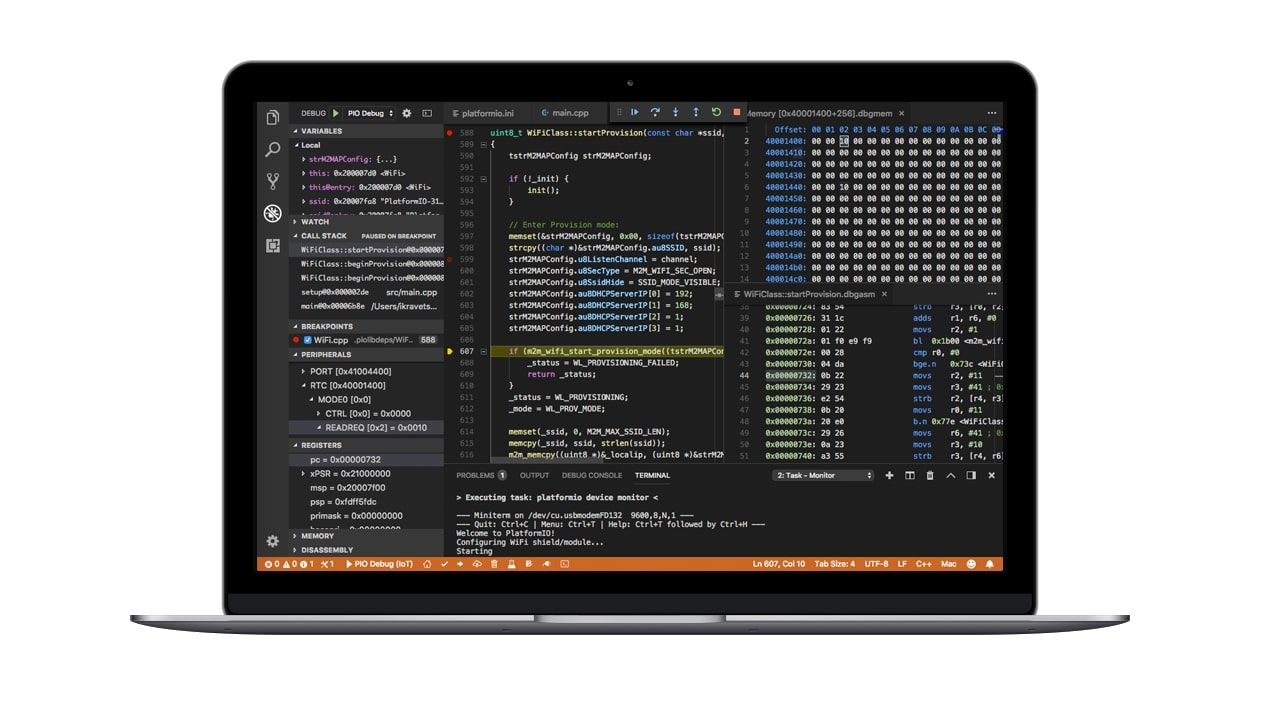
The IDE working environment
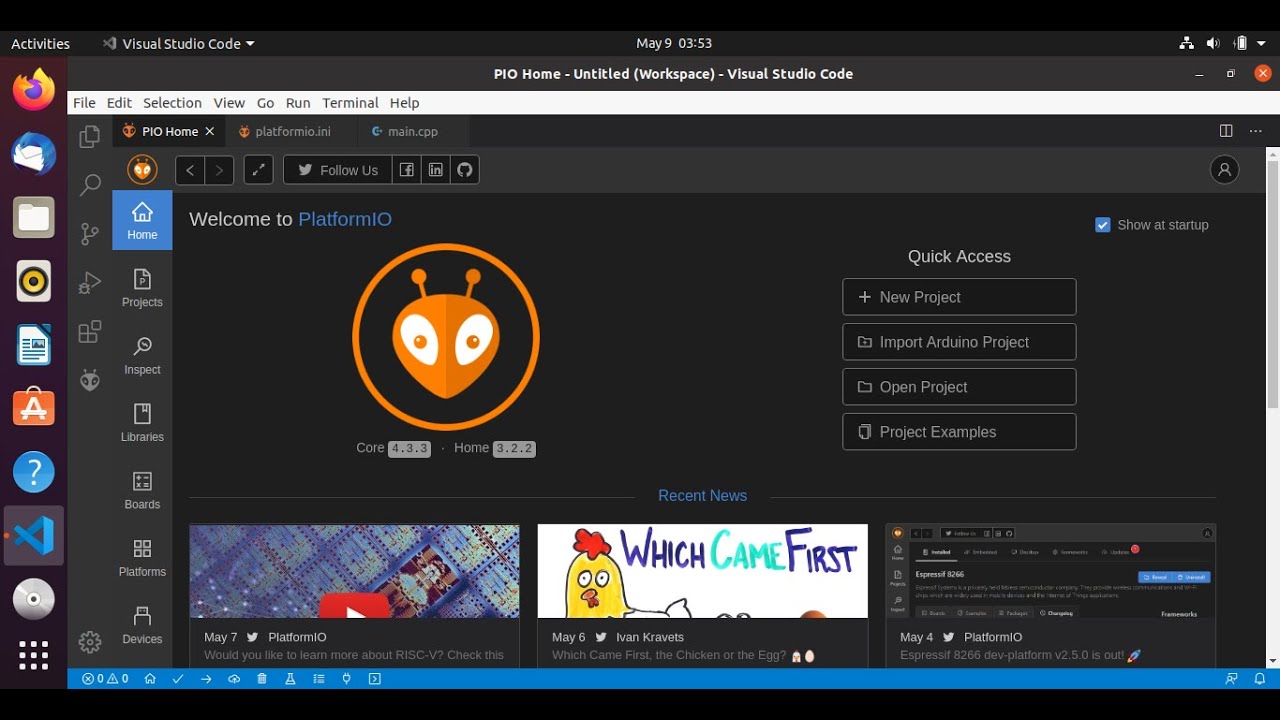
If this is the first time you see the Platformio interface, you will see that it is not complicated, and that it is divided into several sections. The first thing you'll see is a welcome screen when you open the editor, and sections like:
- Welcome: first screen of the extension, with the installed version, functions to create, import and open projects, see examples, etc.
- Projects: on the left you can also find a list with all the projects created that you can edit.
- Inspect (Inspector): In this section you can inspect your projects for memory usage statistics.
- Libraries: This section corresponds to the library manager, to help you include global and private libraries.
- Plates (Board): here you can find and install drivers for the different boards that you use in your development. There are more than 1000 available.
- Platforms- Platforms used so far are listed.
- Devices: list with the boards connected to your PC that you currently have. It is generated automatically when connecting to the port.
Steps to create the first project
If you want to start create your first project, you can use the Wizard to create it easier and faster:
- Go to Platformio Extension Welcome (PIO HOME).
- Click Create project.
- Choose a name for your new project.
- Select a plate in the plates tab. You can enter the first letters of the name of the plate and the list will be reduced with the matches.
- Now you will see that the Framework option (a series of criteria, concepts and good practices to facilitate development) is automatically marked, although you could modify it.
- You can modify where to save the project in the Location box, otherwise it would store it in the default directory.
- Once you are done, you can press the Finish button and it will start.
From here, the way of proceeding will change depending on the type of code or project you want to develop, and the chosen board or platform, since there will be slight differences.