Some users wonder if the Raspberry Pi has BIOS or UEFI, like other computers, since UEFI, as you know, is also supported on Arm-based computers, as is the case with this SBC so popular and cheap. But the truth is that the raspberry guys have opted for another alternative solution.
Here you will learn what that solution is and the reasons why does not use this firmware, in addition to showing you how some configurations are made on the Raspberry Pi when there is no Setup Menu as on computers...
Why doesn't the Raspberry Pi use BIOS/UEFI?
As you know, the BIOS or UEFI is a firmware that is present in a multitude of computers, both desktops, laptops, AIO, servers, workstations, etc. However, it is not on the Raspberry Pi, despite being an SBC (Single Board Computer), unlike other x86 SBCs that do use this firmware for the boot process and system check. And it's not because the Raspberry Pi is ARM-based, as many ARM computers also have BIOS/UEFI.
On the other hand, it must be said that this firmware is designed so that startup easier from the storage medium where the operating system is located, in addition to being able to control many other settings. This is where he gives us clues as to why the Raspberry Pi doesn't use BIOS. On the one hand, because it can only boot devices from the same medium, such as SD cards, and not in other ways. And on the other hand because the number of peripherals and functions in a Raspberry Pi are more limited.
However, this is not entirely a reason not to use BIOS or UEFI. In fact, if we analyze carefully, the The Raspberry Pi's ARM SoC uses its own internal firmware to boot the CPU into a proper state and the rest of the system without the need for a separate BIOS chip. But... then why can't you access the BIOS Setup or BIOS menu? On the one hand, because this firmware is very limited, and not as complex as the BIOS/UEFI, so a menu to configure parameters would be meaningless, and on the other, because of what was previously mentioned, that it can only boot from a default storage medium. , as is the SD card.
The developers of the Raspberry Pi have for this reason preferred to use this basic firmware for initialization and booting from an SD card rather than using a rom chip with more complex firmware installed on the PCB. And it is that, if you look, mobile devices do not have BIOS / UEFI either, since they can only boot Android (or another operating system), from internal memory.
In this way, on the one hand, that additional chip on the board is saved, and on the other hand, the need to include flash memory for storage is also eliminated. would make the Raspberry Pi more expensive. You have to buy the SD card separately.
However, it must be said that in the Raspberry Pi 3 experimental support was added for boot from USB media which must be explicitly enabled and cannot be disabled. This is included in the embedded firmware of the SoC of the new version, but this was a bit more complicated, which is probably why they initially decided to start with the easy stuff and use booting only from SD memory cards.
What was the Raspberry Pi using instead?

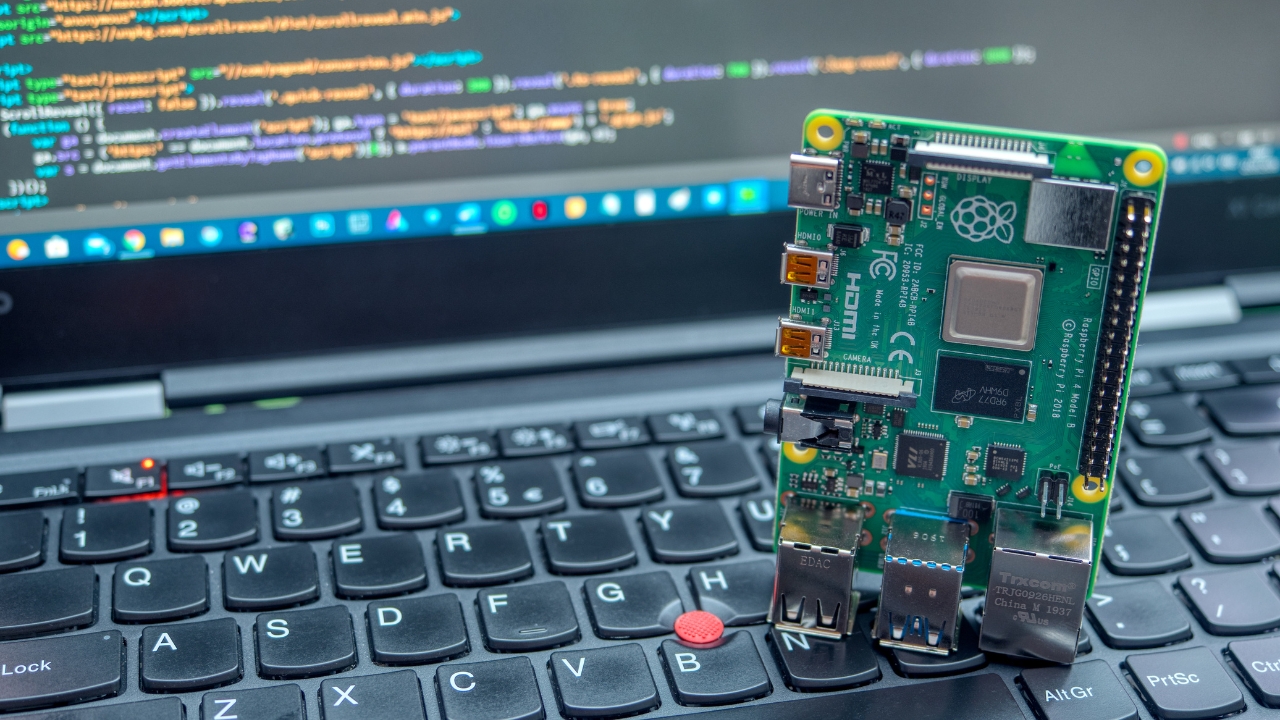
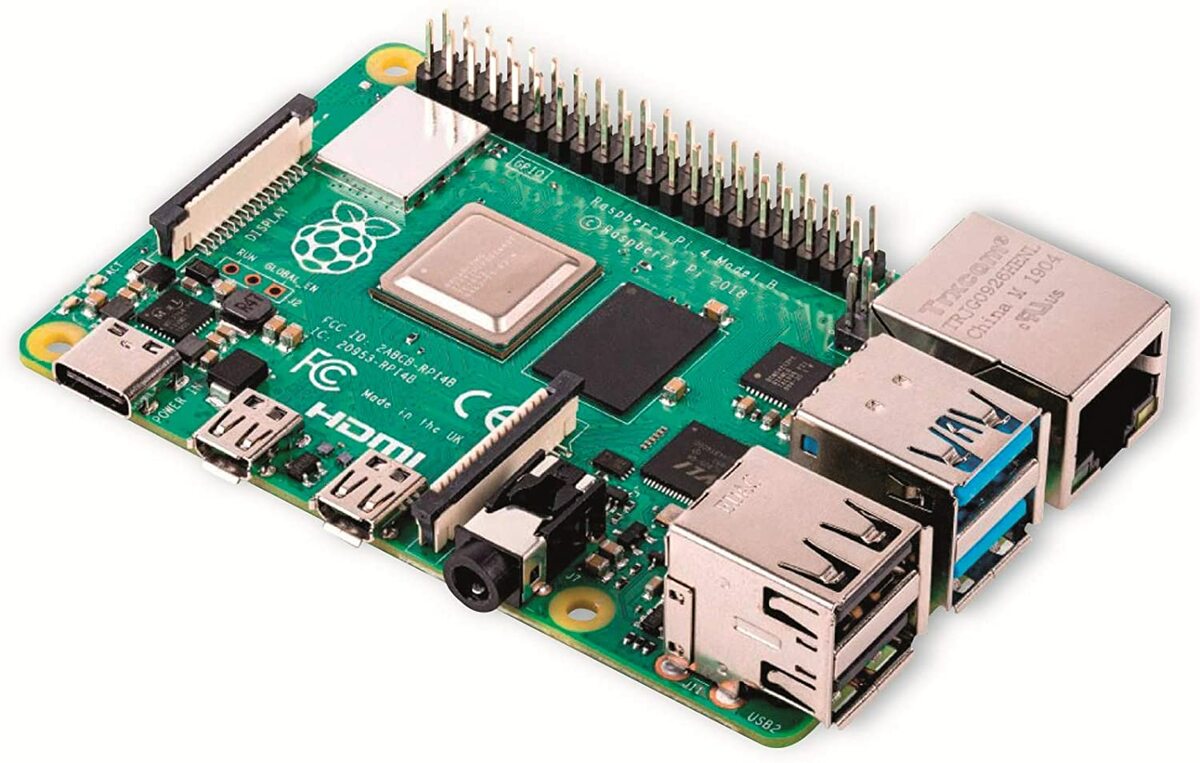
The Raspberry Pi does not have a BIOS or UEFI as understood in the PC world, for example, but it does have a closed source firmware in the SoC as I mentioned above. This chip is designed by the Broadcom company, which supplies the BCMs to these Raspberry Pi Foundation boards.
At SoC (System on a Chip) It integrates an ARM Cortex-A Series CPU, a VideoCore GPU, a DSP for digital signal processing, SDRAM memory shared by the CPU and GPU, and controllers such as USB, etc. In addition, it also includes a ROM memory in which the firmware we are talking about is integrated and that is necessary for booting.
starting procedure
The followed that follows this firmware are:
- This firmware takes care of start bootloader of the operating system that is on the SD card. As you know, the bootloader mounts the FAT32 partition of the SD memory card and goes to the second boot stage, which is programmed in the SoC and cannot be modified.
- In the second stage, a file known as bootcode.bin, in which the GPU firmware is prepared and started. This file can only be stored on the SD card, so the boot priority cannot be changed like in a conventional BIOS/UEFI of a PC, and it will only boot from there. However, as I said, on the Pi 3 the ability to boot from USB was also experimentally added.
- Then comes a third stage in which use is made of the start.elf file, which starts up the CPU, and a file called fixup.dat, which is used to create the necessary partition in the SDRAM so that it can begin to be used by the CPU and the GPU.
- Finally, the user code is executed, which are usually the executable binaries or images of the Linux kernel, such as kernel.img, or from other operating systems supported by the Raspberry Pi, and this is how the operating system boots up for use...
As you have seen, it is a simple process, but somewhat strange if we compare it with a PC or other computers. And it is that, in the case of the Raspberry Pi, instead of starting the CPU, as in other cases, GPU boots first. In fact, this Broadcomo GPU will be in charge of executing a kind of embedded operating system in the SoC that is very simple, but necessary to function. It is known as VCOS (Video Core Operating System), and it will communicate with Linux. This is very rare, but the truth is that the GPU of the Pi is not only in charge of graphics and starting, it is also in charge of control system clock and audio.
In principle, having said this, it seems that there is little we can do to modify boot configurationBut the truth is that it is not entirely like that. And it is that there is a file called config.txt that is located in the /boot/ directory of the system and if it is opened with a text editor, its content can be easily modified to alter the boot and configure it with certain parameters.
This config.txt file it will be read by the GPU after starting the ARM kernel, and it contains instructions for the SoC to know what to do during system boot. For example, we can modify the dedicated memory in it, the memory refresh, disable access to the L2 cache, alter the CMA configuration, enable or disable the camera LED, change video mode options, codecs, some options booting, overclocking, etc.
This file has a syntax quite peculiar, so it must be respected to avoid problems at startup. And if you want more information about it, you can read the wiki that I leave you in this link.
Change Boot Priority on the Raspberry Pi

When you change the boot order or priority on a PC it's all very simple, you just have to enter the BIOS/UEFI, and in the Boot tab you can find the parameters that you can vary to boot from the hard disk, an optical medium , USB, network, etc. Instead, on the Raspberry Pi it is not so easy. By default it will always boot the OS from the SD memory card inserted in the SBC. In fact, even after version 3, if both an SD card and a USB stick are inserted, the system will still boot from SD first. If the SD is removed and only the USB is left, then it will be done through the USB.
But this order can be altered. for that you must start raspbian, for example, and do the following:
- Open the Raspberry Pi setup with the command:
sudo raspi-config
- Go to the "Advanced Options" section. (notice, the menu is in English)
- Then, within this section, press ENTER on the "Boot Order" option.
- You should now see three different options to choose from:
- SD card boot- By default, this option is already enabled on your Raspberry Pi device and if you insert an SD card and USB simultaneously, the system will use the SD card as a default boot option unless you remove it.
- usb boot: If you want to use USB as the primary device for booting, you can select this option, which works when you have a USB device inserted into the Raspberry Pi. Otherwise, you should not insert an SD card to boot the system.
- network boot: This boot option is useful if your Raspberry Pi SD card is not working for some reason or if there is a problem with your operating system. In that case, it will make use of the Imager tool to reinstall the system to the SD card.
Once you're done, you can reboot the raspberry pi to apply the changes...
Diagnose Raspberry Pi problems (POST)
Finally, you will know that in a BIOS/UEFI there is a step called POST that is carried out before the operating system boots and that will check the status of the different components. If everything is OK, it will start the OS. But if it detects any problem, it stops and displays an error message on the screen or emits some audible beep code to identify what the problem is.
This on the Raspberry Pi does not exist either. However, the SoC firmware has a method to try to flag problems that may occur for easy diagnosis. And that's through its power LED. For example, for the Raspberry Pi 4, the light codes that the LED emits to indicate problems are:
| long flashes | short flashes | Status |
|---|---|---|
| 0 | 3 | General failure during startup |
| 0 | 4 | start*.elf not found |
| 0 | 7 | Kernel image not found |
| 0 | 8 | SDRAM failure |
| 0 | 9 | insufficient SDRAM |
| 0 | 10 | in HALT state |
| 2 | 1 | The partition is not FAT (not supported) |
| 2 | 2 | Failed to read partition |
| 2 | 3 | non-FAT extended partition |
| 2 | 4 | Hash or signature does not match |
| 3 | 1 | SPI-EEPROM error |
| 3 | 2 | SPI EEPROM write protected |
| 3 | 3 | I2C error |
| 4 | 4 | Board type not supported |
| 4 | 5 | fatal firmware error |
| 4 | 6 | Type A Misfire |
| 4 | 7 | Type B Misfire |