
BQ entered the 3D printing market hace 3 años announcing a rebranding of the Makerbot replicator 3 2D printer. A couple of months after the announcement, they canceled the project. They dared to take a braver step and launched a printer of their own design, the BQ WITBOX. In the following years they presented a scanner (CICLOP) y a kit printer to assemble yourselfHEPHESTOS).
During 2016 they marketed an evolved model of both printers. Equipment with a large number of new features compared to their original versions. Today we analyze its largest team, the BQ WIT BOX 2.
The BQ Witbox 3 2D printer is a Cartesian axis 3D printer that makes impressions by FDM. You can use a wide variety of 1.75mm filaments thick as long as your printing does not require a heated bed
Unlike other printers on the market, this printer uses electronics designed and produced by BQ, 100% Arduino compatible. It also has a robust and reliable self-designed extruder.
Comparison of similar products
We are going to compare some of the characteristics of this product with competitors with theoretically similar characteristics:
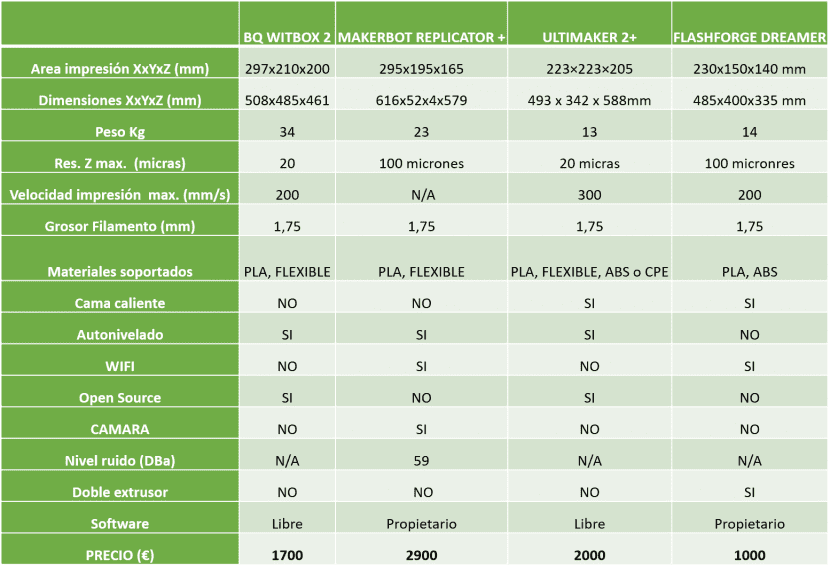
We see that the manufacturer has managed to position its product very well with respect to the competition with a good value for money.
Some manufacturers have recently presented a new range of equipment that incorporates significant new features such as Wi-Fi or double extruder, but despite this, the BQ WITBOX 3 2D printer is still a good choice.
Technical aspects and specifications of the BQ WITBOX 3 2D printer
Print size, weight and area
The printer is heavy equipment. Its over 30 kilos They imply that it will cost you yours to remove it from the box when you unpack it and upload it to the table or furniture in which you leave it installed. The reason that the 90% of the chassis of the printer is steel, it's like a tank. In order to include a printing area so big ( 297x210x210 mm) the printer is required to have generous dimensions, 508x485x461 mm not counting the coil and its support.
Speed and resolution
In this technical aspect the printer excels greatly, being able to print at resolutions up to 20 microns at speeds of up to 200 mm / s. We have an exceptional team that will not fault anything we intend to print. We will only have to limit these values when we use some specific filaments, such as flexible filament that is recommended to be printed at more than 60 - 80 mm / s
BQ designed extruder
El extruder with “Double Drive Gear” system developed by BQ is a good quality component with which we have printed on all the materials that we have been able to access (and you will see in other articles on this blog), filament, wood, cork, flexible filament, PETG ...
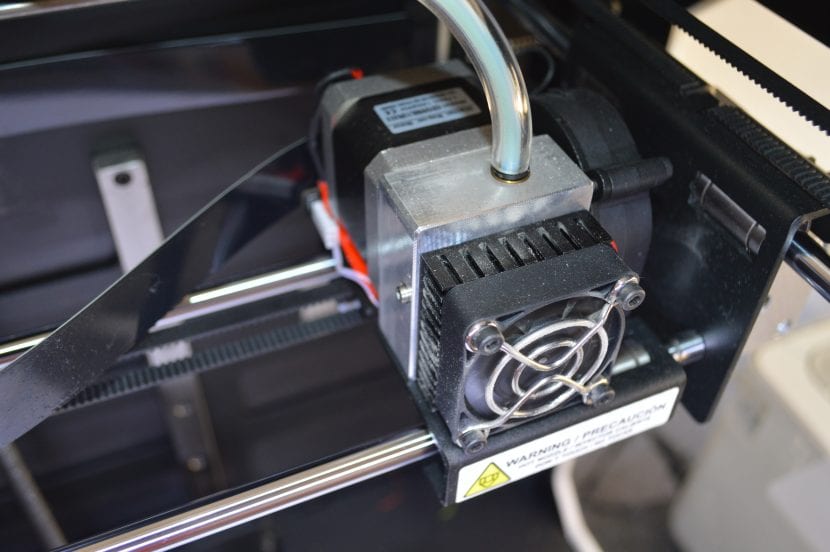
This extruder incorporates sprockets on both sides of the filament to increase traction which is done by dragging the material towards the hotend. Also incorporates a PTFE tube (teflon) that reduces friction of the filament in its movement towards the hotend which will ensure that the filament will only heat up once it has already been introduced into the hotend. All these additions ensure that there will be no jams in the printing regardless of the filament we use.
The main drawback of this system is that the Teflon tube does not withstand temperatures above 240ºC so the printing of ABS and filaments that require high temperatures is totally ruled out.
From time to time you have to replace the PTFE tube insideIn any case, it is a simple process that will not take more than 10 minutes. However, many hours of printing will take before you have to make the first replacement.
Other technical aspects
In a world where everything carries everything, even if we don't use half of the product functions later, it is surprising that the manufacturer has not included a heated bed in the characteristics of the BQ WITBOX 2. Later in this article we will go into detail about what can and cannot be printed if we do not have a computer with a heated bed.
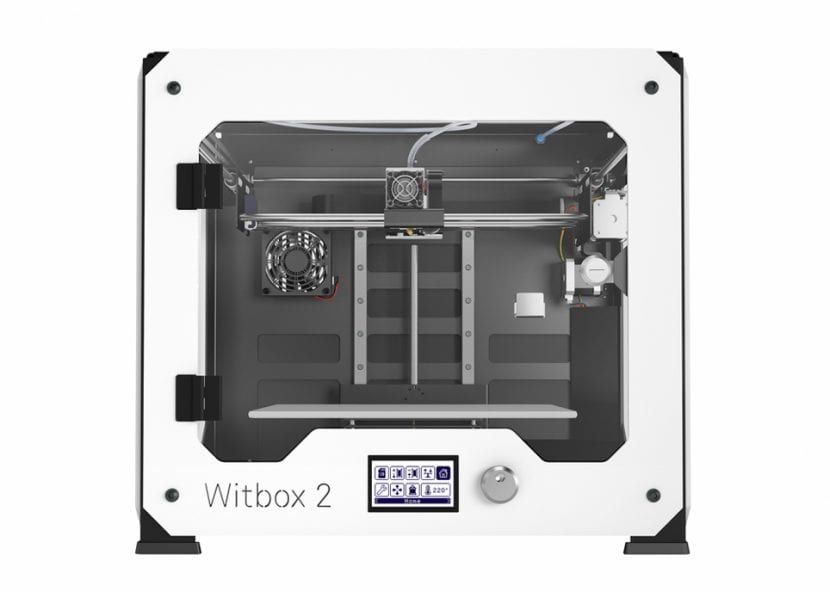
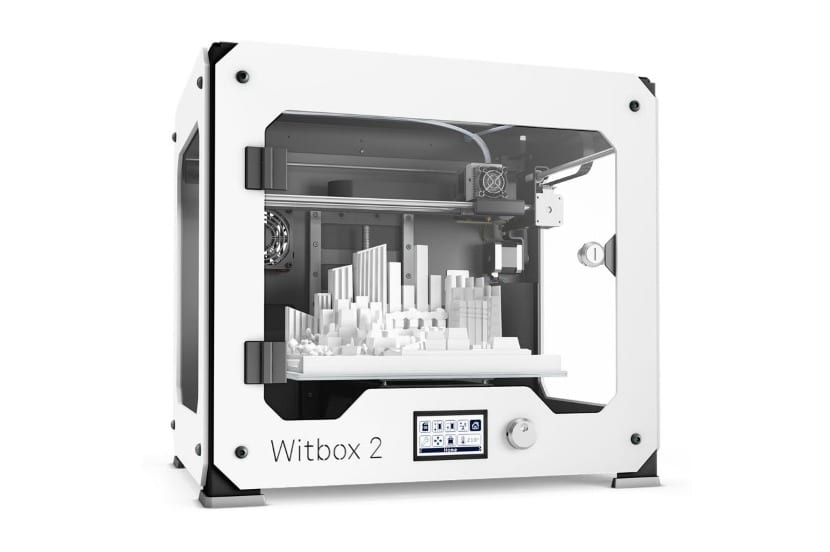
The printer has a simple and functional design in which practically everything is reduced to straight lines. Large panels transparent with white methacrylate frames on all visible faces of the team and a body constructed of steel specially designed for we can stack several same printers.
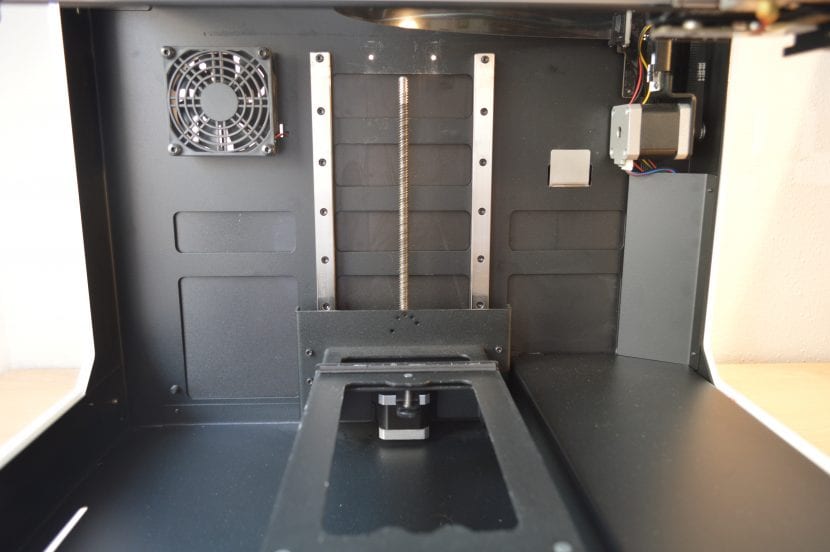
An additional point to be appreciated is that they have been able to design the set so that no cables are visible, the result is very professional.
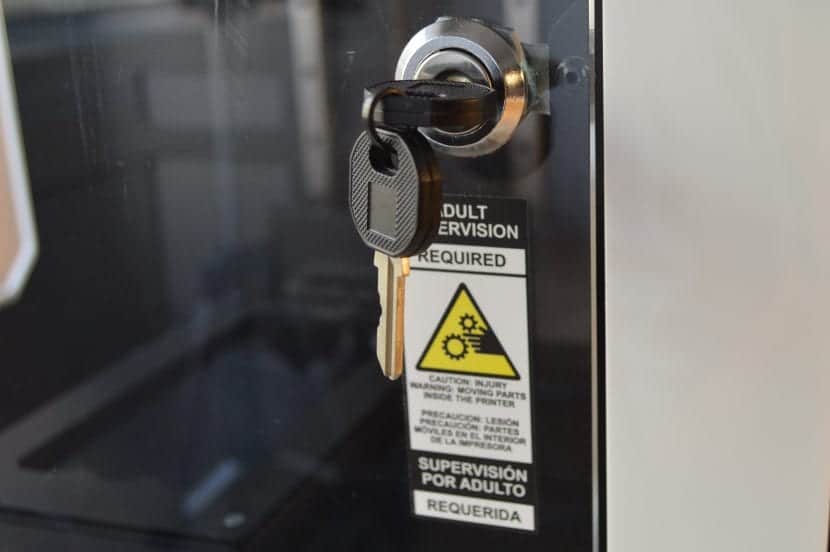
As well have incorporated a lock with a key on the door that gives access to the interior of the printer, an especially advantageous detail if we are going to locate the printer in an area where there may be children or other people who do not know what the interior of the printer should not be handled during printing.
Connectivity, autonomous operation and supported operating systems
Although the printer has a COM port che best works is printing GCODE files copied directly to the SD. The display that incorporates the printer includes an easy and intuitive menu from which we can perform all the necessary actions for its use.
We have been able to connect the printer through the COM port and move the axes, but the movement achieved is not as smooth as that made from the menu of the equipment itself.
Unboxing and assembly of the BQ WITBOX 3 2D printer
Due to the size and weight of the product, the packaging has an opening system like that of current televisions. Turn some supports and pull the box upwards. We find our printer adequately protected so that it arrives in perfect condition and a box that includes various accessories (some even printed in 3D) and a thick paper instruction manual.
We immediately rule out reading the manual to make uA quick internet search for steps to use to use the printer.
BQ has a Youtube channel in which we find videos for the most common tasks that we will carry out with the WITBOX 2, we found the appropriate video and in just under 15 minutes we have already removed the immobilizer from the printing carriage, mounted the side panels, the filament support and we are playing around with the printer menu to calibrate the equipment.
Using another video that BQ has on its YouTube channel, we carry out the necessary calibrations.
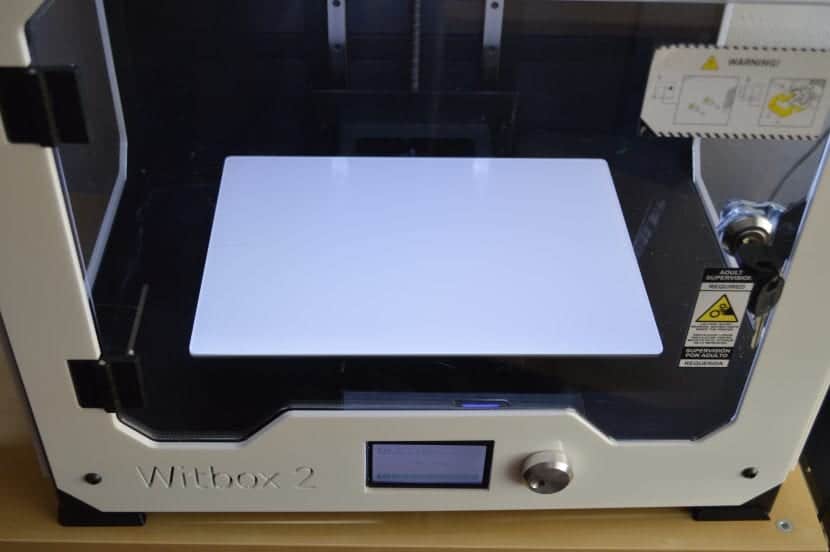
Level the build platform
Is done by turning 3 screws. The twist can be done by hand without the need for any tools and we only have to be aware of when the printer's led turns on to stop rotating.
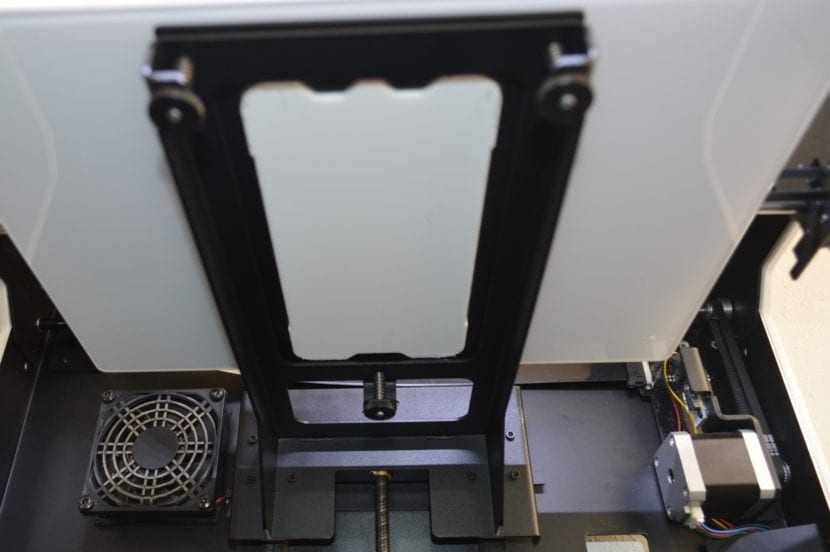
Adjust the nozzle offset relative to the build plate.
This step is less intuitive, you have to adjust gap between nozzle and build plate so that when printing a layer of material of a specific thickness you have just enough space. If we leave little space, material will accumulate in the nozzle causing, among other things, jams, if we leave too much the material will not be well adhered between layers. After several tests and an extensive internet search we are convinced that the best option is to place an 80 gram sheet of paper between the nozzle and the base and reduce the distance until we have difficulty moving the sheet with our hands.
One last step to take before printing, you have to give it a suitable treatment for the printing surface. A cheap coat Nelly lacquer it is enough to get the printed material to adhere properly to most prints (it should be repeated before each print and clean the base of excess every 10 prints or so). Anyway we advise you To completely forget about warping problems, always use the BRIM option of Cura. A small layer of a few millimeters will be added to the impression to the perimeter of the piece, wasting a tiny amount of material but fully ensuring the adherence of the piece to the base.
Since we have unpacked the printer until we have started to print our first object, barely half an hour has passed.
BQ WITBOX 3 2D printer in detail
In this section we are going to be demanding and look for levels of quality and details that may seem excessive. In the same way, the criteria used is very subjective and perhaps you do not agree with any of our conclusions, leave us your opinions in comments.
Since 3D printers They are heavy equipment that, depending on the quality of construction, they can present vibrations during printing they must be placed on a firm surface and with enough space.
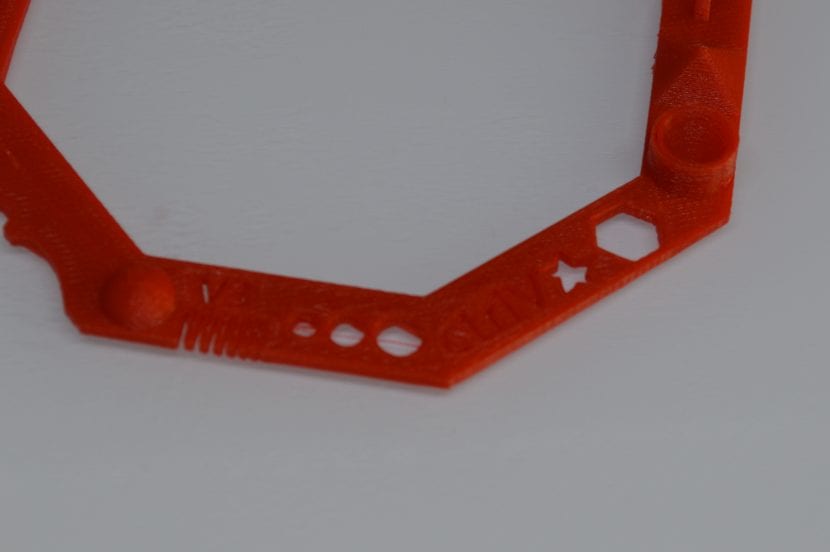
El support for filament spoolsor is located in the back of the printer and the filament is introduced through a hole that leads the material through a plastic tube to the extruder. The Teflon tube that goes from the coil to the extruder uses the fibonacci constant to trace its path.
If you have enough space, this solution is very elegant as well as functional, if on the contrary it happens to you like us and you want to reduce the depth of the printer as much as possible, you will prefer to print a support to place the coil on the printer. The .stl files for printing this medium are available to everyone on the manufacturer's website.
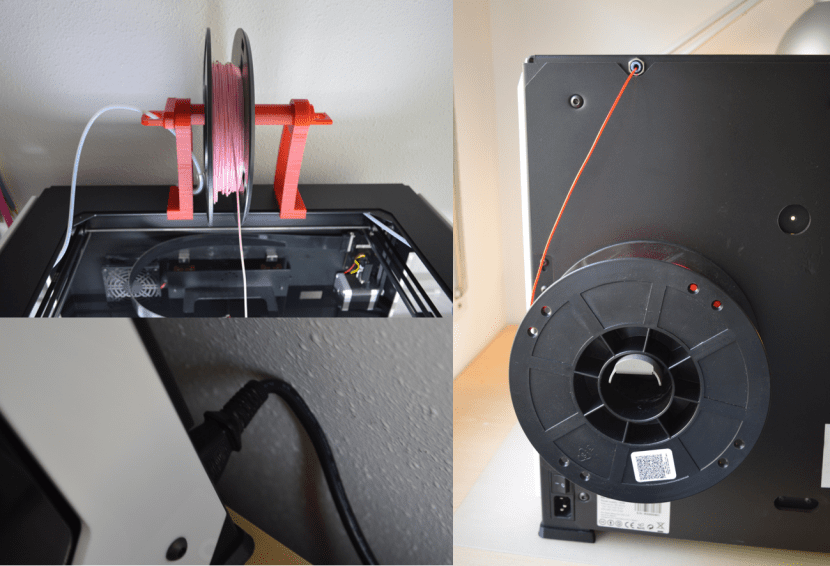
In the same way the power cable. It enters the printer at a right angle, if the manufacturer supplied a cable with a 90 degree angle with the equipment, we would gain a few additional centimeters.
From STL file to GCODE
The files that the printer uses to print the objects are GCODEe. So, as with most printers on the market it will be necessary to use some laminator software to convert the popular format STL to GCODE . In our case we have used Cura 2.4 with very good results, but we have other options like Slic3r, Simplyfy3D, skeinforge…. The variety of software that exists today is such that we could even dedicate an article to talk exclusively about it, Bq has chosen not to manufacture its own software.
Once we have an SD card inserted into the printer with the GCODE file of what we want to print, we can do all the necessary steps from the printer screen itself.
The display
During printing on the screen we are informed of the name of the printed object, the extruder temperature, printing speed, the% printed and the time we have been printing. With such a large screen we miss more information, although it is not essential, it would be appreciated. Some possible parameters would be time remaining, mm and grams printed and remaining
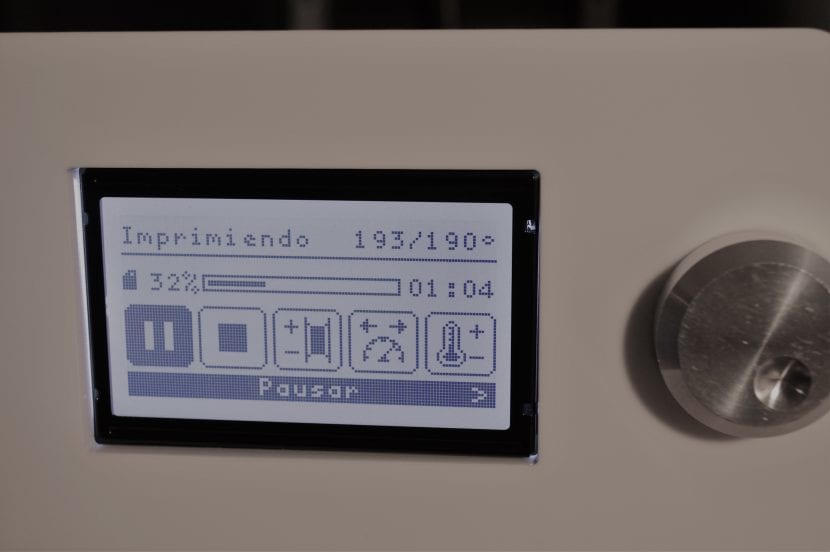
Throughout the printing process from the screen we can pause, stop, change the temperature and printing speed. It would also be interesting to be able to increase the flow of extruded material.
During printing
The printing area has very generous measurements and we can print multiple objects without any problem or we will be able to print large pieces without the need to make modifications to them. In the case of a simultaneous printing of multiple objects, the retraction of the filament in the extruder and the precision in the axes ensures that the change from one object to another is clean and precise.
Although it is true that during printing you can pause the printing even, if necessary, make a filament change we do not recommend it because the layer on which the pause was made will be visible on the printed object. This is surely due to the physical properties of PLA, as the layer on which we are trying to adhere the material gets too cold, the union is not perfect.
Print speed is an interesting as well as complex option. Yes OK the printer is technically capable of printing at speeds of 200mm / s not all materials have the physical characteristics necessary to withstand such high speeds. For each material we will have to do several tests until we find the ideal configuration. And it is interesting that we play with this value because we can significantly shorten the printing times.
One detail for which we have not been able to find an explanation is that the expected printing times from Cura are somewhat shorter than the actual printing times. We imagine this is due to modifications that BQ has made to the printer firmware to minimize noise during printing.
Printer noise level
The BQ WITBOX 3 2D Printer is, like all printers, noisy. But there are many variables that can influence the level of noise it emits. Printing at high speeds is louder, if we have removed the upper methacrylate to place the optional filament support it is louder, if we print with the door open it is louder. But even the worst possible scenario, with all the aggravations that we have just discussed.
If we have it located in a room with the door closed in the adjoining rooms, only a slight hum is heard. With a smartphone and a DB measurement app just one foot from the printer we have a value between 47 and 57 dB and just when leaving the room and closing the door we have a value of 36 dB. You must bear in mind that these types of applications are not very precise, but they serve to give us a rough idea.
Print quality and error rate.
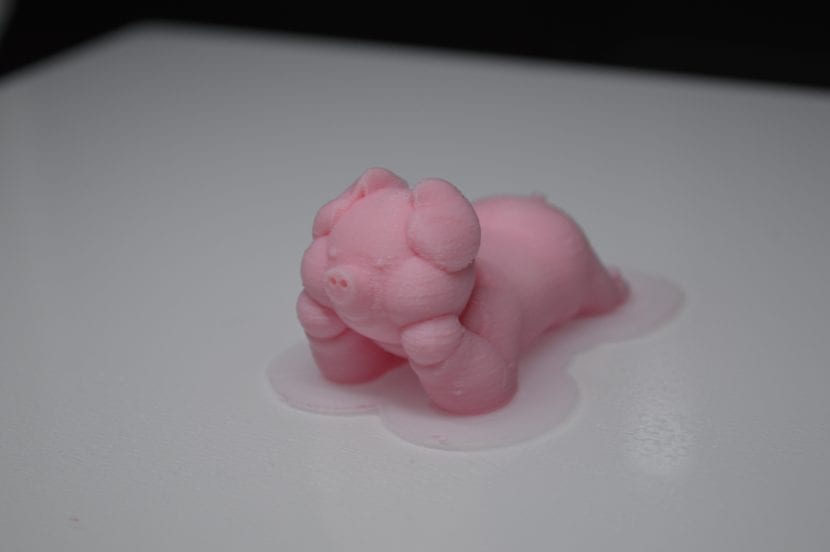
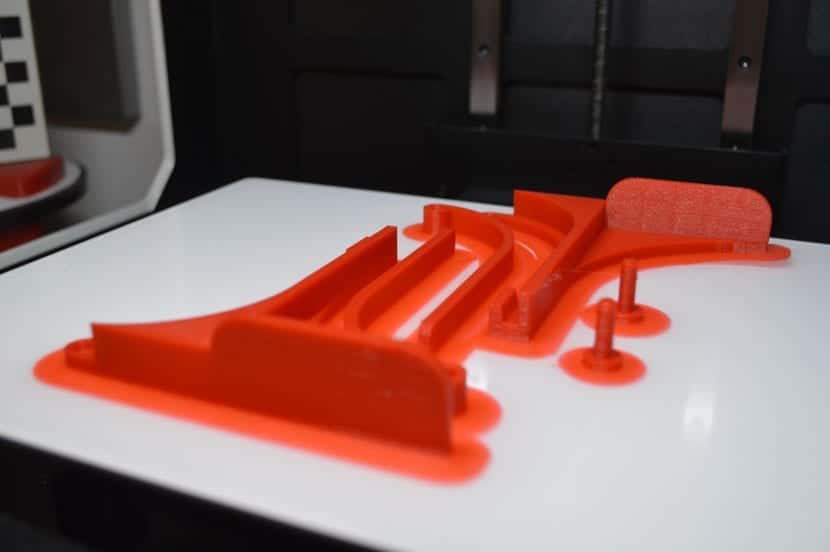
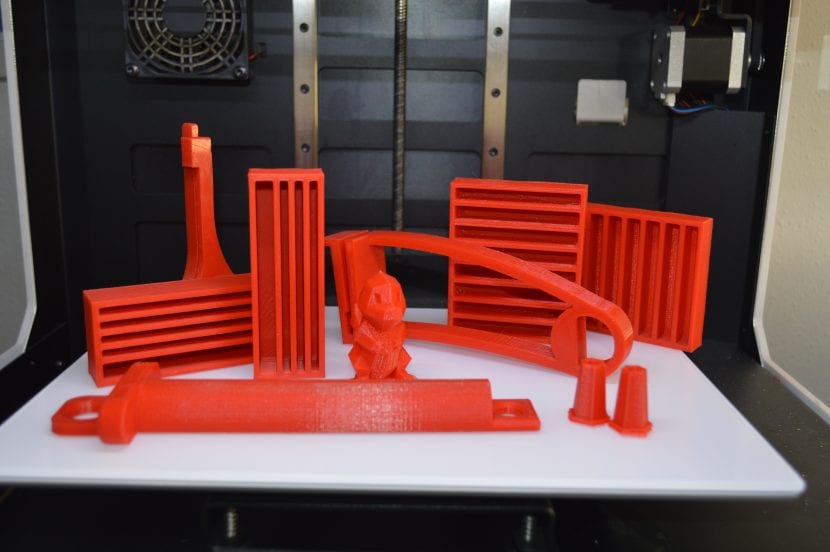
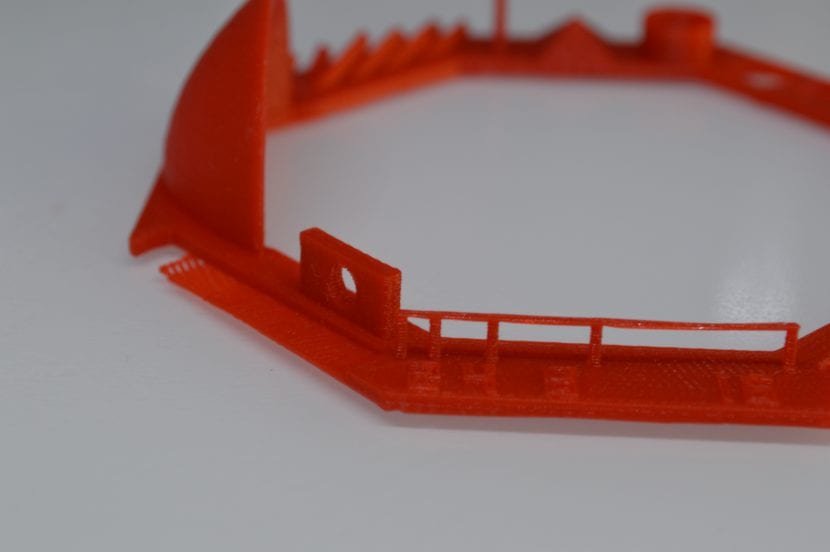
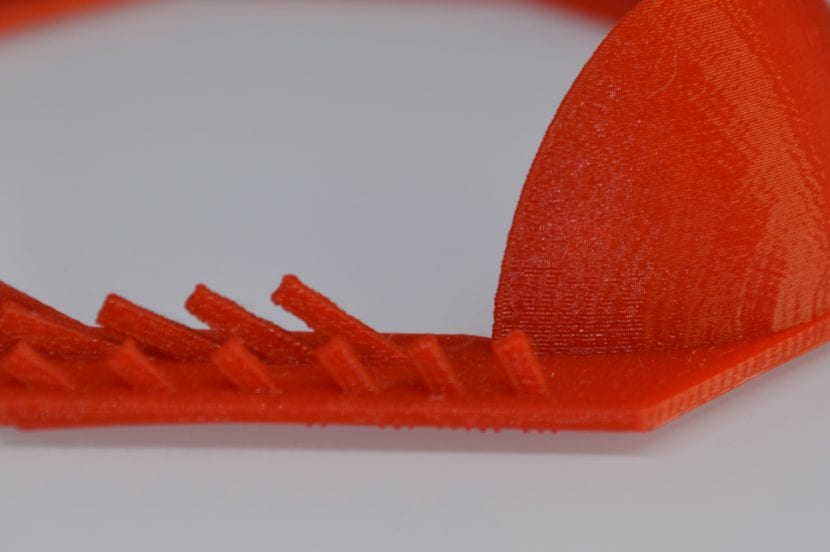
If there is something that we especially liked about this printer is the high quality with which it prints. Whether at high resolutions or low resolutions, the printing is very smooth and there are no errors. We have printed various stress tests and the printer passes them with ease.
After Sales Service and Support from the Maker Community
Historically, BQ has had a very active community for all its products capable of solving product problems even before the technical service did. In the official Mibqyyo forum there is a separate thread for this product in which company personnel participate and answer all the questions that arise.
Also the manufacturer makes available to its customers telephone, twitter and mail to try to cover all possible means of communication. From any of the routes we use they will give us a adequate and correct treatment, you just have to review the latest comments and messages to realize it.
Being a open source project it is relatively easy to find modifications both physical and hardware level of some aspects of the printer. The manufacturer even has its own user on the Thingiverse portal. Another bonus point for BQ for supporting Open Source !!
However, we consider that there are too many places where we can find documentation and support material for the printer; the official website, the Diwo portal, mibqyyo, Youtube. The manufacturer should make an effort to concentrate all the information as much as possible.
BQ filament and filaments from other brands.
The printer is delivered with a one kilo spool of Red PLA Filament. BQ filament is very suitable for making first impressions with our BQ WITBOX 3 2D printer. Adheres very well to the build plate, flows properly and constantly by the extruder. The printed objects, even with low fill percentages, will have a considerable hardness. On the other hand, this hardness will also make us more difficult to remove supporting structures from complex objects.
The quality and reliability of the extrusion head has allowed us to print using a wide variety of filaments from different manufacturers, obtaining very good results with all of them.
You can take a look at some articles that we have recently published with these filaments:
- We test cork and wood filaments from FormFutura
- We analyze filaments of different types provided by Filament2Print: FilaFlex, carbon fiber, Gold filament and Metallic filament
- We analyze PrintedDreams PLA filament, this time pink filament
Price and distribution
El official price of the printer is € 1690 in the manufacturer's own online store, and is distributed through most large consumer electronics stores. So it is simple that in some specific campaign of these establishments we can find it at an even lower price.
Conclusion
After testing the printer for 45 days and having it printing more than 5 hours a day, we can confirm that we are dealing with a very reliable equipment, which after many and many prints continues to print like the first day. With a devilishly high speed and optimal print resolution.
Despite not including a hot bed, the variety of filaments that we can find that do not require this feature will make us not miss it. We have tested all types of filaments and we can assure you that the printer is very capable of obtaining good results with any of them.
We miss wireless connectivity and ease of handling from mobile devices.
The size and weight of the printer will cause many potential buyers to back down from not having a place to put it at home. But if it is not your case you will have a team with excellent features at a reasonable price.
Editor's opinion
- Editor's rating
- 4.5 star rating
- Exceptional
- BQ Witbox 2
- Review of: Tony of Fruits
- Posted on:
- Last modification:
- Integrated
- Durability
- Finishes
- Price quality
Pros and cons
Pros
- Very generous print area
- Open Source Project
- Stackable
- Responds well to widely disparate filaments from a wide variety of manufacturers
- Lockable door for added security
Cons
- The rear position of the filament increases the size of the printer
- It does not have Wi-Fi connectivity
- The position of the power connector is not ideal
- Too heavy
Good morning
I have a question. The BQ brand to date does not offer technical service, since the company has closed. What can be done with the 3d printers of this brand without this support?
Thank you
Hello,
As you say, BQ no longer exists as such, due to economic losses it was sold to a Vietnamese group, and now many of its employees seem to have been left unpaid and customers without technical support. Until not long ago, Madrid-based Smart Labs was in charge of providing external technical service for BQ devices, but when the factory closed, they have also stopped offering support due to lack of material.
From the current owners, it is assumed that they were going to give support in Spain through VimSmart to the BQs that still had a guarantee, but I do not know very well if that is happening, or what will happen to the equipment that no longer has a guarantee ... I guess you have to think about repairing yourself if you can, or changing equipment ...
Regards!