In some of your projects you will have needed to measure distances. Well, you should know that the VL53L0X is a device that allows to measure them with high precision. In addition, its small size and low price make it ideal for your DIY projects, especially to integrate with Arduino.
There are many devices that can measure distances, some of them are distance meters based on ultrasound that emit a sound and when bouncing with the object it allows to know with enough accuracy the distance that there is. But if you want the highest precision, for this you need a optical distance meter. This type of measuring devices is based on laser, as is the case with the VL53L0X.
What is the ToF?
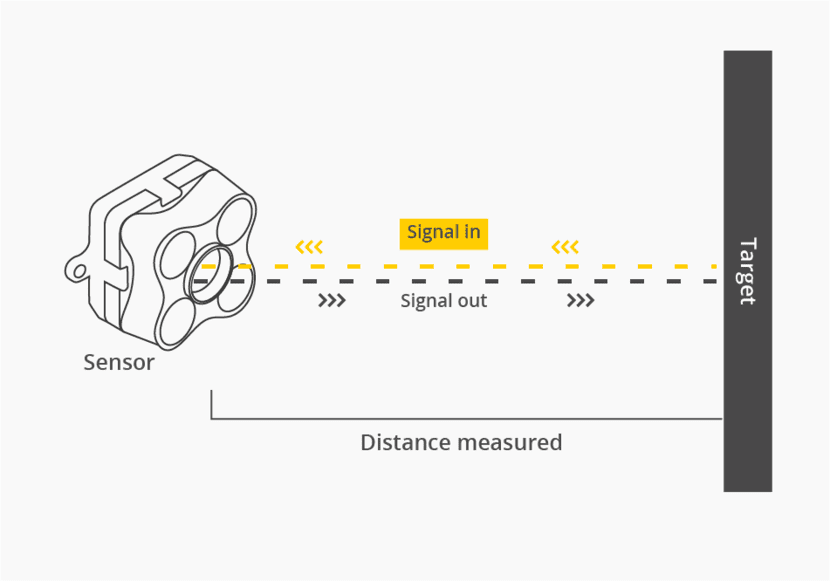
Time-of-Flight or ToF (Time-of-Flight) camera it is a technique used to measure distances. It is based on optics, measuring the time elapsed between the emission of a light beam and the reception. They can be CCD, CMOS sensors, and the pulses can be infrared, laser, etc. The system will be synchronized to start the time measurement just when the pulse is triggered and stop the counter when they receive the bounce from the sensor.
That way, distance can be calculated quite accurately. All it takes is additional logic circuitry built into the chip to perform the calculations from when the beam is fired to when it is received and thus determine the distance. The principle is pretty straightforward.

This type of device is used in robotics to allow the robot or drone to avoid obstacles, to know how far away they are from a target, to detect movement or proximity, for car sensors used for different applications, to implement an electronic meter, such as an actuator for Arduino to do something when it detects certain proximity of an object, etc.
What is the VL53L0X and datasheet
El VL53L0X uses this principle to measure distances by laser infrared. last generation. Together with a processor, like Arduino, it can be a powerful tool for measuring. Specifically, the chip can capture distances between 50mm and 2000mm, that is, between 5 centimeters and 2 meters.
To measure closer distances you probably need a variant of this chip called VL6180X that allows you to measure a range of between 5 and 200 mm, that is, between half a centimeter and 20 centimeters. If you want to find a similar device but based on ultrasound for any technical reason, then you should look at the HC-SR04, another fairly cheap module popular with makers.
El VL53L0X chip has been designed to work even when the ambient light is quite high. Bear in mind that when working optically, the greater the light "pollution" of the environment, the more difficult it will be to adequately capture the bounce of the signal. But in this case it does not present too much problem. In addition, the compensation system that it integrates allows it to measure even if you use it behind protective glass.
That make it one of the best distance sensors that you will find in the market. With a much higher precision than sensors based on ultrasound or infrared (IR). The reason for being so precise is that the laser will not be affected by echoes or reflectance from objects as in the other cases.
Currently you can find it integrated in mules with some extra for about € 16 or in simpler plates of just over € 1 or € 3 in other cases. You already know that you will find it in stores like eBay, AliExpress, Amazon, etc. The manufacturers of these devices are various, so if you need to know the details of the model you have bought, it is best to check the manufacturer's datasheet that you have chosen. For example:
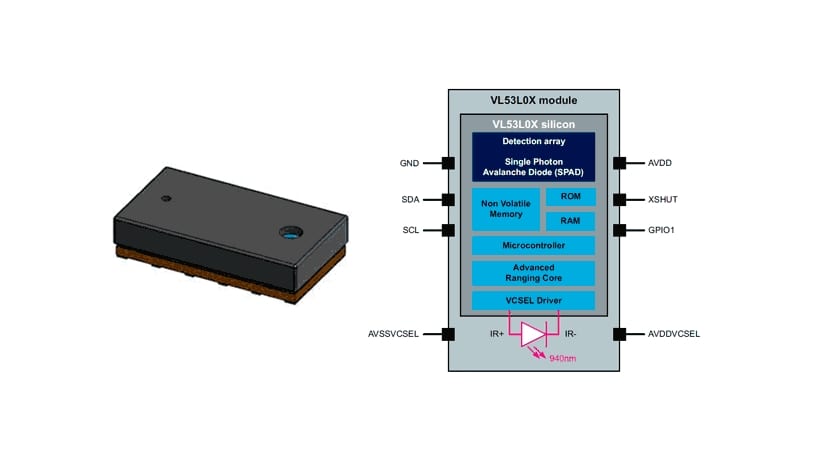
El VL53L0X It has inside the chip the emitter of the laser pulse and the sensor to capture the returning beam. In this case, the emitter is a 940nm wavelength laser and VCSEL type (Vertical Cavity Surface-Emitting Laser). As for the capture sensor, it is a SPAD (Single Photon Avalanche Diodes). It also integrates an internal electronics called FlightSenseTM that will calculate the distance.
El measurement angle or FOV (Field of View) it is 25º in this case. That translates to a measurement area of 0,44m in diameter at a distance of 1m. Although the measurement range will depend on the surrounding conditions. If it is done indoors it is a little higher than if it is done outdoors. It will also depend on the reflectance of the object you are pointing at:
| Target reflectance | Terms of use | Interior | Body exterior: |
|---|---|---|---|
| White target | Typical | 200cm | 80cm |
| Mimic | 120cm | 60cm | |
| Gray target | Typical | 80cm | 50cm |
| Minimum | 70cm | 40cm |
In addition, the VL53L0X has several operating modes that may vary the results. Those modes are summarized in the following table:
| Mode | Timing | Scope | Precision |
|---|---|---|---|
| Default | 30ms | 1.2m | See the table below |
| High accuracy | 200ms | 1.2m | + / - 3% |
| Long-range | 33ms | 2m | See the table below |
| High speed | 20ms | 1.2m | + / - 5% |
According to these modes, we have several standard and long-range accuracies that you have in this table:
| Interior | Body exterior: | |||||
|---|---|---|---|---|---|---|
| Target reflectance | Distance | 33ms | 66ms | Distance | 33ms | 66ms |
| White target | at 120cm | 4% | 3% | at 60cm | 7% | 6% |
| Gray target | at 70cm | 7% | 6% | at 40cm | 12% | 9% |
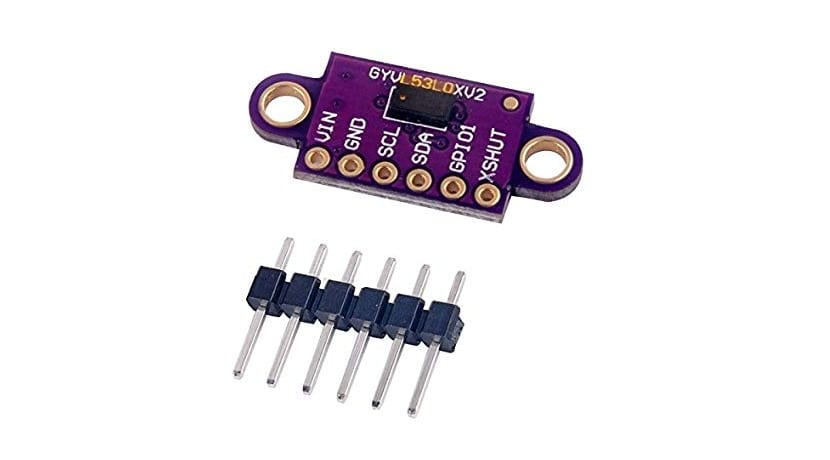
Pinout and connection
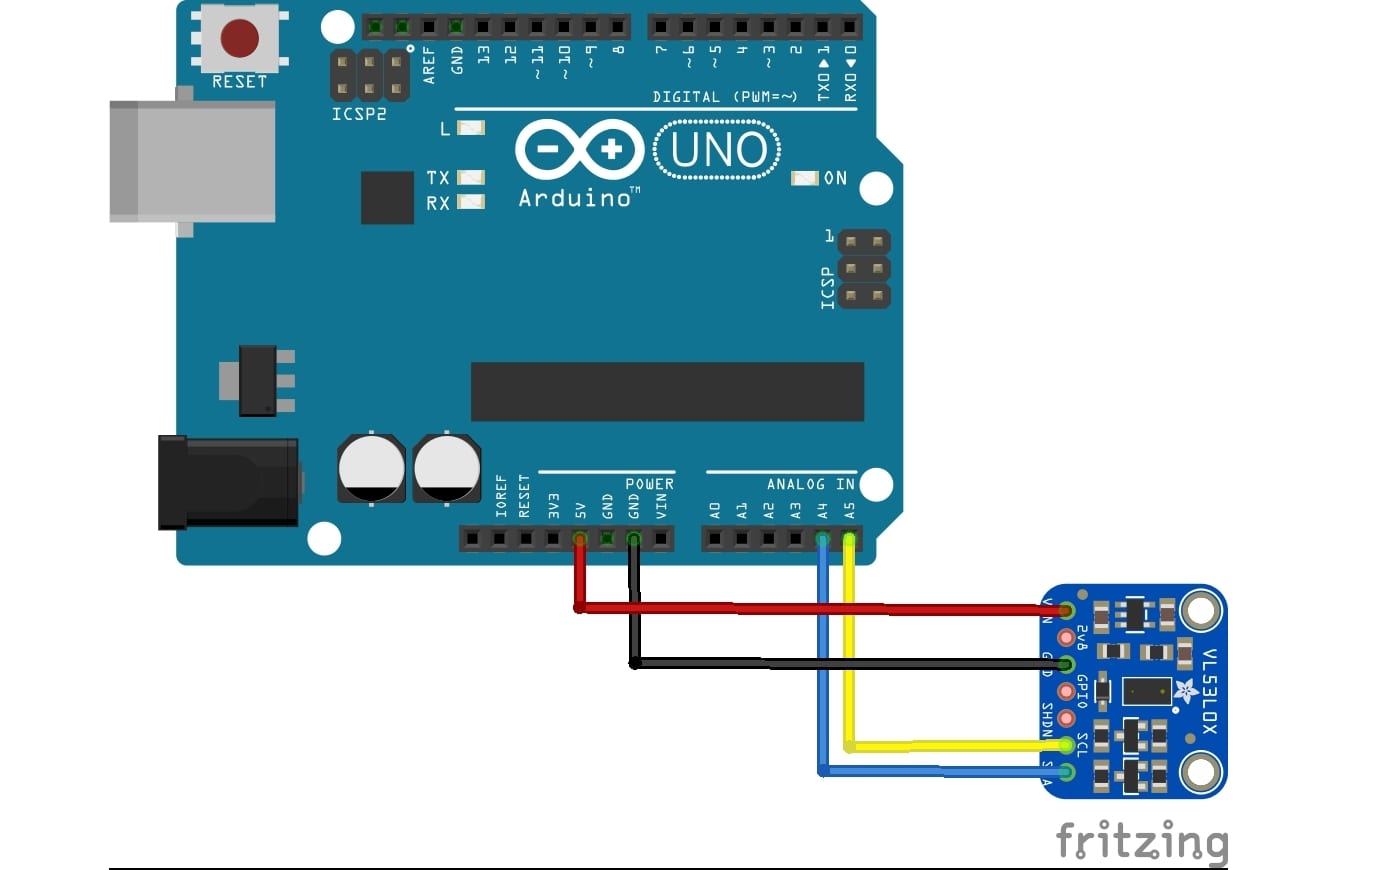
For all of this to work properly you need an interface with the outside world. And that is achieved through some pins or connections. The pinout of the VL53L0X is quite simple, it only has 6 pins. For its integration with Arduino, communication can be done through I2C.
To feed it, you can connect pins So:
- VCC to 5v from Arduino
- GND to GND of Arduino
- SCL to an Arduino analog pin. For example A5
- SDA to another analog pin. For example A4
- The GPI01 and XSHUT pins do not have to be used at the moment.
Integration with Arduino
As for many other modules, for the VL53L0X you also have libraries (eg the one for Adafruit) of available code that you can use to work with certain functions when you write the source code to handle your project in Arduino IDE. If it is your first time with Arduino, I recommend our programming manual.
An example of Simple code for you to take measurements and display measurement value through serial port so you can see it from your PC screen while you have the Arduino board connected is:
#include "Adafruit_VL53L0X.h"

Adafruit_VL53L0X lox = Adafruit_VL53L0X();

void setup() {
  Serial.begin(9600);

  // Iniciar sensor
  Serial.println("VL53L0X test");
  if (!lox.begin()) {
    Serial.println(F("Error al iniciar VL53L0X"));
    while(1);
  }
}


void loop() {
  VL53L0X_RangingMeasurementData_t measure;

  Serial.print("Leyendo sensor... ");
  lox.rangingTest(&measure, false); // si se pasa true como parametro, muestra por puerto serie datos de debug

  if (measure.RangeStatus != 4)
  {
    Serial.print("Distancia (mm): ");
   Serial.println(measure.RangeMilliMeter);
  }
  else
  {
    Serial.println("  Fuera de rango ");
  }

  delay(100);
}
In Adafruit's own library you have more examples of use if you need it ...