
If you remember, we have already introduced the ESP8266 chip, a very practical IC for WiFi connectivity to use in your projects with Arduino. Now it's your turn the turn to Wemos D1, a board that includes this same chip and that is also quite practical for a multitude of DIY projects. If you wish, you can obtain documentation for this board from the official Wemos website, where you can access from here.
Te I recommend seeing our article on the ESP8266 that I have put in the previous link, since otherwise, when starting with Wemos D1 you will be somewhat more lost if you do not have a base. You should also see our other guide on NodeMCU, which has a lot to do with the ESP8266 and with this other component that we are dealing with today. In these two articles you will also get code examples to be able to program the ESP8266, the necessary libraries for the Arduino IDE, etc.
wemos
It is a Chinese brand that manufactures this type of electronic development boards and their shields from their official website. Among its featured products, you can find the Wemos D1 board.
Wemo D1
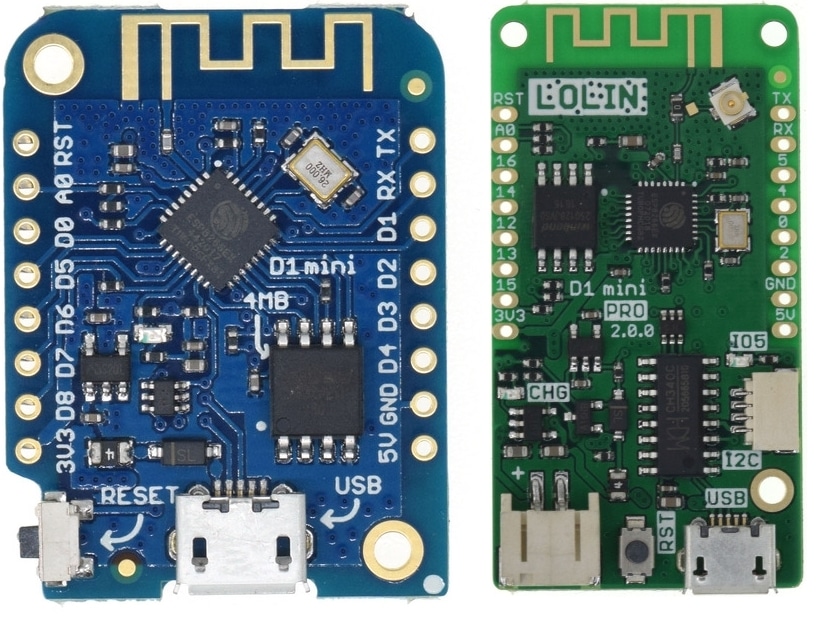
There are two very interesting plates provided by Wemos, one of the Wemos D1 and the other is its little sister Wemo D1 Mini, which is smaller, or other more expensive versions like the Pro (with 16M flash instead of 4M), etc. For many, it is one of their favorite development boards for the ESP8266 chip, even on top of NodeMCU, or other modules with ESP8266, for certain applications.
In the NodeMCU and ESP8266 article that I have quoted, you can learn that the ESP8266 chip can be integrated into various modules such as ESP12, ESP12E, etc. In the case of the Wemos D1 Mini, it is a little larger in size than directly using an ESP12 without more, with dimensions of 34.2 × 25.6mm and 3 grams of weight.
But if you use the bare ESP12, you will have many shortcomings. With the Wemos D1 Mini you have advantages and extras such as a microUSB port and serial converter for your connection. It also includes a voltage regulator to feed it directly with the Arduino's 5V socket, and the internal circuitry will take care of passing those volts to the voltage that the module really needs.
Another advantage of Wemos products is that they allow extend its functionalities with shields, that exist in great quantity to control motors (drivers), relay module, OLED screens, temperature and humidity sensors, PIR, button, etc. That is, it gives you many facilities to use these components with control from the Internet or in a WAN network.
Although not all are advantagesOn the contrary, it has a smaller number of pins available, with 11 GPIOs compared to the 17 that you have in other modules such as ESP12 or NodeMCU. However, this should not be a major problem, since many projects do not need more than these 11 pins, although everything will depend on what each user needs ...
Features, pinout, and prices
Being based on the ESP12E, share featuresTherefore, I will give you a summary here:
- It works at speeds of 80 to 160Mhz.
- 4 MB flash memory
- 3.3v power supply, although it has a converter to be able to feed it with the Arduino 5V if you want.
- 11 GPIO, all with PWM except D0.
- Interruptions
- I2C bus
- Analog inputs 1 (3.2v max)
- MicroUSB connector
El price from about € 2 and peak, up to € 20, depending on the model. You can find it in many specialized stores and online. So you can have a very very cheap Wemos D1 Mini, more than NodeMCU and just a little above the price of an ESP12E module without any more extras ...
For buy these products and their shields, Wemos offers a section of Online Store, but redirects you to AliExpress, so it is the place where it is officially distributed.
El Pinout of a Wemos D1 Mini basic board is:
- TX: it is connected to the TXD of the ESP8266, for TXD.
- RX: it is connected to the RXD of the ESP8266, for RXD.
- A0: connected to the pin of the same name as analog input.
- D0: is the GPIO16 of the module, and is used as I / O.
- D1: the module's GPIO5, such as I / O, PWM, Interrupt, I2C, and SCL.
- D2: to GPIO4, for I / O, PWM, Interrupt, I2C, SDA.
- D3: to GPIO0, for I / O with 10K pull-up resistor, PWM, Interrupt and I2C.
- D4: GPIO2, same as above, but add BUILTIN_LED
- D5: to GPIO14, for I / O, PWM, Interrupt, I2C and SCK.
- D6: GPIO12, same as above, but instead of SCK for MISO.
- D7: to the GPIO13 of the ESP12, the same as the previous one.
- D8: to GPIO15, for I / O with 10K pull-down resistor, PWM, Interrupt, I2C and SS.
- G: is the GND (ground), the ground connection.
- 5V: for power supply.
- 3V3: 3.3v power supply.
- RST: connected to RST, that is, to reset.
For get a datasheetYou already know that you can get the documentation from the official Wemos website that I left at the beginning of the article. Also they have a complete Wiki that I recommend, since you can get a lot of help ... They even have Tutorials.