The sensors are widely used devices in a multitude of circuits. There are temperature, humidity, smoke, light, and a long etc. They are elements that allow us to measure some magnitude and transform it into a voltage response. The analog output signal can be easily transformed to digital and thus be able to use this type of sensor with digital circuits, LCD screens, an Arduino board, etc.
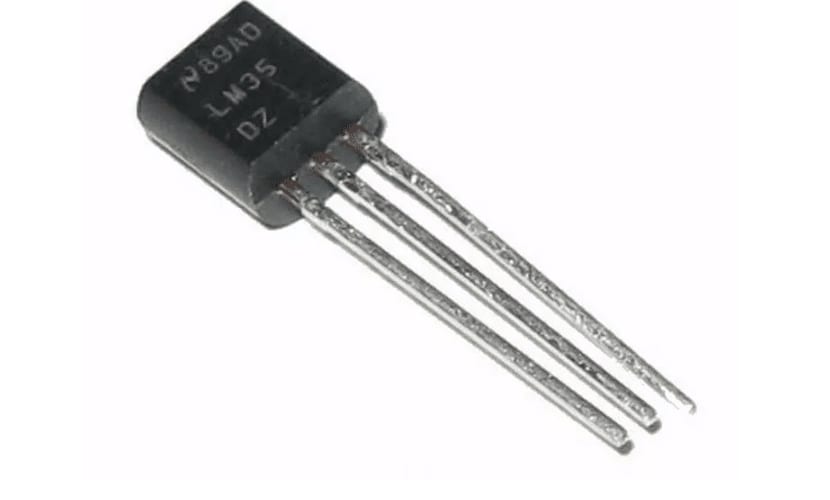
LM35 is one of the most popular sensors and used by all, since it is a temperature sensor. It comes encapsulated in packaging similar to that of the transistors that we analyze in this blog, such as 2N2222 and BC547. What it does is measure the environmental temperature and depending on whether it is higher or lower, it will have one or another voltage at its output.
The LM35
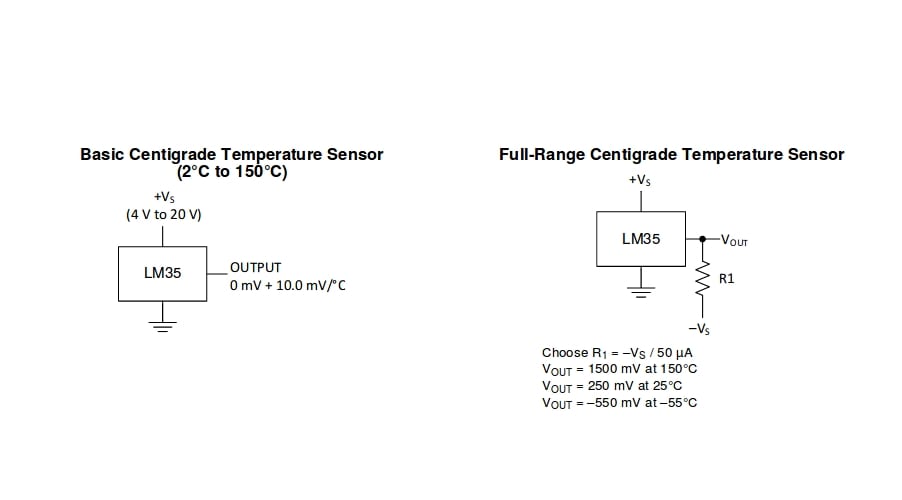
El LM35 is a temperature sensor with a calibration of 1ºC of variation. Of course, this does not mean that all temperature sensors come prepared for degrees Celcius, but it does in this case. In fact, that is something that you must adapt later to calibrate it and make it measure on the scale you need. At its output it generates an analog signal of a different voltage depending on the temperature it is capturing at any given time.
You can usually cover measurement temperatures between -55ºC and 150ºC, so it has a good range for measuring quite popular temperatures. In fact, that is what has made it so successful, that it can measure very frequent temperatures. The temperature range is limited by the amount of variable voltages it can have at its output, ranging from -550mV to 1500mV.

That is, when it is measuring a temperature 150ºC we already know that it will give 1500mV at its output. Whereas if we have -550mV it means that it is measuring -55ºC. Not all temperature sensors have these same voltage ranges, some may vary. The intermediate temperatures will have to be calculated using simple formulas knowing these two limits. For example, with a rule of three.
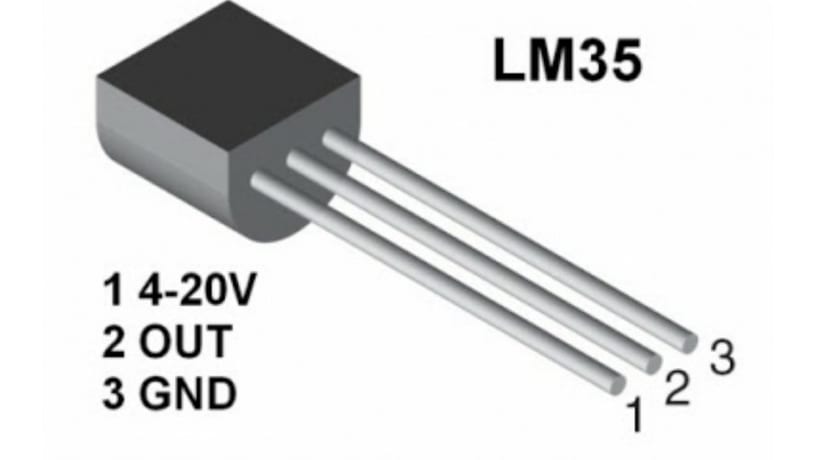
The LM35 pinout It is quite simple, the first pin or pin is for the power needed for the sensor, which goes from 4 to 30v, although it may vary depending on the manufacturer, therefore, it is better that you look at the datasheet of the sensor that you have purchased. Then, in the center, we have the pin for the output, that is, the one that will give one voltage or another depending on the temperature. And the third pin is ground.
Features and datasheets
El LM35 is a device that does not need extra circuitry to calibrate it, therefore it is very easy to use. For example, if we use it with Arduino, we only have to worry about the range of voltages that it gives to its output knowing the maximum and minimum temperature that it can measure, and make a simple sketch so that the analog signal that the Arduino board receives can be transformed to digital and that the temperature appears on the screen in ºC or make conversions to the scale you want.
Since it does not usually get too hot, it is usually encapsulated in cheap plastic packages and the like. The low voltage required for its operation and its output makes this possible. It is not a high-power device that needs a metallic, ceramic encapsulation and even heatsinks as in some cases.
Among the latests Moravia's compositions outstanding technical characteristics are:
- Output voltage proportional to temperature: from -55ºC to 150ºC with voltages from -550mV to 1500mV
- Calibrated for degrees Celcius
- Guaranteed precision voltage from 0.5ºC to 25ºC
- Low output impedance
- Low supply current (60 μA).
- Low cost
- Package SOIC, TO-220, TO-92, TO-CAN, etc.
- Working voltage between 4 and 30v
To get all the details about the LM35, you can use the datasheets contributed by manufacturers such as TI (Texas Instruments), STMicroelectronics, and other popular suppliers of this type of sensor. For example, here you can download the PDF of the datasheet for the TI LM35.
Integration with Arduino
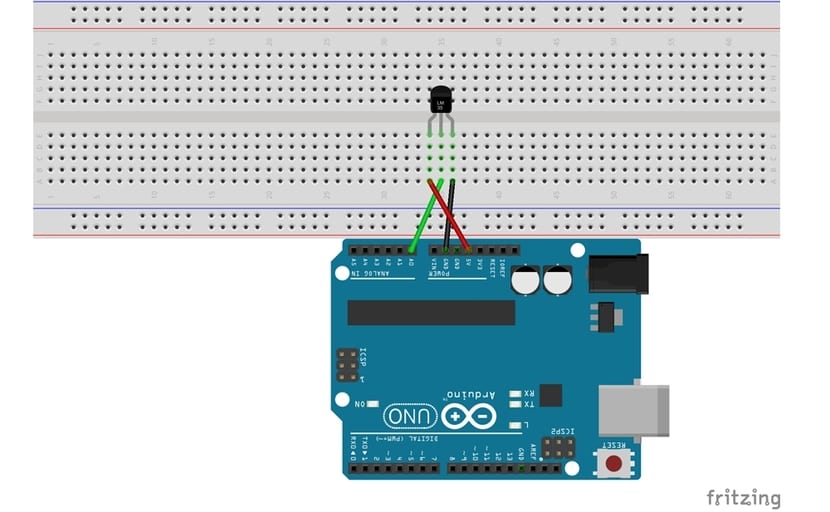
You can get code examples for Arduino IDE and practical examples with our course or programming manual on Arduino. But to offer an example of how to use an LM35 with Arduino and code, here we see this simple example.
For reading the temperature of an LM35 with Arduino is very simple. Let's first remember that -55ºC and 150ºC, with a sensitivity of 1ºC. By doing calculations, it can be concluded that a 1ºC temperature means an increase or is equivalent to 10mV. For example, if we take into account that the maximum output is 1500mV, if we obtain 1490mV, that means that the sensor is capturing a temperature of 149ºC.
Una formula to be able to convert the analog output of the LM35 sensor to digital it would be:
T = Value * 5 * 100/1024
Remember that 1024 is because the Arduino, in its digital input accepts only that amount of possible values, that is, from 0 to 1023. That will represent the temperature range that can be measured, with the minimum being 0 and the maximum corresponding to 1023. This is the way to transform from analog to digital the signal obtained at the output of the LM35 pin.
This, passed to code you have to write in Arduino IDE for it to work it would be something like this:
// Declarar de variables globales
float temperatura; // Variable para almacenar el valor obtenido del sensor (0 a 1023)
int LM35 = 0; // Variable del pin de entrada del sensor (A0)

void setup() {
  // Configuramos el puerto serial a 9600 bps
  Serial.begin(9600);

}

void loop() {
  // Con analogRead leemos el sensor, recuerda que es un valor de 0 a 1023
  temperatura = analogRead(LM35);

  // Calculamos la temperatura con la fórmula
  temperatura = (5.0 * temperatura * 100.0)/1024.0;

  // Envia el dato al puerto serial
  Serial.print(temperatura);
  // Salto de línea
  Serial.print("\n");

  // Esperamos un tiempo para repetir el loop
  delay(1000);
}
Remember that if you change the connection pins on the Arduino board or want to adjust it to another scale, you will have to vary the formula and the code to correspond to your design ...
In this way, on the screen you can get temperature measurements in ºC quite reliable. You can try bringing something cold or hot closer to the sensor to see the alterations that occur ...